3D Workflow
The following diagram shows the basic workflow of taking a 2D pattern and turning it into a 3D sample:
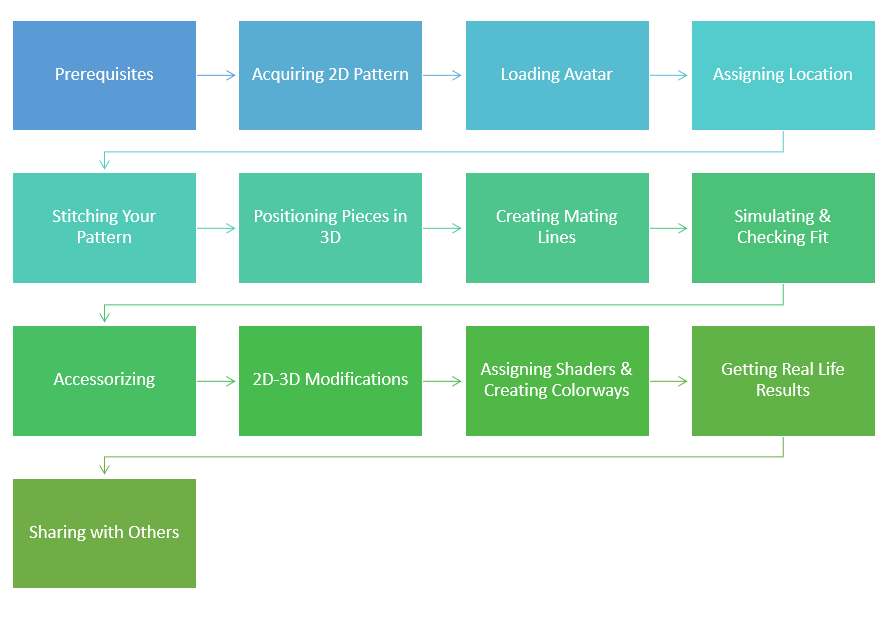
Prerequisites: Includes preparing avatars, preparing stitch assets (presets), preparing textures/logos, rigid parts and the fabric list.
Acquiring 2D Pattern: The user can either import a file into the PDS, or create a pattern from scratch.
Loading Avatar: Using Load Model, the user can load the avatar they defined and can select required sizes, final poses, etc.
Assigning Location: The user can assign piece locations, shapes, define layers and select physical fabric properties.
Stitching the Pattern: The user can now stitch the pieces together.
Positioning Pieces in 3D: The user can place the cloth on the avatar and move pieces to adjust their position.
(Optional) Creating Mating Lines: The user can create mating lines if they want to make sure the pattern sits at the right place on the avatar.
Simulating and Checking Fit: The user can now simulate the pattern, and then check fit by seeing final poses, using Tension Map, etc.
Accessorizing: The user can now add visual stitches using the Seam & Stitch Manager and add rigid parts if required.
2D 3D Modifications: The user can make changes to the pattern, for example, remove sleeves, lengthen a skirt, etc.
Assigning Shaders & Colorways: The user can now assign shaders and textures to the different elements in the pattern.
Getting Real Life Results: The user can now view the pattern using different rendering engines (HQR, PRR) and then save images.
Sharing with Others: Once the pattern is complete, the user can upload the sample to O/Cloud and share with others.