Generating Tech Pack Essentials
You can generate tech pack essentials for the current PDS style file.
The tech pack essentials include the report-style document and optionally exported AI, DXF (AAMA and ASTM) and FBX files.
To generate tech pack essentials for a current PDS style file:
From the main menu, go to File > Tech Pack Essentials. The Tech Pack Essentials dialog box appears allowing you to specify the content.
Important: The Tech Pack Essentials feature requires a license. Contact your Optitex representative, if you encounter any issues or if you need to request the license.
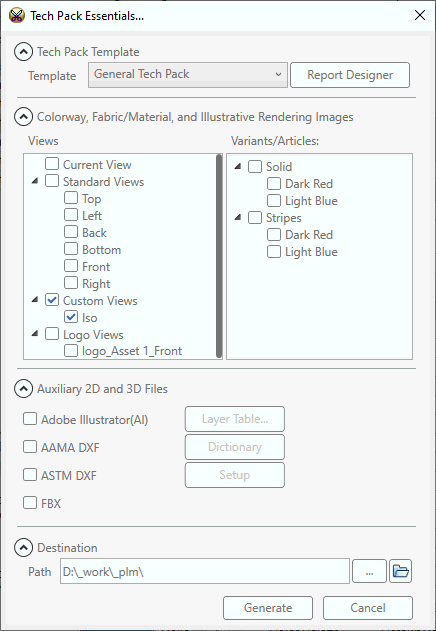
Under Tech Pack Template, select a template in the drop down list,.
Important: The drop down list provides you with tech pack templates available in the templates folder specified in Preferences.
This folder contains tech pack templates provided by Optitex as well as custom user templates.
Under Colorway, Fabric/Material and Illustrative Rendering Images, use the Views panel to select the desired views.
-
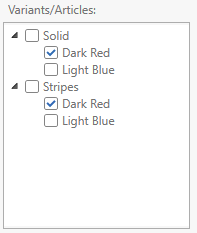
Once the Tech Pack Essentials dialog box is displayed, the Views panel provides you with the list of all 3D model views available for colorway images generation.
-
The list includes a current model view, standard views (such as Back, Front and Left), custom views (if available) and
 logo
views (if available)
 -
Selected views will be used for generation of images for chosen colorways, fabric/material and illustrative rendering.
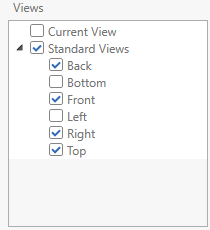
Under Colorway Images use the Variants/Articles panel to select the desired variants and articles.
Once the Tech Pack Essentials dialog box is displayed, the Variants/Articles panel provides you with the list of all variants and underlying articles defined in the scope of current style file.
The list allows you to select variants and articles separately during the tech pack generation.
For every selected colorway (either variant or articles a series of images will be generated.
A single image will be generated for every selected view. In such a way, if you selected 3 views and 4 articles, 12 images will be generated during the tech pack creation.
After the generation, these images will be available within the tech pack folder and appear in the tech pack document (based on the template selected).
Under Auxiliary 2D and 3D Files, choose the desired files to export during the tech pack generation. Available formats:
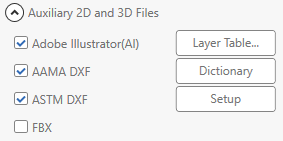
Adobe Illustrator (AI): Export the pattern geometry in Adobe Illustrator format.
AAMA DXF: Export the pattern geometry in AAMA DXF format
ASTM DXF: Export the pattern geometry in ASTM DXF format
FBX: Export the 3D model in FBX format.
-
The Layers Table button opens the Layers Table dialog box, allowing you to customize layers for ASTM/AAMA/AI export.
-
The Dictionary button opens the Import/Export Dictionary dialog box allowing you to customize standard names for ASTM/AAMA/AI export.
-
The Setup button opens the export settings allowing you to customize options for ASTM/AAMA/AI export.
Under Destination, choose the destination output directory for the tech pack essentials.
-
During the tech pack essentials generation, the tech pack essentials files will be placed within a newly created tech pack folder located under the destination folder and named as XXXXXX_TP (where XXXXXX is the name of current style file). In a case when folder with such a name already exists, a numeric index is added to the folder name to avoid folders overwrite. By default, the proposed destination folder is location of the current style file.
-
You could either confirm the current destination directory for the tech pack or choose a different location.
Click the Generate button to start the tech pack generation.
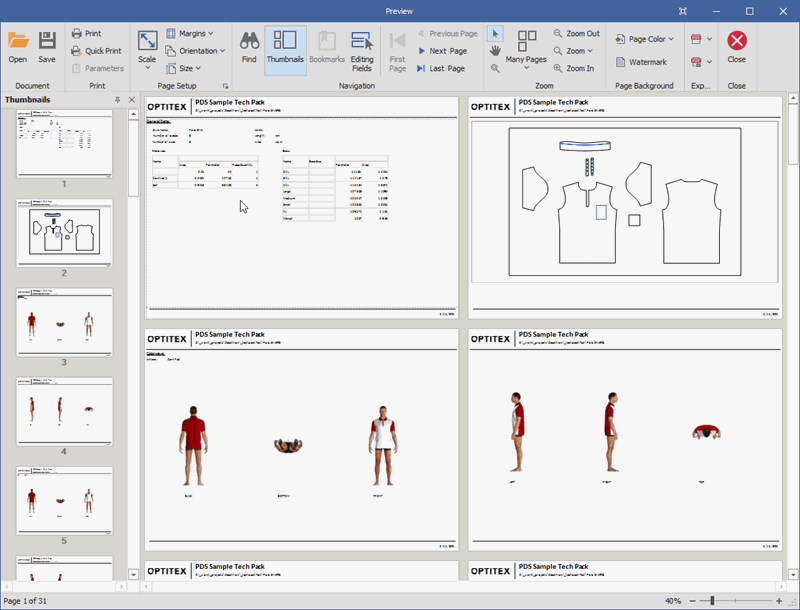
When the process is completed, the Preview window is displaying the generated tech pack:
 Note:When the Preview window is displayed, all
tech pack essentials files are generated in the selected tech pack
destination folder.
As the Tech Pack is displayed in the Preview window, you can adjust the tech pack, zoom, change colors, print, export, etc. For more information, see Viewing a Tech Pack / Report.
Once the report preview
session is completed, click  Close
button to close the preview window.