O/24.xx
Click below to see the updates in version O/24.xx
PDS-3D Updates

Check out the new features and enhancements in our latest version: O/24.0
Upload all colorways to O/Cloud as GLB files
Starting in version O/24.0, all colorways (articles) are added next to the PDS file uploaded to O/Cloud

This is done byuploading a PDS file to O/cloud, using O/Cloud link.
The process will automatically add GLB files of all available colorways (Articles).
Improved FBX export for creating animations in other applications
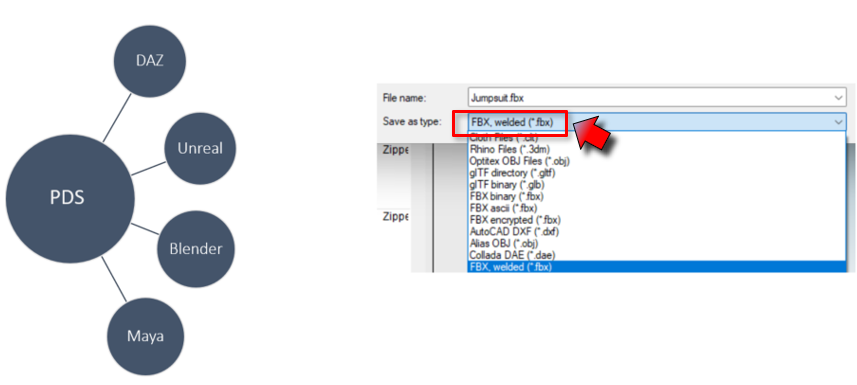
The new FBX, welded export format has been added for whoever is interested to bring their Optitex simulated garments into Unreal, DAZ, Maya or other 3rd party packages and further animate the garments there. This export welds pieces along the stitch lines preventing garments from falling apart during external animation.
 Note: This export outputs just bare cloth, without trims and materials. They should be assigned in external animation App.
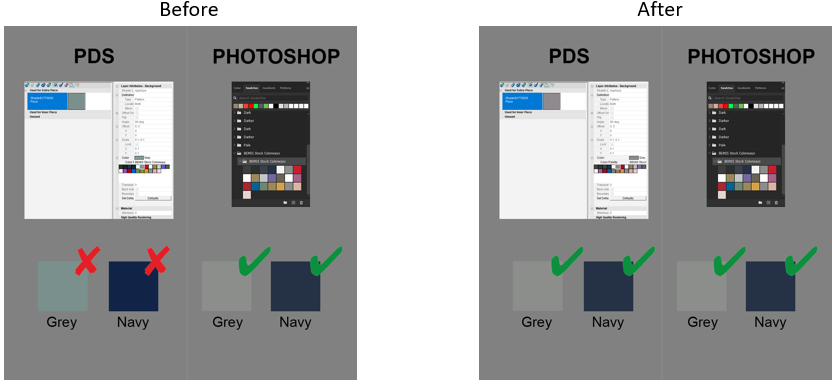
Enhanced color matching between PDS and Photoshop
PDS-2D Updates

New in Version O/24.0
New ASTM/AAMA export symmetry option
Normally, pieces withHalf Symmetry with notches or other elements, which are not reflected on the other half, should be exported so that the a-symentrical elements are kept.
In previous versions, you had to cancel the symmetry to keep non reflected elements correctly in the output.
This new option allows you to keep the symmetry while controlling the export of Half Symmetry Pieces.
This is done in the exportSetup:
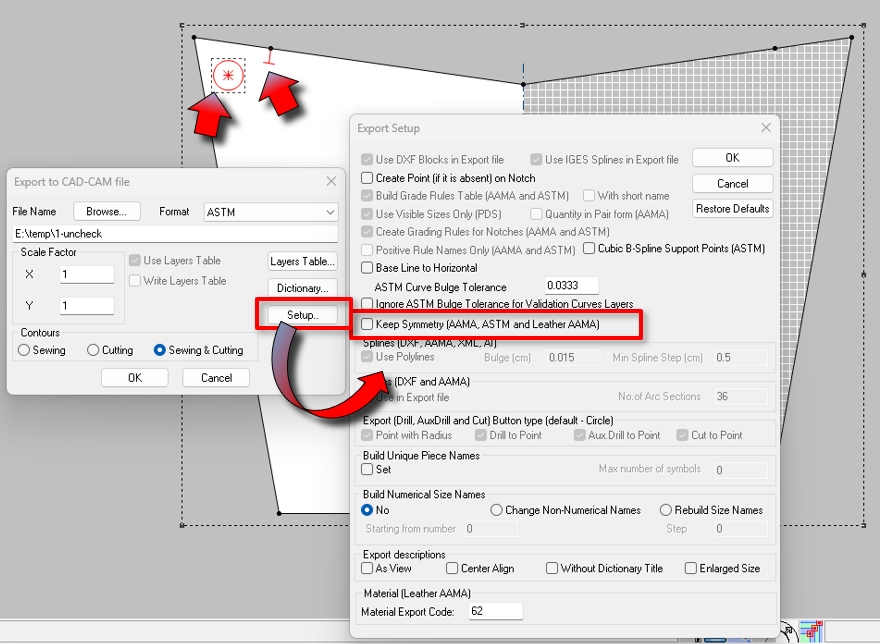
The Check-box Keep Symmetry (AAMA, ASTM, and Leather AAMA) is used as follows:
-
To keep non reflected elements, un-check this option. this will perform Open Half during the export, keeping the non reflected elements as they were.
-
Keep this Check box selected, if you want to keep the Half Symmetry. This will result in a symmetric piece with the notches and other elements reflected on the other Half.
 See also: Half Symmetry Export Options
New functionality: Exclude buttons in sizes
Starting in version 24.0, buttons can be excluded in sizes.. This is done in the Button's properties.
You can select for each button, in which sizes it will be available and in which sizes not.
This way, you can adjust the number of buttons in the smaller / bigger sizes, as needed.

 Note:
Note:
-
This is also reflected in 3D.
-
When you switch to a size where a button is excluded, the button is indicated with a smaller icon, so you can still see its location in 2D.
For more information see: Buttons appearance in Sizes
Marker Updates
New in Version O/24.0
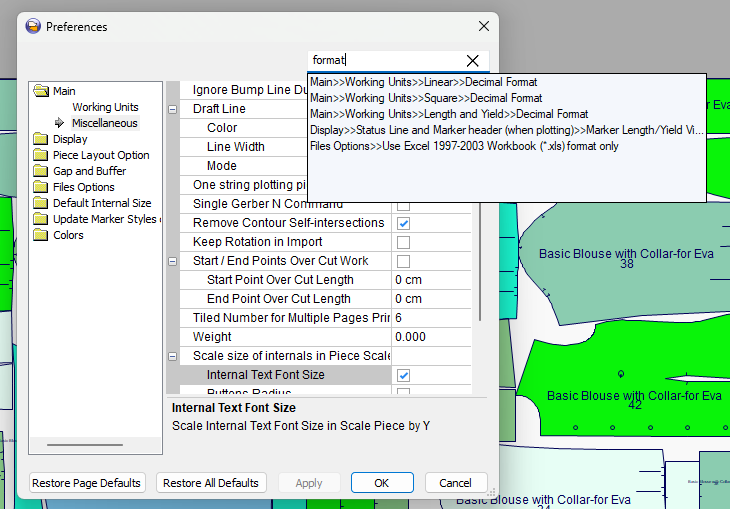
Searching the preferences is now also available in Marker:
This allows you to find items quickly, not having to browse and look
-
Start typing in the search box, results appear immediately and narrow down as you continue typing.
-
Click any of the results to switch to it.
-
Click outside the search list to close it.
 See also: Previous Optitex Versions