Using Material Converter
Use the material converter to convert different textures formats (U3M, U3MA, xTex) to Optitex materials.
The results can be used with Optitex PDS.
Using Material Converter output with PDS
Sharing the converted materials
Converting Texture Maps to Materials
To convert materials using Material Converter:
From
the Start menu under Optitex (version number), select Material Converter.
The
Material Converter opens.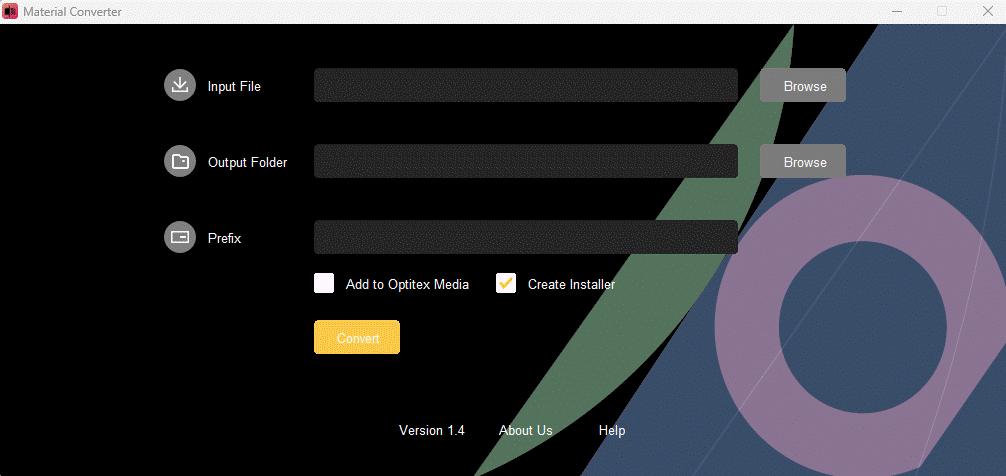
Select your Input File: either U3M, U3MA, xTex, or a zipped version of these files and folders.
Select an Output Folder to save the result of the conversion.
Select a Prefix if needed. It is recommended to use a unique name that you can remember later.
Select Add to Optitex Media checkbox if you have PDS installed.
Create Installercheckboxis selected by default. It creates a file called materialfileinstaller.exe in the output folder.
 Note: Creating an Installer is optional. It is easier to share with other users this way, but it is not mandatory.
Click
Convert.
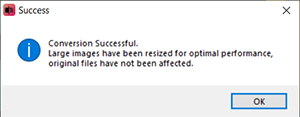
At the end of the conversion process you will receive the following message:
If the input texture files has width or height exceeding 2000 pix, the converter will downscale the texture proportionally to 2000 keeping the original document (physical) dimensions.
The new converted file can be found within the PDS Shader Manager.
Note:
-
Often, the output of material scanners are very large material maps that significantly slow down the CAD and Rendering applications. Therefore we create scaled versions of these maps for optimal performance in Optitex applications without loss of quality.
-
In case your materials' file names require paths longer than 256 characters, you can remove the limit in Windows 10: Enable Long Paths in Windows 10
 See also:
Using Material Converter output with PDS