Converting Texture Maps to Materials
Starting from version Material Converter 1.4 (included in Optitex version O21.2), you can create materials (shader types) using only Texture Maps.
These texture maps could come from Adobe Substance, material scanner or other material creator and editing tools.
To covert texture maps to Optitex materials
-
Create a new folder which only includes the following:
-
Texture maps for one specific material.
-
Create a text file named “input.json” (The file extension is .json) that contains the actual size of the swatch captured in these texture maps.
You can use this template file and edit it as needed.
 Important keep the file name input.json as is!
 -
Open the "input.json" file with a text editor (such as Notepad) and define the actual size of the swatch captured in these texture maps as follows:
-
Crop/tile size X and Y in centimeters (the actual dimensions of the texture)
-
Preferred file name (name/code that will refer to the new texture).
-
Save the edited "input.json" file.
Here is an example of the “input.json” file, please follow the same format using your required values: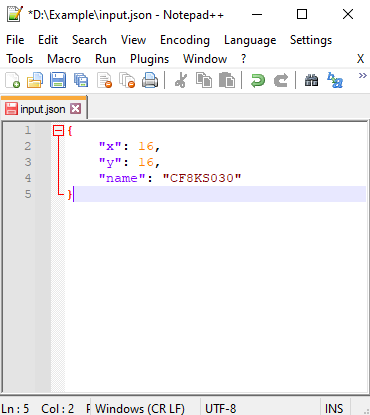
Here is an example of a folder with the required data: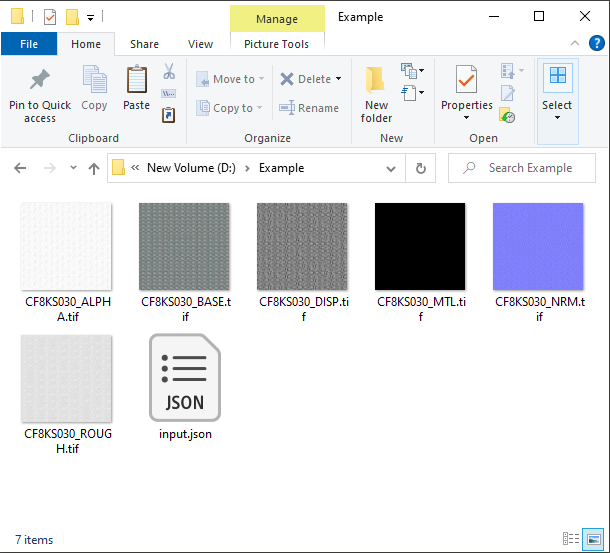
-
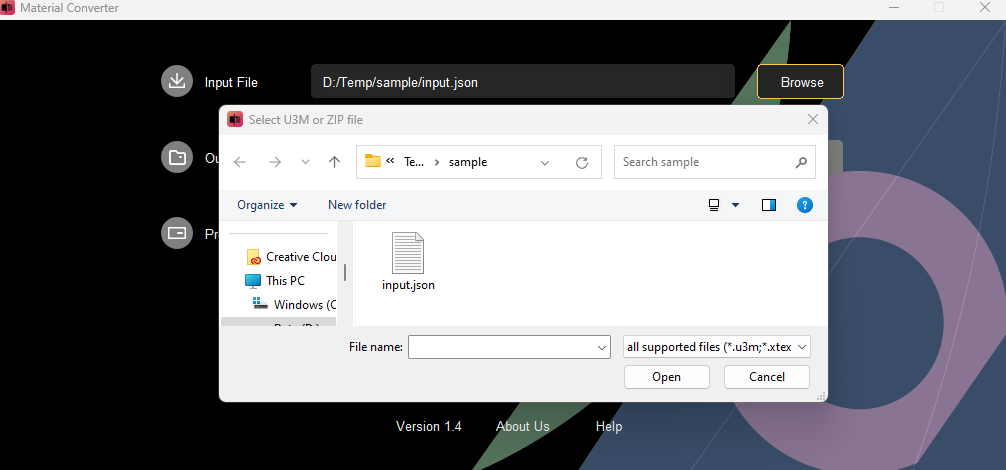
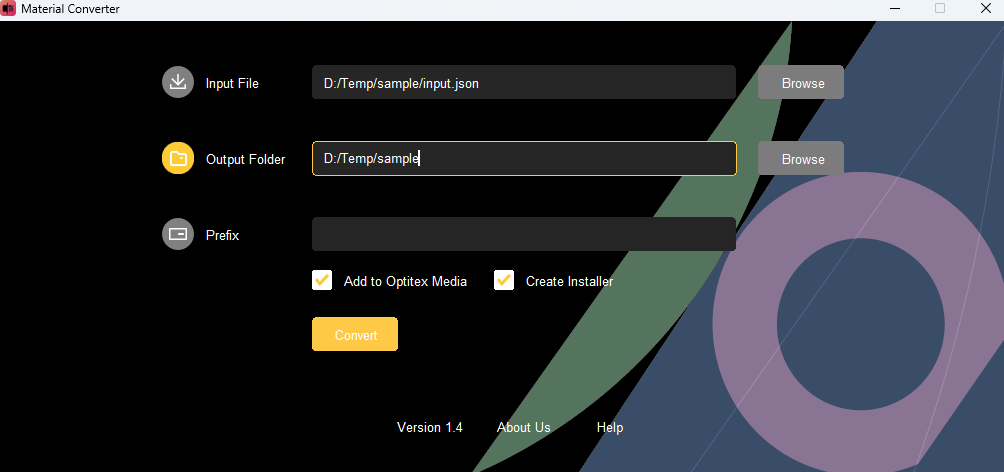
Run Material Converter.
-
Select the Input file, click Browse and select the “Input.Json” file from the previously created folder.
-
Designate the Output folder, click Browse and select the folder to save the new converted material.

-
Add a Prefix if required.
-
Select Add to Optitex Media checkbox. This option installs automatically the new converted material in the PDS material repository.
When you later re-launch PDS, you will find this material named as combined with the Prefix you used and the material name you are defined in the input.json file.
-
Select the Create Installer checkbox, to create a zip file that contains material information. This can be shared with the entire team members and easily installed their system.
-
Click the Convert button, the Material Converter dialog appears:
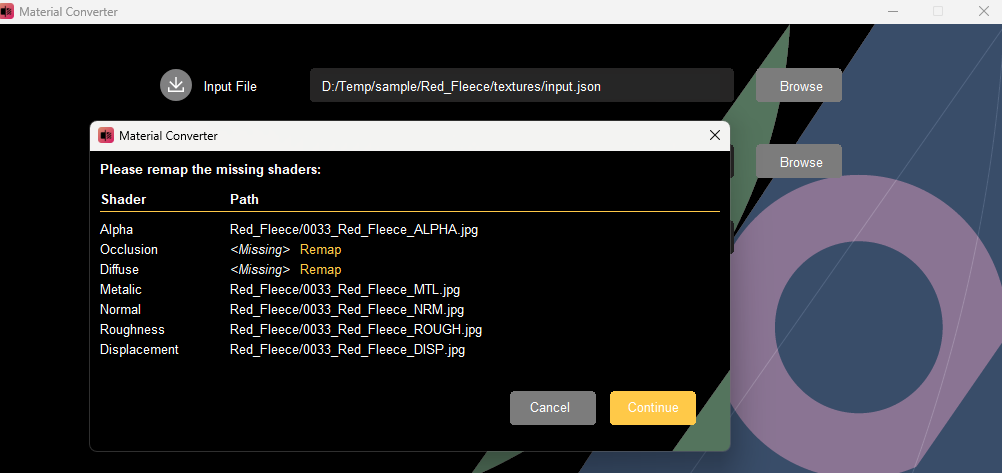
10. Click Remap, then find the missing file (in the current example, the Diffuse map was missing).
Maps are auto-located by Material Converter by name.
However sometimes a slightly different name is used, for example “Metalness” instead of “Metallic”.
This prevents automatic finding the map texture and would require you
to select it manually.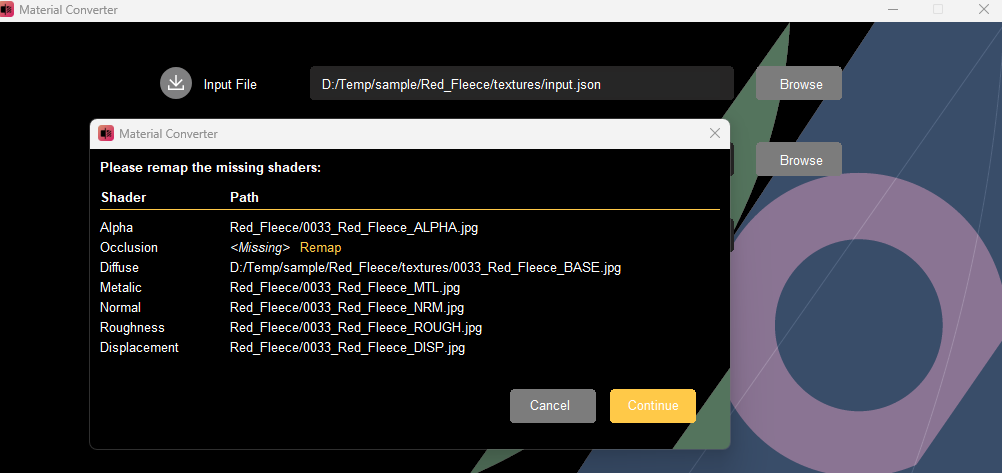
11. If/when there are no missing mapped textures click the Continue
button.
12. At the end of the conversion
process you will receive the following message: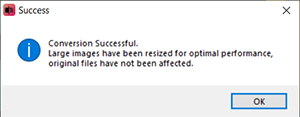
A new material is installed and is ready to use
in PDS and\or shared
with others. Note: If the input texture
files has width or height exceeding 2000 pix, the converter will
downscale the texture proportionally to 2000 keeping the original document
(physical) dimensions.
Note: If the input texture
files has width or height exceeding 2000 pix, the converter will
downscale the texture proportionally to 2000 keeping the original document
(physical) dimensions.
Large maps significantly slow down the processing and increase style size.
 See also:
Using Material Converter output with PDS
Sharing the converted materials