Defining Your Fabric Pattern
Once you have created your 3D sample, you can now define your fabric pattern. This allows you to load an image file of your pattern, adjust the image's parameters and define gaps between images.
For more detailed information, see Using the Fabric Pattern Dialog.
To define your fabric pattern:
-
From the main menu toolbar, go to Piece > Fabric and Stripes > Fabric Pattern.
The Fabric Pattern dialog is displayed: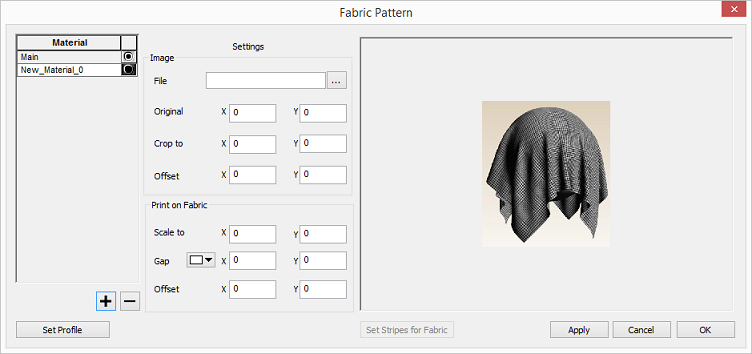
-
In the Material area, select the Main radio button to indicate that this is the active fabric that should be used for your pattern.
Note: If the piece has a defined fabric (setup in the Piece Properties) it must be the same name as was defined in the fabric pattern dialog. If no name was defined the piece will automatically get the selected fabric.
-
If you want to add more materials, use the
 icon.
icon.
-
In the Settings area, go to Image > File.
-
Click the
 button to search for the image you want to be used as your fabric
pattern.
button to search for the image you want to be used as your fabric
pattern.
Note: You can only upload 24 bit JPG files. If you require a 32 bit image, save as a PNG file instead.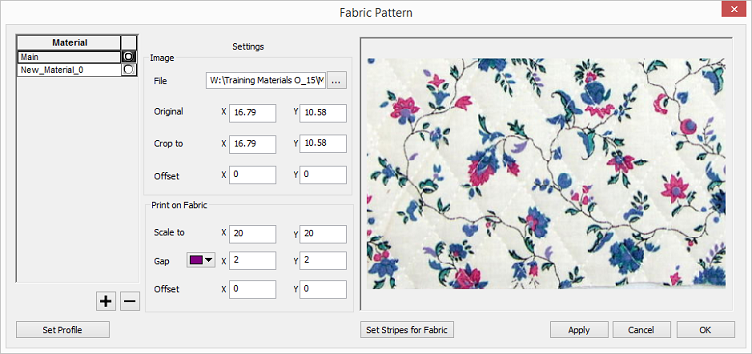
Once the image has been selected, you can now define the properties of the image if you would like, or you can use the predefined properties of the image.
-
In the Original area, define the width (X) and height (Y) of the actual print size of the image.
-
In the Crop to area, define the width (X) and height (Y) of the area in the image that will be printed.
-
In the Offset area, define the offset of the printed image according to the X and Y axis.
-
Go to Image > Print of Fabric area and define the properties of the printed image on the fabric.
-
In the Scale to area, define the size of the printed image, width (X) and height (Y), in comparison to the Crop to dimensions defined above.
-
In the Gap area, define the gap between the repeated image (X and Y directions).
Note: You will only see the gaps when the image is located in the 2D background. For more information, see Activating 2D to 3D Model.
-
Click
 and from the drop-down
list, select the color for which you want to represent the gaps in
your fabric pattern.
and from the drop-down
list, select the color for which you want to represent the gaps in
your fabric pattern. -
In the Offset area, define the offset of the image to determine the horizontal and vertical distance that starts the image repeat.
-
If you want to define your fabric with stripes, click Set Stripes for Fabric. For more information, see Defining Stripes on the Fabric.
-
Click Set Profile, if you want to save the settings of this image as an FPF (Fabric Pattern Profile) file.
-
Click Apply when you are done.
Your changes are made to the file and the 2D background picture is updated accordingly.
-
To make sure the fabric image is displayed in the 2D background, from the Main Menu, go to View > View Fabric.
You can always turn this on or off accordingly.
Move on to the next step, Defining Transparency and/or Opacity.