Creating a Print & Cut File
Once you have nested Marker, you can generate an output for print & cut. In this step you are creating two output files: PDF (print) and DXF (cut). In such a way you get corresponding PDF and DXF files for further job running.
You can then add cut marks, define layers, and add QR codes to allow automatic loading of the cut data on a cutter, etc.
 Note:
The PDF format v1.6 (Acrobat 7.x) and DXF version of R11/R12 are used.
Note:
The PDF format v1.6 (Acrobat 7.x) and DXF version of R11/R12 are used.
To create a Print & Cut file:
Go to File
> Print & Cut.
The Print & Cut dialog appears:
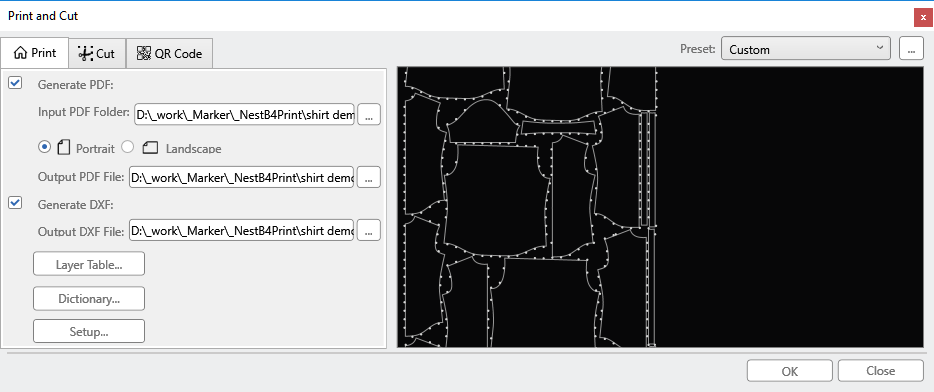
There are two files you can create, a print file (PDF) and a cut file (DXF).
To create a PDF file, select the Generate PDF checkbox, then in the Input PDF Folder area, click Browse and select the folder where you saved the predefined PDF files earlier.
Select the radio
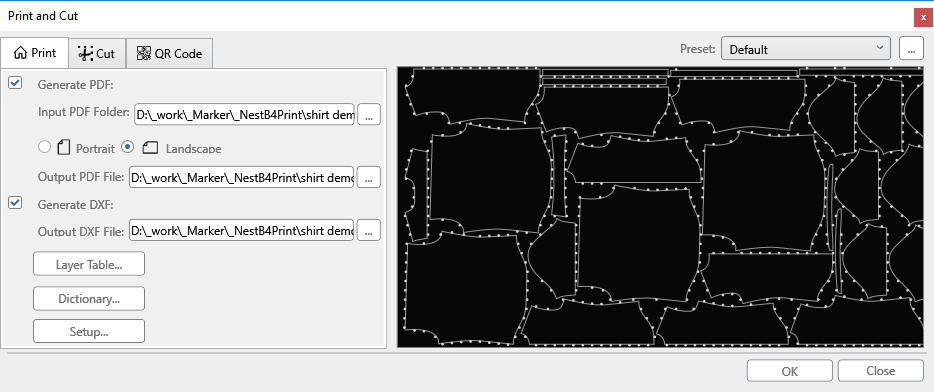
button of the required layout: Portrait
or Landscape. Note that the Portrait/Landscape options affect
only the PDF; the cut data is not affected by this.
The preview area updates accordingly once you select an option.
Portrait
Landscape
In the Output PDF File area, click Browse and select the location where you want to save the created PDF file.
To create a DXF file, select the Generate DXF checkbox.
In the Output DXF File area, click Browse and select the location where you want to save the created DXF file.
Click Layer
Table if you want to define layers for the print file. 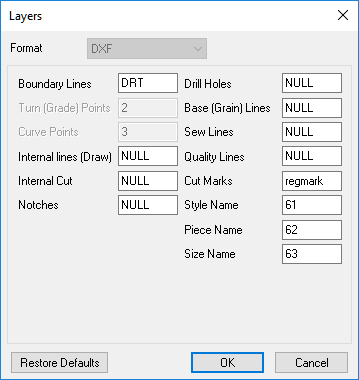
The Style Name/Piece
Name/Size Name layers allow
you to put corresponding names separately for certain labeler machines.
So, when the layer for the Style Name is defined, all style names are
available on this layer in the output DXF file, and so on.
Additionally, the reserved NULL word can be used instead on a layer name
to skip adding this layer and corresponding data to the DXF file.
For more information, see Export
To CAD/CAM Files.
Click Dictionary, if you want to modify the Import/Export Dictionary. The process is the same as in the PDS. For more information, see Saving and Loading a File Import Dictionary.
Click Setup, if you want to modify the export setup properties.
If you want to define
cut marks, ![]() click
here.
click
here.
If you want to define
a QR code, ![]() click
here.
click
here.
Click
Ok when you are done defining
all the properties of the cut and print files.
Once you click Ok, the files are
created (depending on what you selected and how you defined them).
You have now completed the process Print & Cut and you should have
two files - a PDF file and a DXF file. The PDF file can be sent to the
printer, and the DXF file can be sent to the cutter.
 See also: Print & Cut