Moving Software Keys from One Computer to Another
You can move a software key from one computer to another when you want to use the same software key on a different computer.
This means you are doing a similar process to removing the physical key and inserting it into a different computer but with a software key.
You must have access to both computers: the computer where the key is currently installed (the transferring computer) and the computer where you are moving the key to (the Recipient Computer)
To move a software key from one computer to another:
First step: On the recipient computer
On the computer where the key is being transferred to, the Recipient Computer:
-
On the Windows start menu, run Network License Utility if you are using a Floating (network) key or Local License Utility if you are using Fixed (regular) key.
You can also find these utilities in the Optitex installation folder (C:\Program Files\Optitex\Optitex [version#]\App).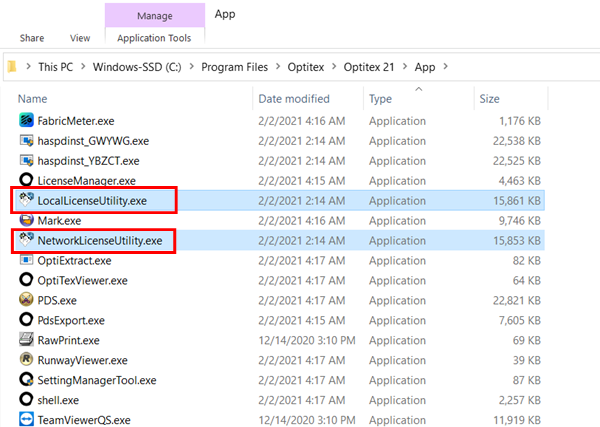
 Note: in version 19 or earlier Local License Utility is named RUS_YBZCT.exe and
Network License Utility is named
RUS_GWYWG.exe and are not on the start menu.
The RUS dialog appears: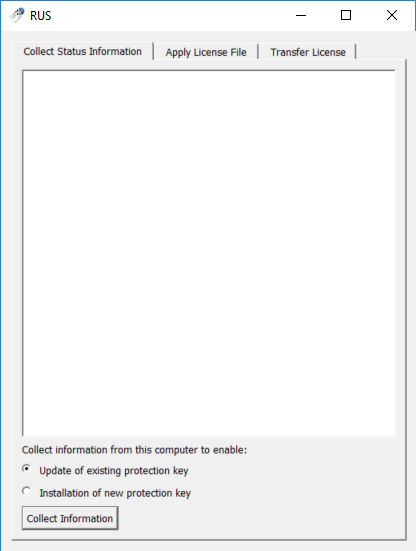
First you have to create and save the recipient computer Information File.
-
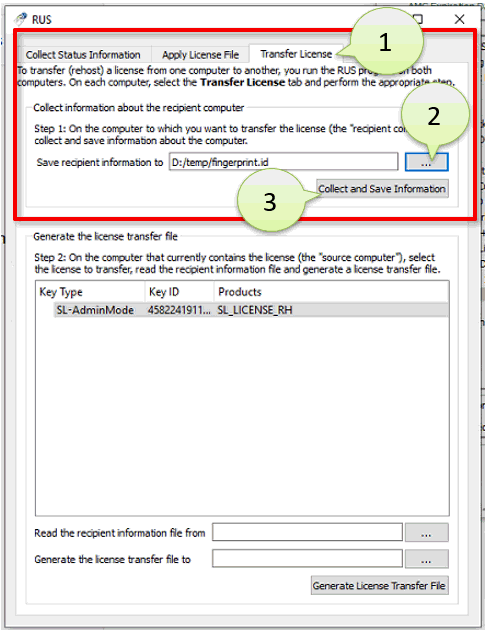
Select the Transfer License (#1 in the illustration) tab:
-
Under Collect Information about the recipient computer, click the
 (#2 above) button and browse to the folder where you want to save
the file.
-
When selecting the location, you need to also to name the file. It is recommended to enter a name that is easy to understand, for example PC1_recipient_Information_File.
The file is saved as an .id file. -
Click Collect and Save Information (#3 above). The file is saved.
-
Copy the file to the transferring computer.
Second step: On the transferring computer
This is the computer where the key currently exists, but you want to move it away.
-
On the Windows start menu, run Network License Utility if you are using a Floating (network) key or Local License Utility if you are using Fixed (regular) key.
You can also find these utilities in the Optitex installation folder (C:\Program Files\Optitex\Optitex [Version#]\App).
-
Select the Transfer License tab.
-
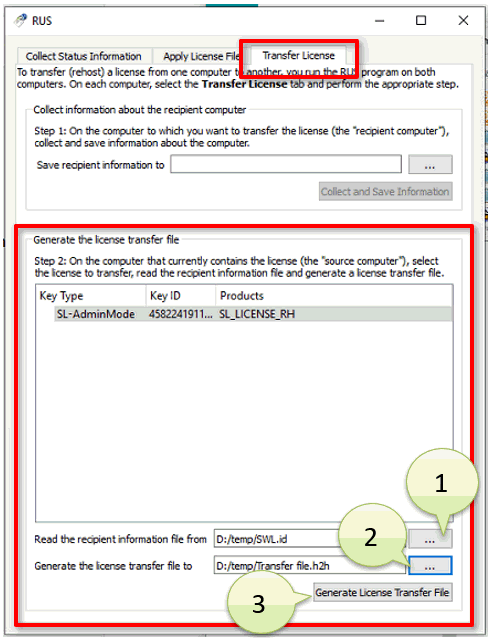
Under Generate the license transfer file, go to Read the recipient information file from. click
 (# 1 below) and select the .id
file you created on the recipient computer.
-
Now go to Generate the license transfer file to area, click
 (#2 above) and select the location where you want to save the transfer
file.
You will also have to name the file (e.g PC1 _License_transfer_File)
-
Click Generate License Transfer file. (#3 above) A license transfer file (*.h2h) is created.
-
Move the file to the recipient computer.
Third step: On the recipient computer
Back to the recipient computer.
-
On the RUS Select the Apply License File tab (#1 in the illustration below).
-
Go to Update File at the bottom and click
 (#2
below) to browse and select the transfer file.
The license information appears as follows: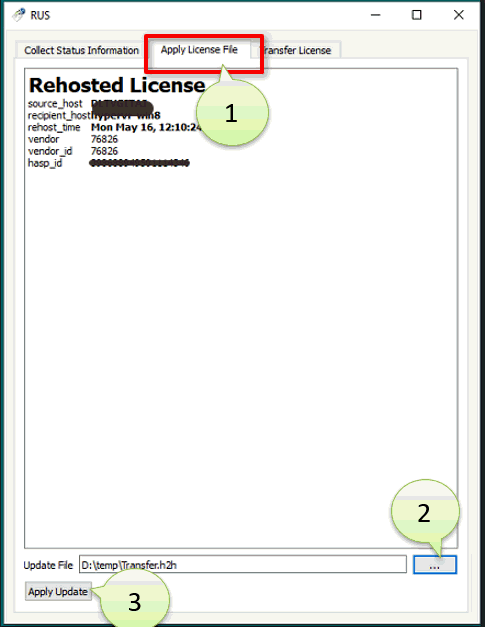
-
Click Apply Update. (#3 above). The license is transferred.
-
Go to http://localhost:1947/_int_/devices.html to view the transferred license:

-
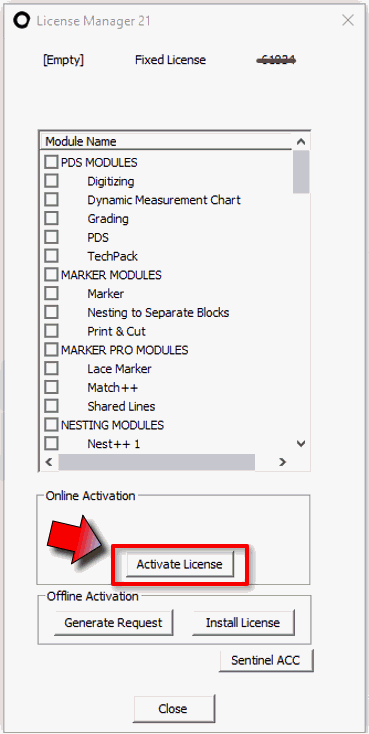
Open theLicense Manager and if needed, activate the key on the recipient computer:
 Note:
Note:
-
If Online activation is not possible, proceed with Offline activation.
-
If you are regularly moving a key between the same two computers (e.g. home & office) you can keep the two .id files ready and reuse them each time. This will speed the process.
 See also: