Uploading your 3DDI Design to O/Cloud
You can upload images and 3D files from a 3DDI style to Optitex O/Cloud using O/cloud Link which is included in 3DDI:
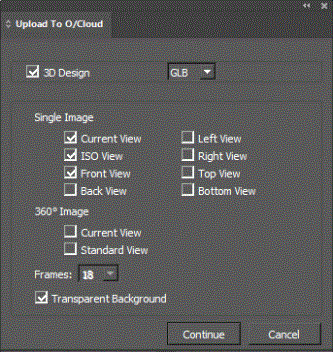
Optional elements are:
-
3D format (glTF or GLB)
 Note:
Note:
-
Single and 360 images can be created with, or without transparent background.
-
In the current version, glTF and GLB files that are uploaded to O/Cloud using O/Cloud link do not contain materials.
-
Currently, the 3D viewer in O/Cloud does not support materials.
To upload directly from 3DDI using O/cloud Link
-
In 3DDI, click the Upload To O/Cloud icon:
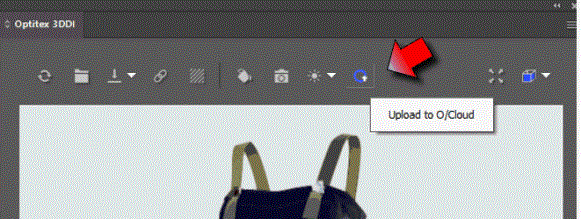
The Upload To O/Cloud dialog opens:
-
Select the desired images, 3D format and options you want to upload.
-
Click Continue. O/Cloud Link upload wizard opens.
-
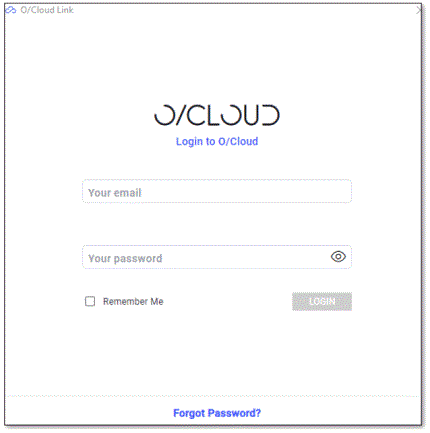
If it is the fist time you are using O/Cloud Link, you will have to login first:
-
Enter your O/cloud credentials and click Login.
-
Select Remember Me to stay logged in.
-
If you are already logged in, the wizard opens directly:
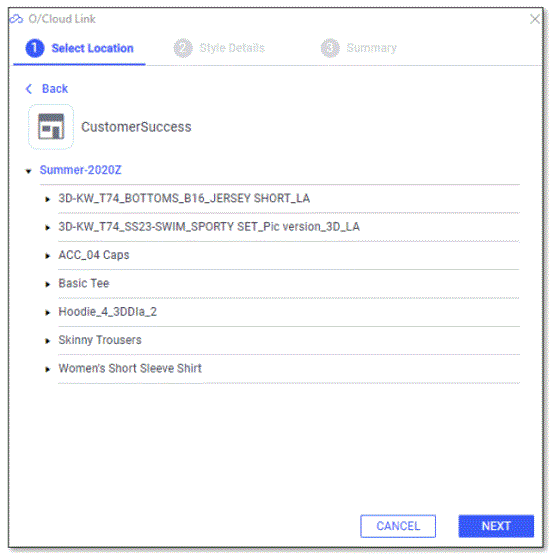
The Upload wizard Opens:
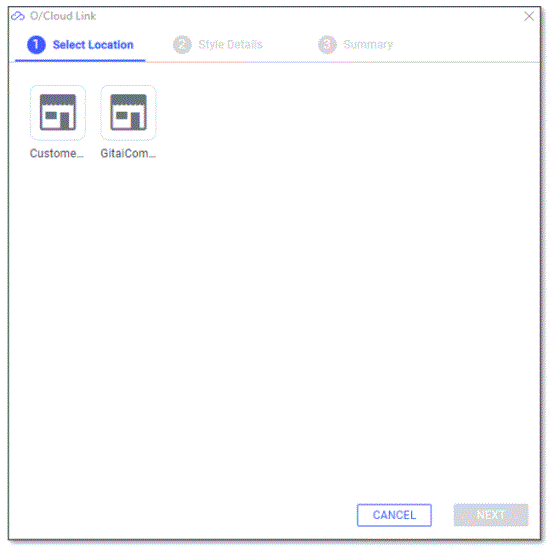
-
Select the O/Cloud location for the upload and click Next.
-
In step 2 of the wizard you can name the design and enter optional description and parameters:
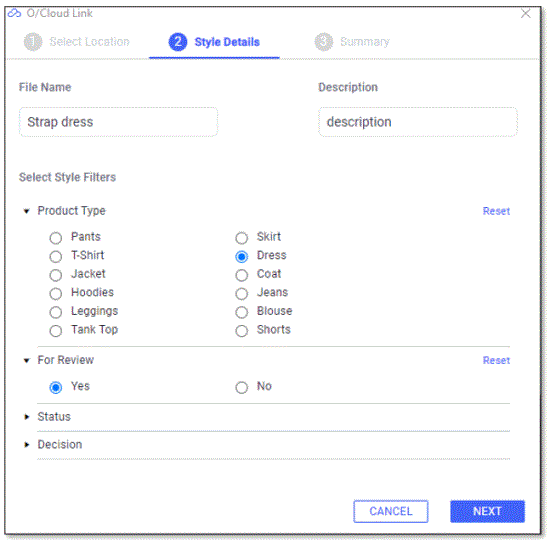
-
Click Next:
-
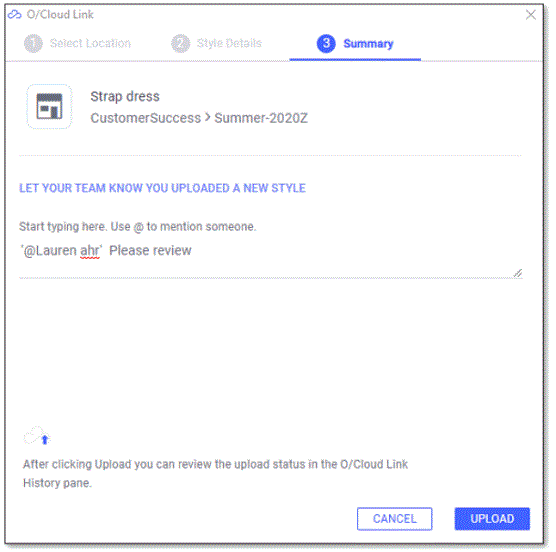
In Step 3 of the wizard you see a summary of the upload, and you can also tag your team members and write them a message.
-
To tag a team member, type @ and select the person you want to tag.
-
The tagged people will get an e-mail with your message .
-
Click Upload. The design is being uploaded.
-
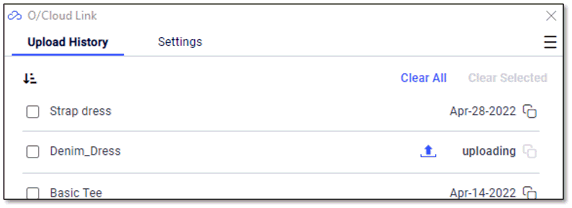
To view the upload progress and the upload history, you can open O/Cloud link from the tray, or from the Start Menu.
-
You can get a direct link to an uploaded style in the list by clicking the Copy icon next to the date:

-
Paste the copied link in a browser address bar to view the uploaded elements.
 See
also:
See
also: