Using Button Shapes
You can use Button Shapes when you want to make your pattern look more realistic by adding different elements such as buttons, bows, clasps, zipper heads, zipper pullers, etc...
You can load the samples included with PDS, or you can use your own files.
To use a button shape:
-
Create your piece.
-
On the 2D toolbar click
 to create a button.
 -
Add a stitch on the entire button.
-
In the 3D Window, click Stitch Mode
 and then select your stitch.
 -
In theButton Stitch 3D Properties(8 on the keyboard) dialog, click the Browse button (next to LoadButton Shape), to load a button shape from your directory.

The Open dialog appears: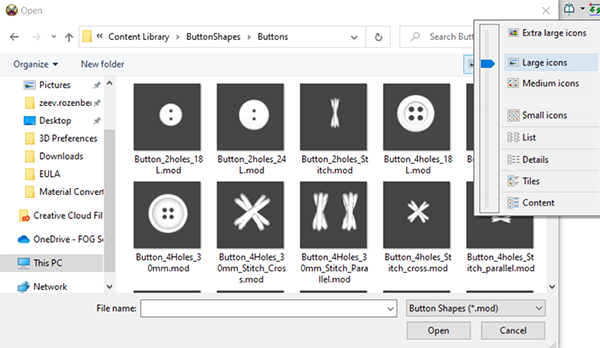
Note: You can change the view option to the large icons in order to see a preview of the selected shape. -
Select the desired shape and click Open.
Once a file is loaded, it appears in the Button Shape drop-down list.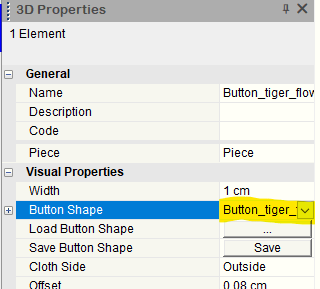
-
Once you load a different shape, the new shape automatically replaces the previous one while keeping the past used shapes in the list.
-
If you want to remove a button shape, you can select None from the drop-down list. (When None is selected, all adjustments applied to the button shape are removed).
-
The drop-down list contains all button shapes that were either loaded in the current session or saved with the PDS file.
-
In the Button Stitch 3D Properties dialog, click the Save button (next to Save Button Shape), to save the embedded button shape.
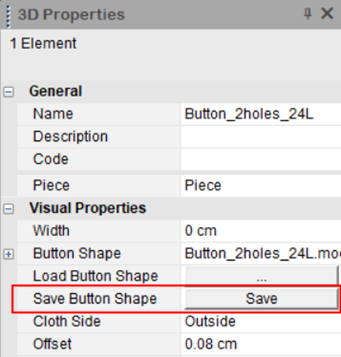
The Save as dialog appears:
-
Select the desired directory and click Save.
Note: You can save the embedded Button Shape to the directory which is assigned to the selected button stitch. -
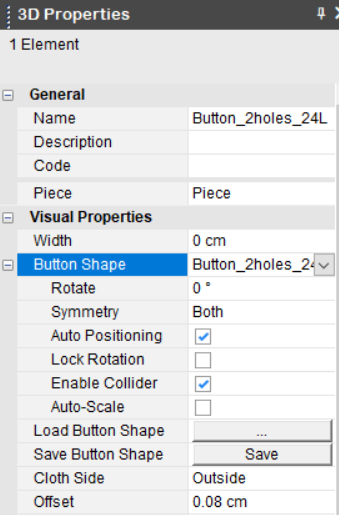
The following properties can be defined for button shapes:
|
Property |
Description |
|
Rotate |
Allows you to rotate the button shape on the surface. |
|
Symmetry |
Allows you to control the button behavior on symmetric pieces. The following options are available: Both Sides: Full Symmetry. Left Only: The button is only on the left. Right Only: The button is only on the right. Note: This is only valid with pairs or half pieces. |
|
Cloth Side |
Allows you to place the buttons on the inside or outside of the cloth. |
|
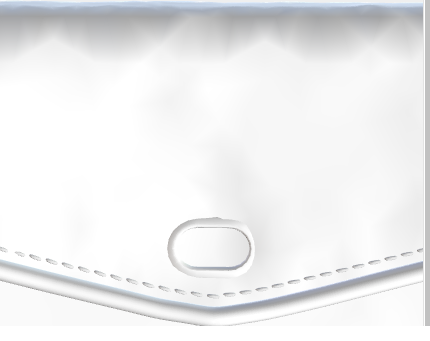
Offset |
Controls the distance between the button and the cloth. Here is an example of a button offset at 0 cm:
Here is an example of a button offset at 1 cm:
|
|
|
|

You can use the Move tool in the 3D window to move the shape manually.
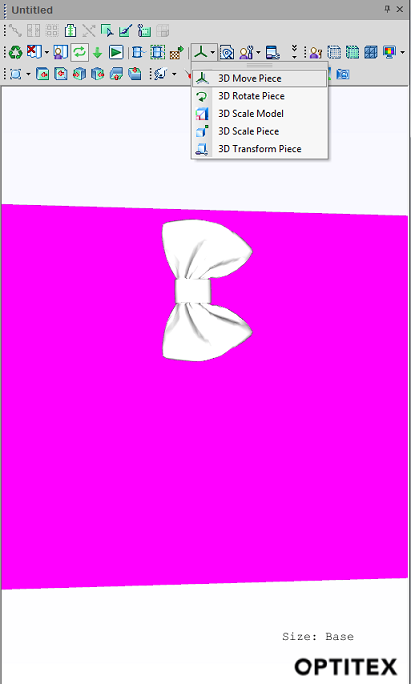
Moving/Rotating a Button
If you want to move the button in the 3D window, you can use one of the 3D Transform tools.
For example, to move a button:
-
From the 3D transformation tools, select 3D Move Piece.
-
Press Ctrl and then left click with your mouse to select the button shape.
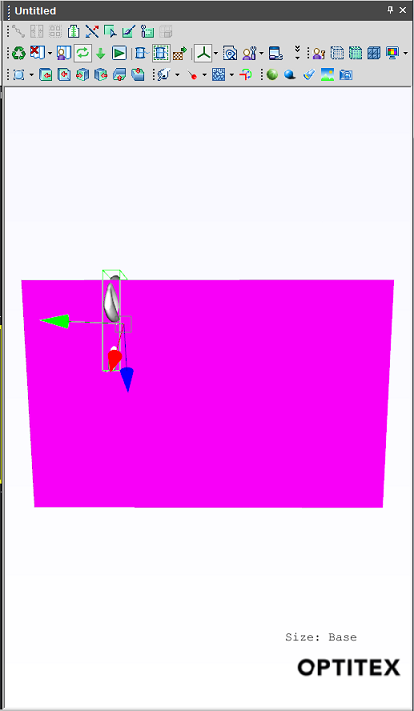
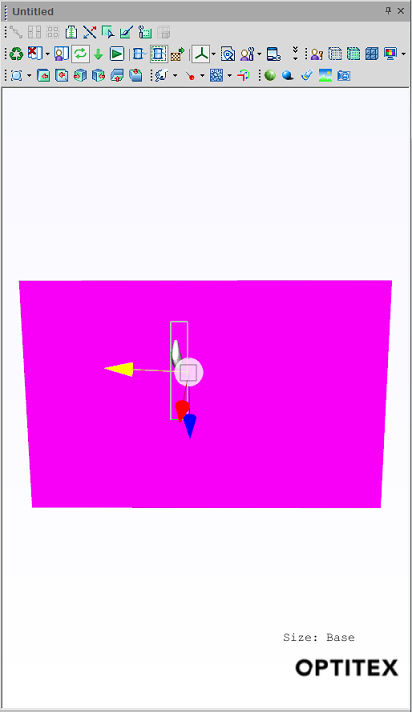
-
Grab the arrows with your mouse to move to the required position.
 See
also:
See
also: