Defining Table and Overlay Properties
In this step you can define the table dimensions and overlay properties for each Marker file that was created in the previous step.
Note: This dialog is similar to the Marker Definitions dialog. For more information, see Marker Definitions.
To define table and overlay properties:
Select the row of
the Marker file you want to define. 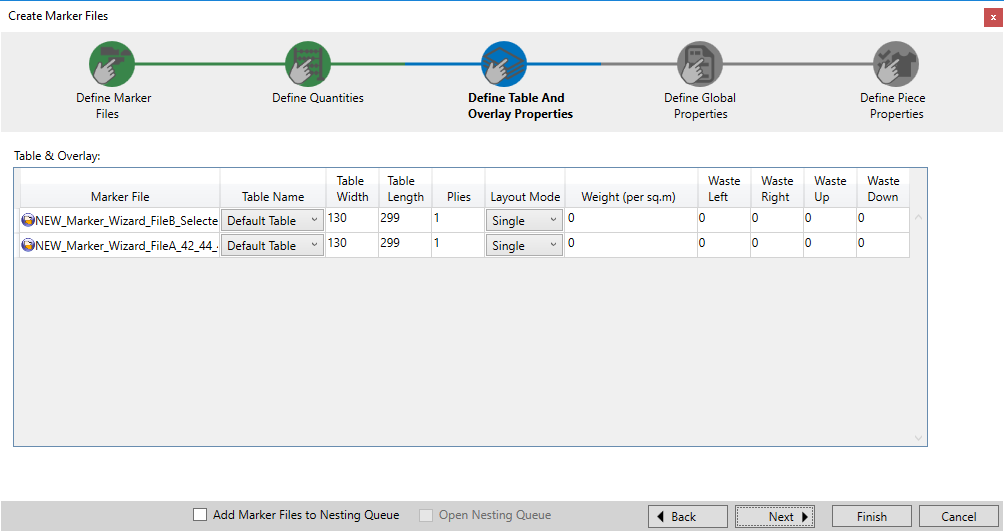
You can use the quick
menu to perform various actions to the cells in the table. To access the
quick menu, ![]() click
here.
click
here.
Enter the following
information:
|
Column |
Description |
|
Marker File |
Displays the Marker file name. |
|
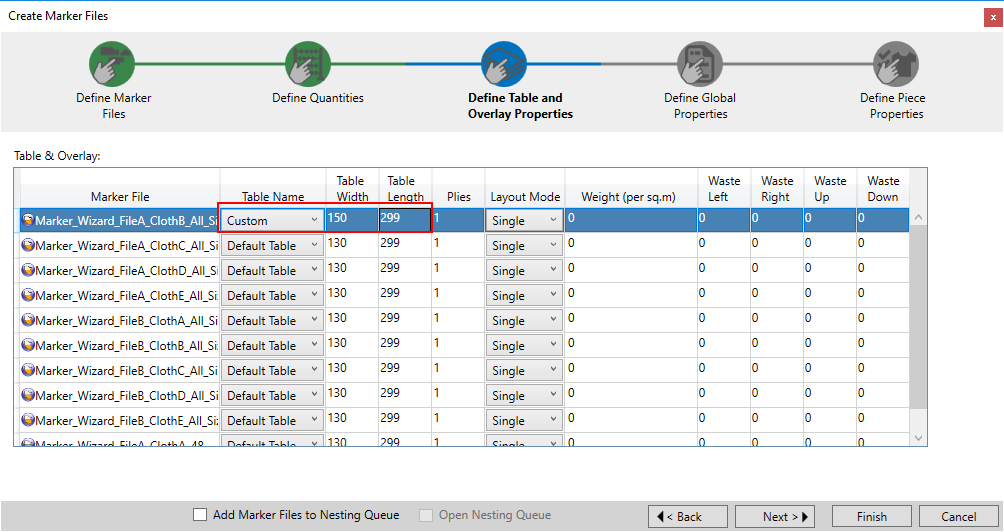
Table Name |
Allows you to select the table you want to use. Once you select a table, the dimensions are automatically updated. Note: By default, Default Table is automatically selected. If you want to create your own customized table, you can change the dimensions of the default table (for example, change the table width to 150), once you click outside of the table, Custom appears in the drop-down list as follows:
|
|
Table Width |
Allows you to enter the table width. Once you change the width, the table changes from Default Table to Custom. |
|
Table Length |
Allows you to enter the table length. Once you change the length, the table changes from Default Table to Custom. |
|
Plies |
Allows you to enter the number of plies. |
|
Layout Mode |
Allows you to select the type of layout and includes the following options:
|
|
Weight |
Displays the weight of the fabric on the Marker. |
|
Waste Left |
If the Marker has poor edges, allows you to define the waste zone to the left side of the fabric. |
|
Waste Right |
If the Marker has poor edges, allows you to define the waste zone to the right side of the fabric. |
|
Waste Up |
If the Marker has poor edges, allows you to define the waste zone to the upper side of the fabric. |
|
Waste Down |
If the Marker has poor edges, allows you to define the waste zone to the down side of the fabric. |
You have now completed the step of defining table dimensions and overlay
properties.
Click Next to proceed to the next step, Defining Global Properties.