Defining Quantities
In this step, you can define the sizes per marker you require, quantity, alternative placement and rotation properties.
If your PDS file contains Variation Grading, this dialog will contain different functionality. See the process below for more information.
Note: This dialog is similar to the Order for Marker Making dialog. For more information, see Order For Marker Making.
-
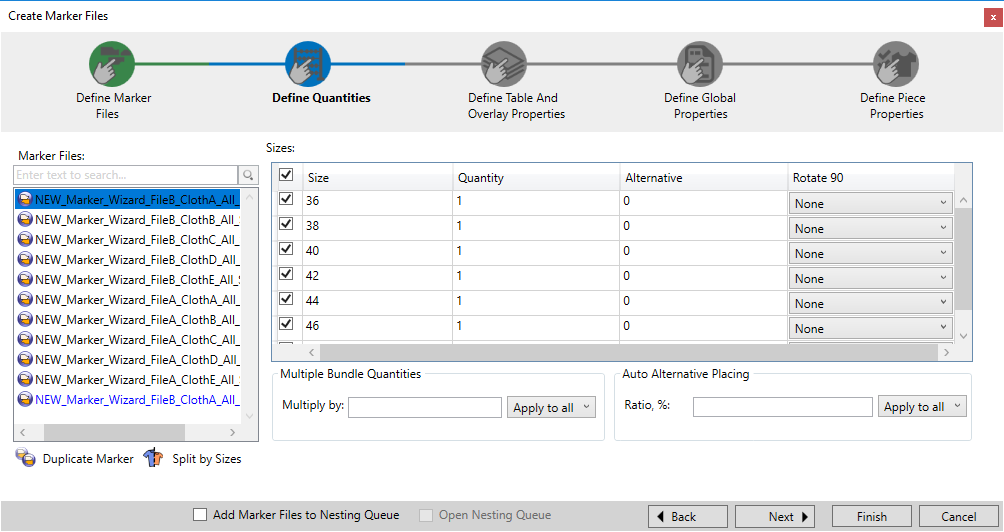
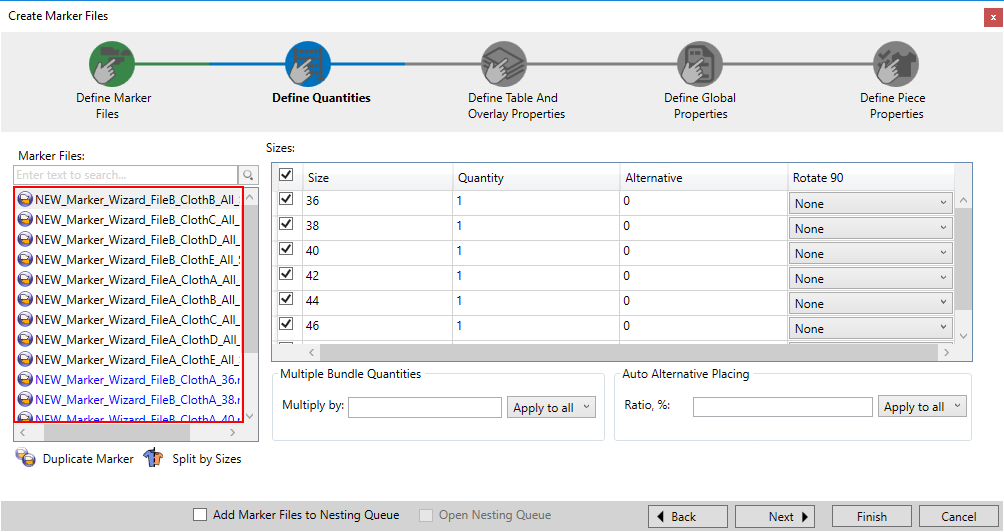
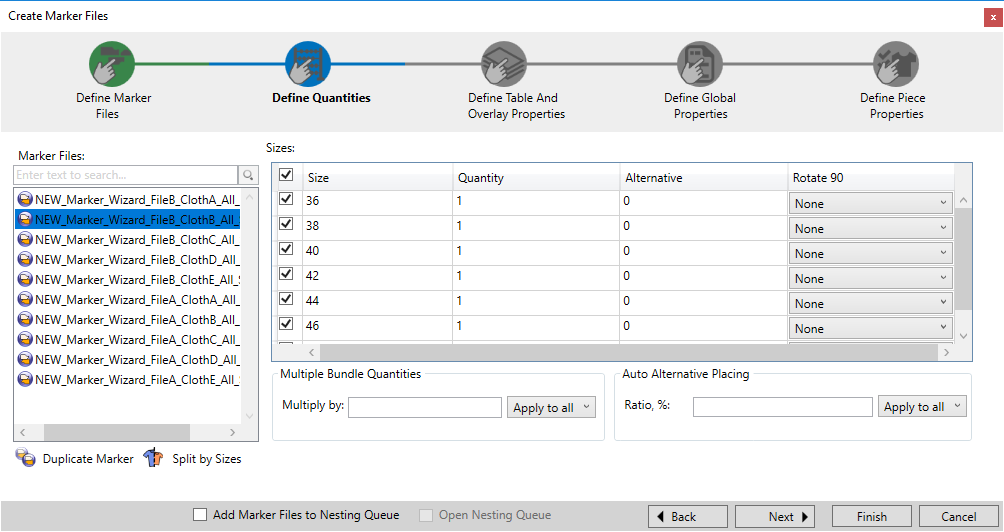
On the right hand side, you can see the Marker file you previously defined.
-
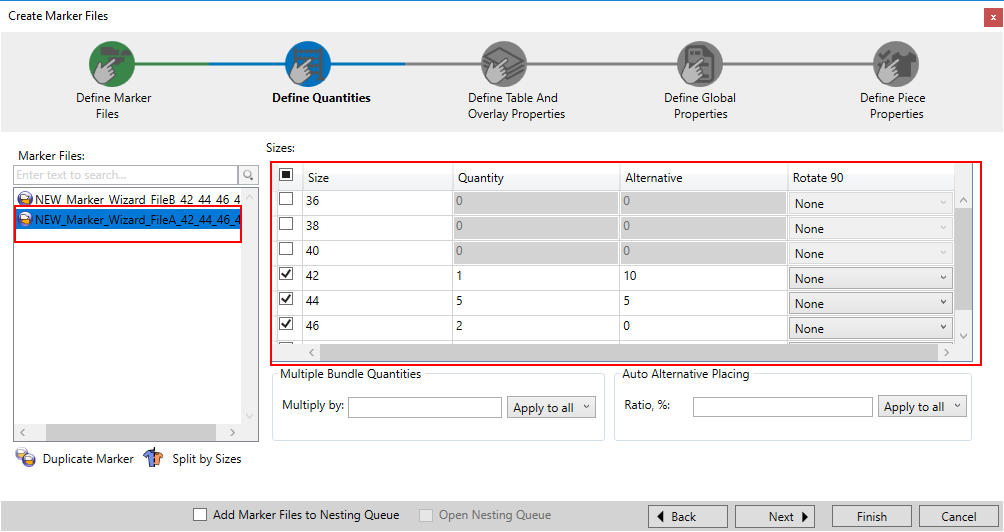
The table is dynamic according to the Marker file you have selected and contains the number of sizes that were defined per style or variation gradings that were defined.
-
You can easily search for Marker files in the Search bar, if for example you have a lot of Marker files and you want to select a specific file.
-
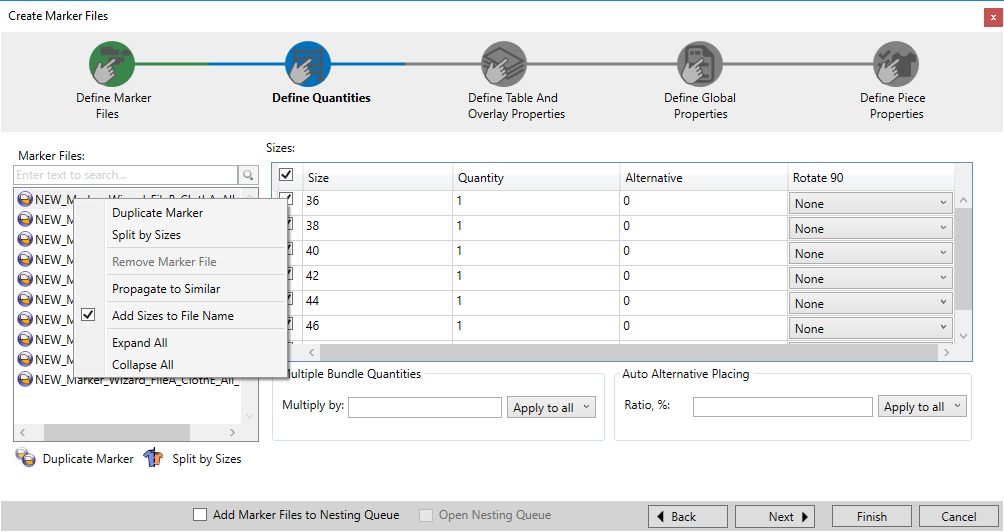
You can use the quick menu to perform various actions on a Marker file. To access the quick menu,
 click
here
To define quantities:
In
the Marker Files area, select
a Marker file.
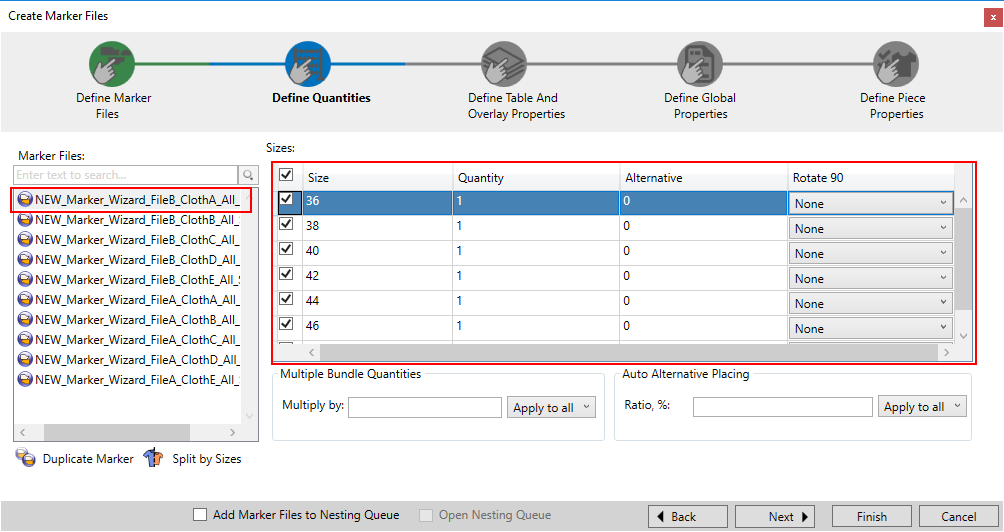
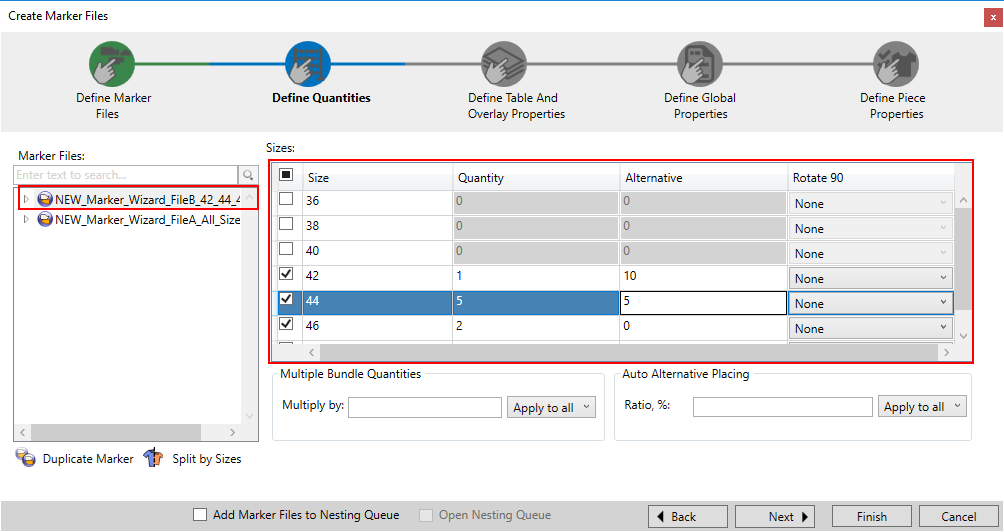
Notice the table displays the values of the selected Marker file: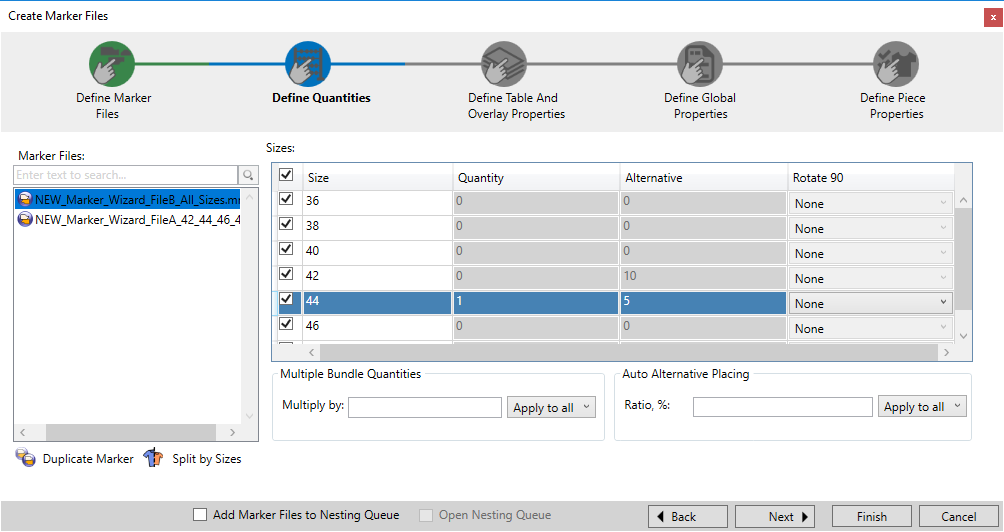
The table contains the following columns:
|
Column |
Description |
|
Size |
Displays all the sizes that were defined in the Style Set for the selected Marker file. You can select the checkbox next to the sizes you want included in the Marker file. If you clear a checkbox, the size will not be included in the Marker file. Click the Sizes checkbox at the top to select all the sizes that were defined in the style file. No Sizes
All Sizes
|
|
Quantity |
Displays the number of bundles required for the size. |
|
Alternative |
Displays the number of bundles you want to apply alternative placement to. |
|
Rotate 90 |
Defines the rotation of the bundle. |
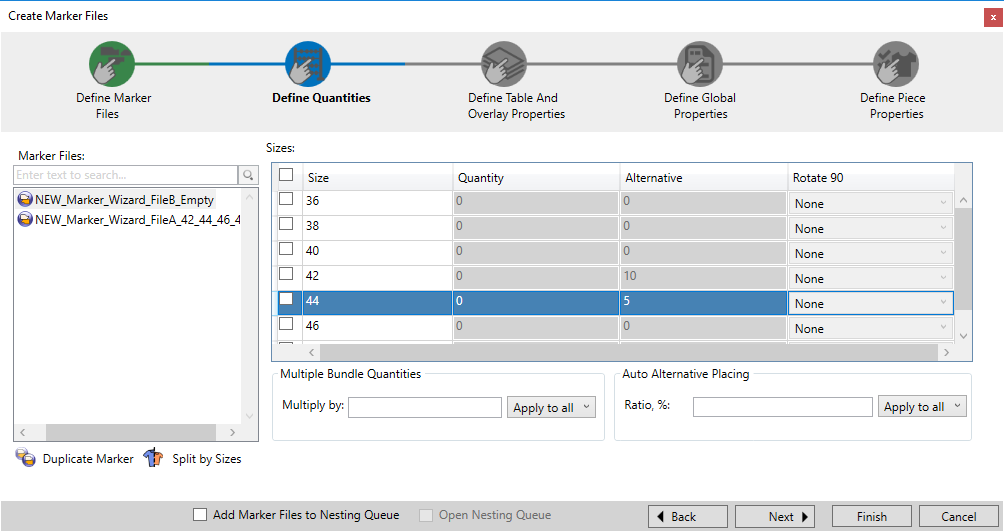
If
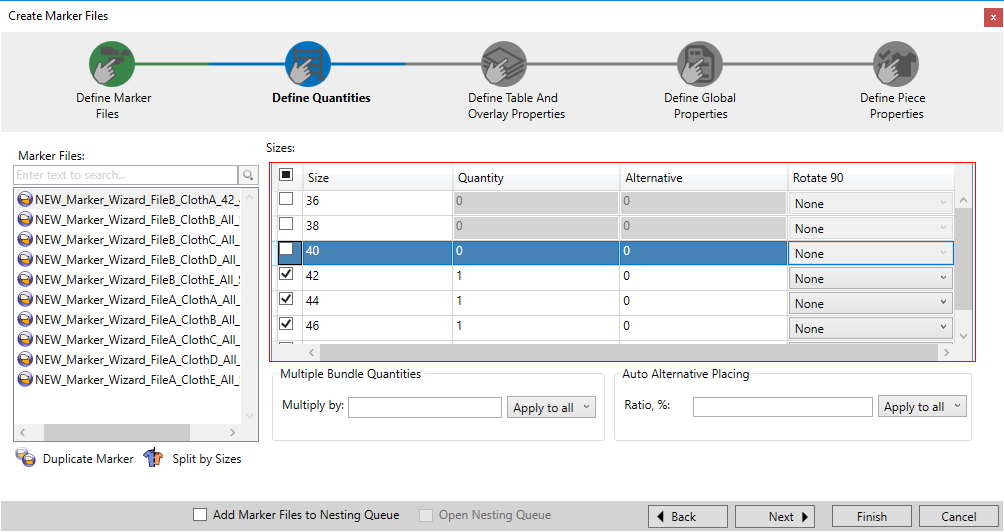
you want to remove a size from the Marker, select the checkbox of the
size you are removing.
Notice, the values appear as "0"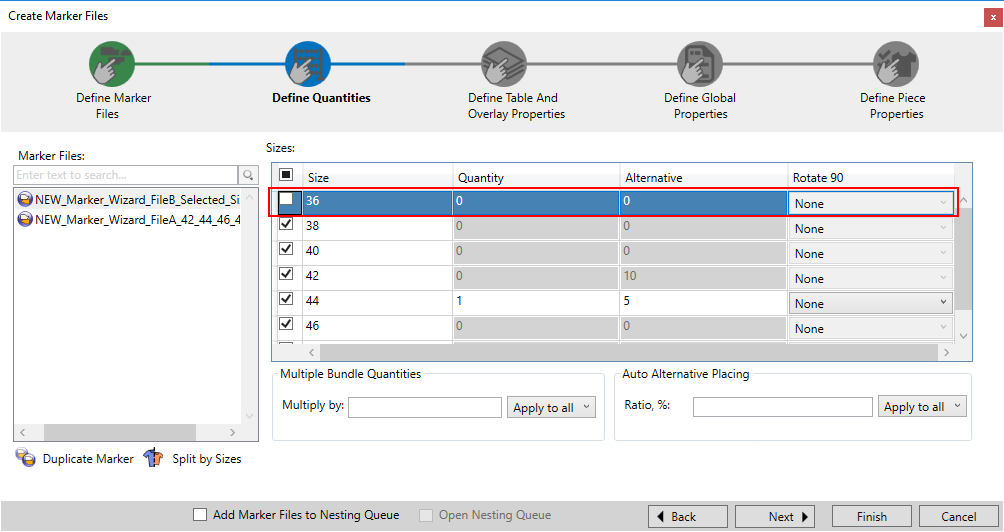
If the file you are using was defined with Variation Grading in the PDS,
the dialog appears as follows:
Note:
By Default, the base size automatically appears in the Sizes
table.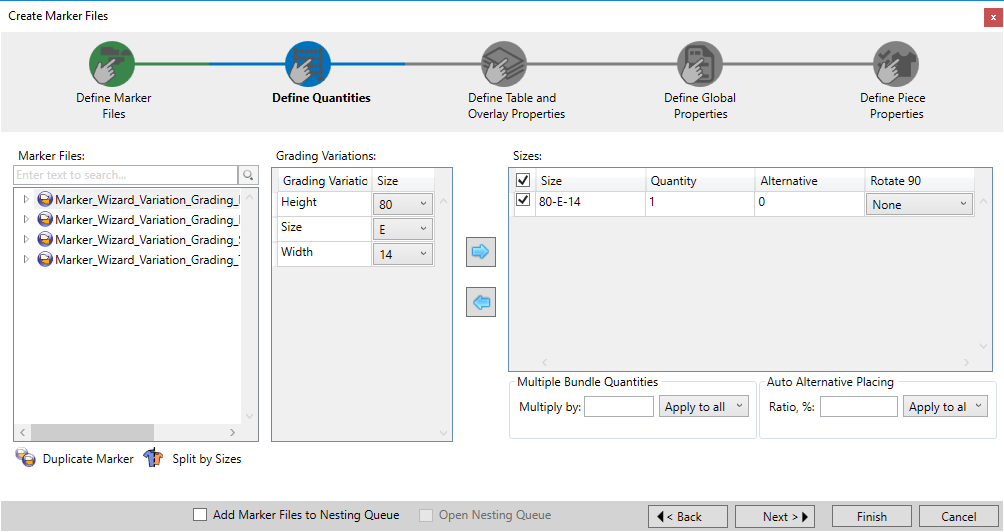
In
the Grading Variations area you
can create a combination of sizes manually and then using the Right
arrow move the combinations to the Sizes
table. For example, create a few different combinations as follows: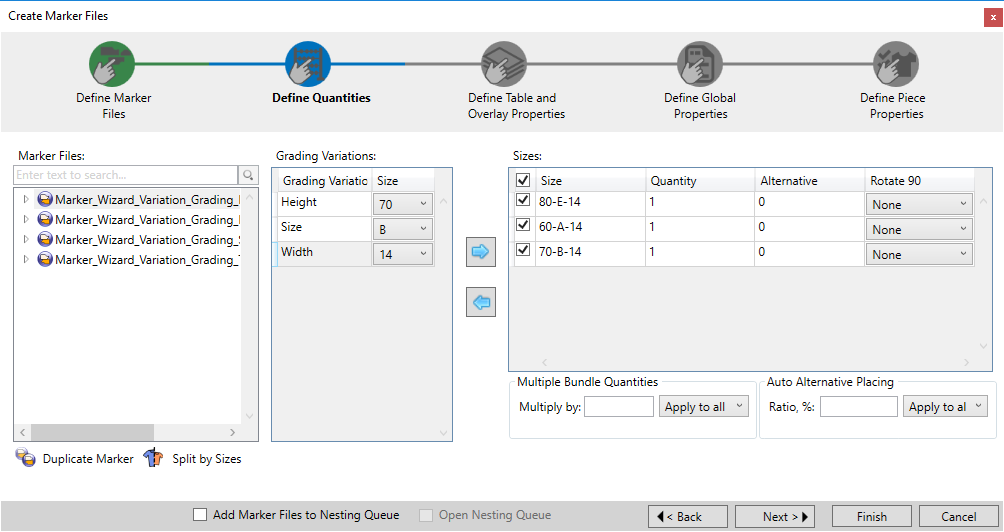
OR
You can use all variation grading that was created by selecting the All option from the drop-down list
of each component:
Note:
Take into account that if you select All
for all the components (in our example Height/Size/Width), you will receive
a large amount of combinations (all depending on the number of values
that were defined).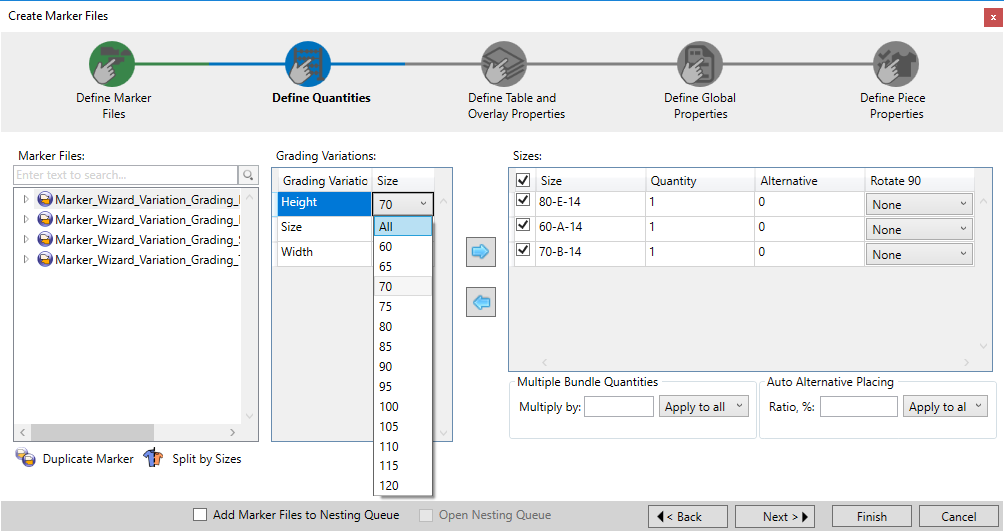
The following steps are the same no matter what type of sizing was used.
If you want to define the number of bundles per size, in the Quantity column, enter the value you require.
If you want to automatically define bundles per amount of sizes, you can use the Multiple Bundle Quantities field.
In the Multiply By field, enter the number of bundles you want to apply to all the sizes. For example, enter 5.
If
you want to only apply to the selected size, from the drop-down list,
select Apply to Selected, otherwise,
select Apply to All.
Here you can see the Quantity column
was updated and shows the value 5 for all the sizes.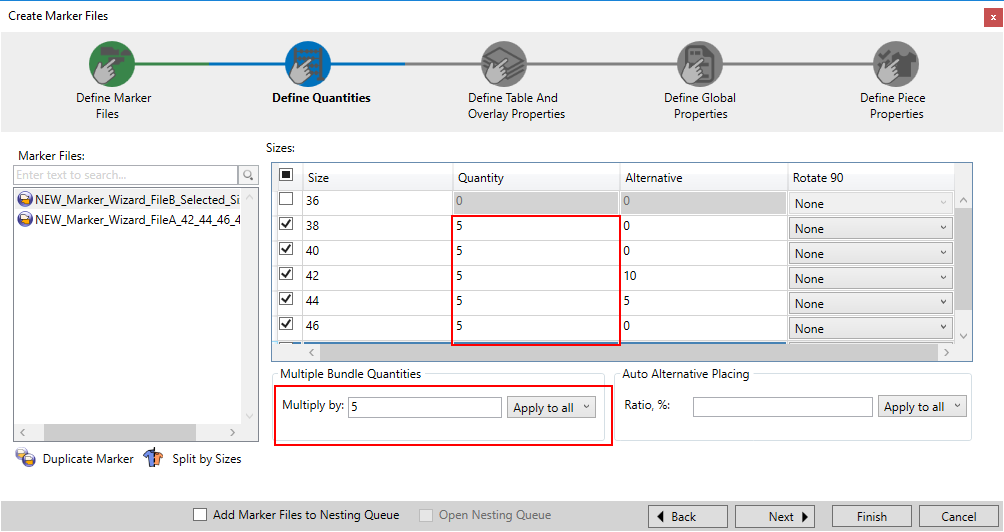
If you want to define alternative placement for a specific size, in the Alternative column enter the number of bundles which require alternative placement.
If you want to specify a percentage of the total bundle quantity, you can use the Auto Alternative Placing field.
In the Ratio % field, enter a percentage. For example, enter 50.
If
you want to only apply to the selected size, from the drop-down list,
select Apply to Selected, otherwise,
select Apply to All.
Here you can see the Alternative column
was updated and shows the value 2 for all the sizes.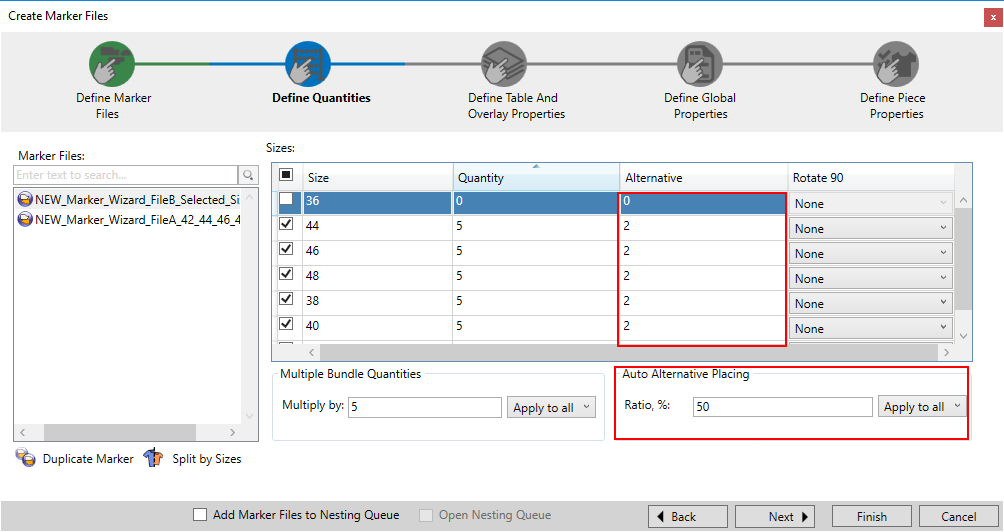
If you want to define a rotation for the bundle, in the Rotate 90 column select one of the following options from the drop-down list:
None: No rotation is applied.
Left 90: The bundle rotates 90 degrees to the left.
Right 90: The bundle rotates 90 degrees to the right.
Rotate 180: The bundle rotates 180 degrees.
You
can use the quick menu to perform various actions to the cells in the
table. To access the quick menu, ![]() click
here.
click
here.
You have now completed the step of defining quantities per size for your
Marker files.
Click Next to proceed to the next step Defining Table and Overlay Properties.
