Order For Marker Making
The Order for Marker Making option allows you to control the exact amount of sizes, bundles and pieces for the Marker.
There are two ways to access the Order for Marker Making dialog:
-
When opening a style file and pressing Edit Selected Style

-
Menu > File > Marker Order
To use the Order for Marker Making option:
From the main menu,
go to File > Marker Order.
The Order for Marker Making dialog
appears: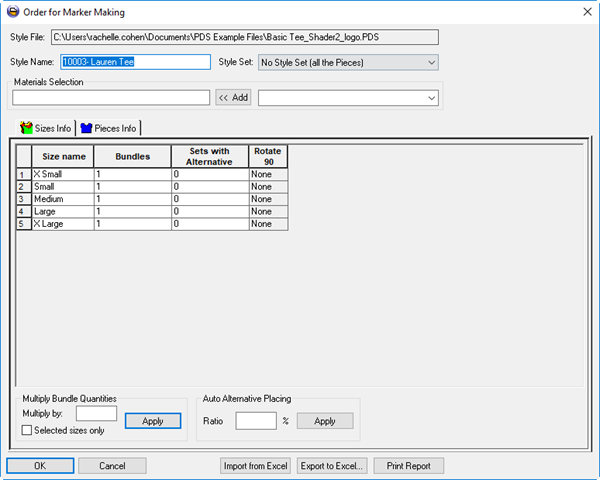
In the Style File field, you can see the location and name of the style file.
In the Style Name field, you can see the name of the style. If you want to change the name, enter a new name.
If the style file
was saved in the PDS with a Style Set, you can select a style set from
the Style Set drop-down list
Or
Select No Style Set, if you want
all the pieces in the style to load.
Note:
In order to change the style set after it was selected, click Cancel,
and then reload the Style file.
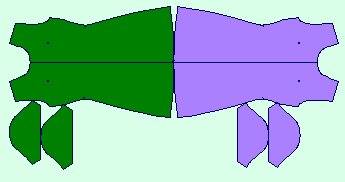
In the Materials Selection area you can see all materials that were loaded with the style file. Only pieces matching the defined materials will be loaded into the marker and will appear in the Piece Bar. If you do not select a material, all the pieces will be loaded, regardless of their material.
If you want to add
a material, from the drop-down list, select a material then click the
Add button.
There are two tabs available in the Order for Marker Making dialog:
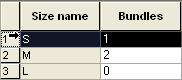
Sizes Info: Here you can view all
the sizes that are available in the style file and you can edit the following
information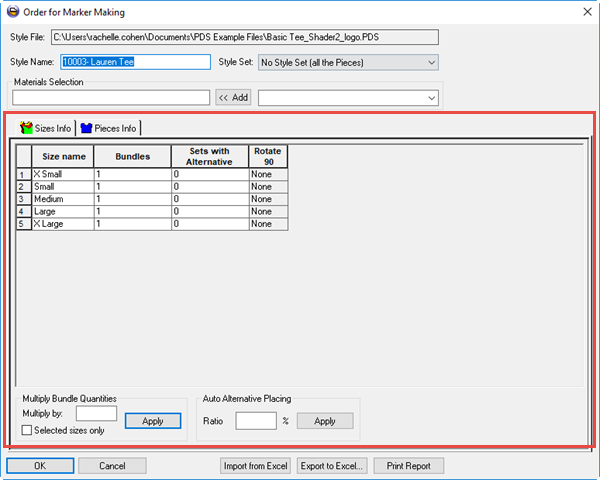
|
Column |
Description |
|
Size Name |
Displays the name of the size as it was defined in the PDS. You can change the name by clicking inside the cell. |
|
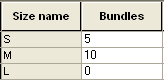
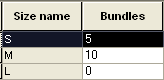
Bundles |
Enter the number of bundles you require of the specific size. This information can bee seen in the Size List
|
|
Sets with Alternative |
When the number of Bundles is larger than '1', a number of bundles can be placed with 180 degrees rotation to the original layout. This is commonly used, when wanting to place the entire bundle with the same orientation, but for efficiency reasons the bundles are rotated
|
|
Rotate 90 |
Allows you to pre-rotate all the pieces of a selected size.
|
|
Multiply Bundle Quantities |
If you want to automatically define bundles per amount of sizes, in the Multiply By field enter the number of bundles you want to apply to all the sizes and then click Apply.
|
|
Selected Size Only |
If selected, then only the size that is selected will receive the multiplied bundles.
|
|
Auto Alternative Placing |
If you want to specify a percentage of the total bundle quantity, you can use the Auto Alternative Placing field. In the Ratio % field, enter a percentage and then click Apply. |
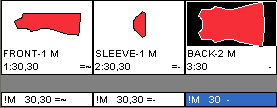

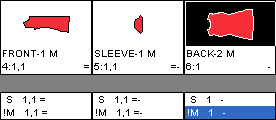
Pieces Info: Here you can view all
pieces that are inside the style file and you can edit various properties.
|
Column |
Description |
|
Piece Name |
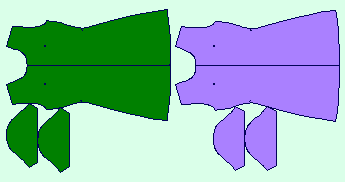
Displays the name of the piece as it was defined in the Style File. This row is read only. When you click on a piece name, a preview of the piece appears. |
|
Code |
Displays the code that was assigned to the piece. This row can be edited. |
|
Description |
Displays the description that was assigned to the piece. This row can be edited. |
|
Quantity |
Displays the number of instances of the piece. This row can be edited. |
|
Material |
Displays the material that was assigned to the piece. This row is read only. |
|
Baseline |
Displays the baseline of the piece. To select a different baseline, click the drop-down box and select another option (if available). |
|
Orientation |
Displays the orientation of the piece. To select a different orientation, click the drop-down box and select one of the following options: None: Piece orientation is not available. Left: Left orientation is set to the piece. The L letter appears within the description. When the Left orientation is chosen, the orientation of the opposite piece is automatically set to be Right. Right: Right orientation is set to the piece. The R letter appears within the description. When the Right orientation is chosen, the orientation of the opposite piece is automatically set to be Left. |
|
Opposite |
Displays the opposite piece direction (if the piece is Paired).To select a different option, click the drop-down list and select one of the following options: None: The opposite piece is not available. Up/Down: The opposite piece is obtained by vertically mirroring the piece's geometry. Left/Right: The opposite piece is obtained by horizontally mirroring the piece's geometry. |
|
Rotation |
Displays the rotation that was assigned to the piece. To select a different rotation, click the drop-down list and select one of the following options: 1-Way: In this case rotation is not allowed; pieces can be placed only in base orientation with no rotation. 2-Way: In this case only 180 degrees rotation is allowed, i.e. pieces can be placed either in base orientation or rotated by 180 degrees. 4-Way: In this case only incremental 90 degrees rotation is allowed, i.e. pieces could be placed either in base orientation or incrementally rotated by 90 degrees relative to base orientation. 8-Way: In this case only incremental 45 degrees rotation is allowed, i.e. pieces can be placed either in base orientation or incrementally rotated by 45 degrees relative to base orientation. Any: In this case rotation is allowed for any angle. |
Click Import from Excel, if you want to import an order. You must make sure the XLS file is similar to the one exported.
Click Export to Excel, if you want to create an XLS file of the style order.
Click Print Report, if you want to send the information to the printer.
Click Ok when you are done or Cancel to exit the dialog.