Configure the Mark-10 M5-5 Force Gauge
Using the Mark-10 M5-5 Force Gauge user interface, configure the machine as follows:
-
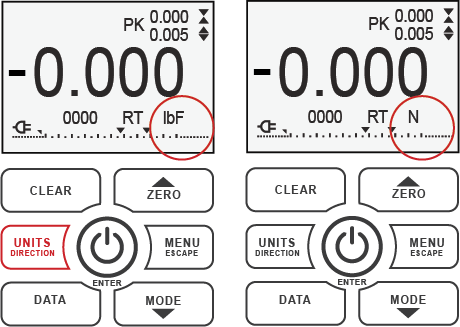
Use the UNITS button to set N (Newtons) as current measurement units.
-
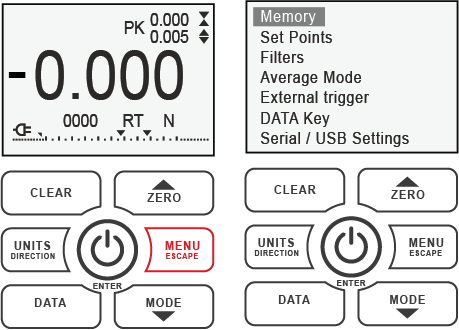
Press the MENU button to display the configuration menu.
-
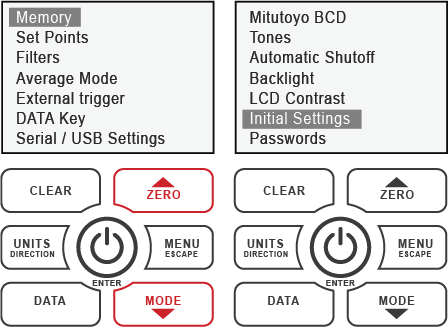
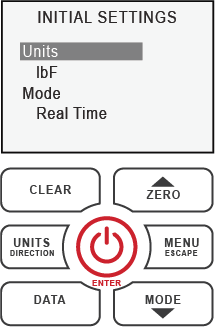
Using arrows, navigate to the Initial Settings item in the menu.
-
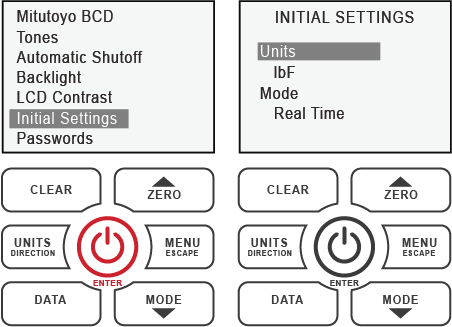
Press the ENTER button to start the initial settings definition.
-
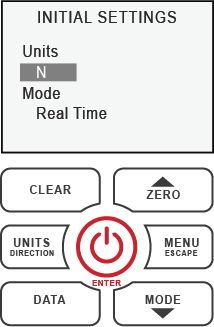
Use arrow buttons to navigate to Units header and press the ENTER button to change it.
-
Use arrow buttons to change Units to N (Newtons) to Units header and press the ENTER button to confirm.
-
Press MENU button to return to the main configuration menu.
-
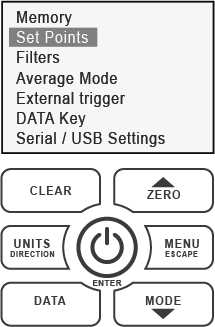
Navigate to the Set Points item and start the set points definition with the ENTER button.
-
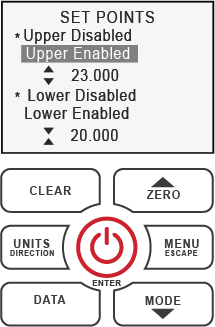
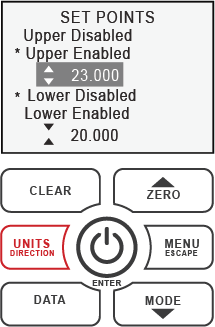
With arrows, navigate to the Upper Enabled option and press the ENTER button to activate it.
-
Once the Upper Enabled option is activated, the upper point value is highlighted. Using arrow buttons, set the value of 23.

-
During the value definition, press the DIRECTION button to set the Tension direction (
 )
)
-
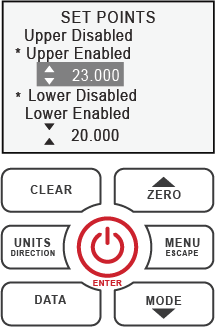
Once the value and direction are set, press the ENTER button to confirm settings.
-
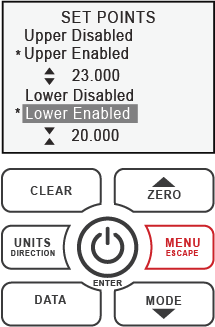
In the same manner, navigate to Lower Enabled option and activate it.
-
Set the value of 20 as well as Compression direction (
 ) and confirm settings with the
ENTER button. Once values are set and confirmed, press the MENU button
to return to the main menu.
) and confirm settings with the
ENTER button. Once values are set and confirmed, press the MENU button
to return to the main menu.
-
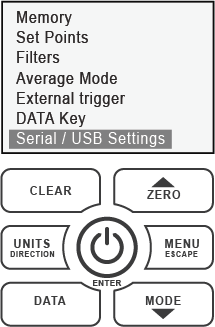
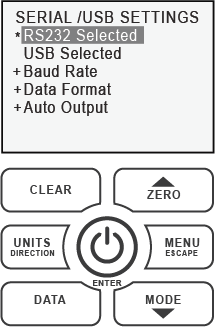
In the menu, navigate the Serial/USB Settings item.
-
In the Serial/USB Setting screen, make sure that the RS232 option is activated as shown below.
-
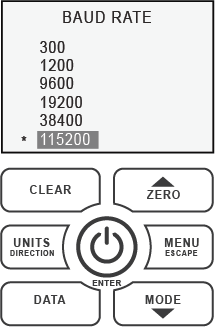
Navigate to the Baud Rate item and make sure that the value of 115200 is set.
-
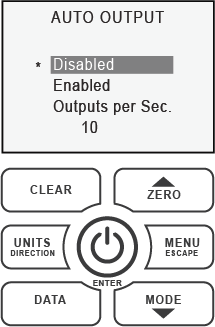
Navigate to the Auto Output item and make sure that Disabled option is chosen.
-
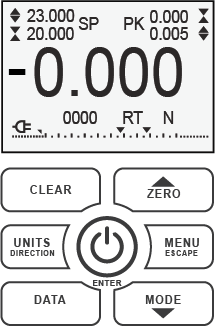
Press the MENU button to exit from the menu. The operation screen will be displayed.
At this stage, the configuration of the Mark-10 M5-5 Force Gauge is completed.
Note: For more information about the Mark-10 M5-5 Force Gauge settings refer to the Series 5 Digital Force Gauges User’s Guide available at www.mark-10.com.
 See
also:
See
also: