Adjusting Morphs to Create Sizes
By default, the avatar appears with defined morphs according to defined naming conventions and properties. They appear in the Tagged Properties tab under the Morphs section. You can change the morphs when you want to adjust the avatar's dimensions and create different sizes.
By default, the avatars are saved in the folder you define when you save the avatar.
Note: You can only adjust morphs and create sizes on a static final pose (not animated). If you have selected an animated final pose all options will be disabled. In order for the Morphs to be available, you will have to select the Static Position final pose.
To adjust morphs to create sizes:
Select the
Tagged Properties tab.
Go to the Morphs section and adjust the parameters you require.
If you require different measurements than those that are pre-defined, you can use the Add Tape Measure/Add Circumference tools and replace the measurements. For more information, see Updating Morph Measurements.
To adjust a morph, go to the category you require and make your adjustments. For example, If you want to change the cup shape, go to the Morphs tab, select Bust, then change the Cup by moving the slider to the right or left.
After you have adjusted
the avatar, from the toolbar click  (Save Size).
The Create Size dialog appears:
In the Size Name field, enter a new name. For example, SizeS, SizeM, etc.
Click Save
when you are done.
Once you save a size, the size appears in the Sizes
section as follows: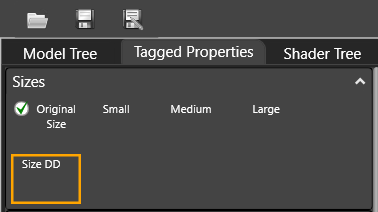
If you want to remove
a size; for example if you no longer want it saved with your avatar, select
the size you want to remove. Right-click with your mouse, then select
Remove Size.
If you want to rename
a size, select the size you want to rename. Right-click with your mouse,
then select Rename Size.
The Rename Size dialog appears: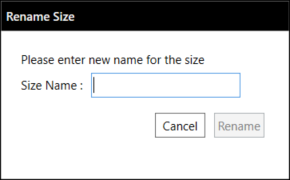
In the Size Name field, enter a new name and then click Rename. The name is changed to the new name.
Select
the Tagged Properties tab.
To copy Avatar sizes from another avatar (starting
from version 019.4):
1. You can transfer Avatar sizes from previous rigged avatars to a new
one. To do so, in the Avatar Editor, open the new avatar's .mod file (must
be the same avatar type/gender).
2. Open the folder location with the old avatar. To do so, select the .mod
file, hold down the Shift + CTRL keys, and drag and drop the old avatar
.mod file onto the new avatar. All manually created sizes will be copied
to the new avatar. Once you select one of the copied sizes, all morphs
and the avatar will be updated accordingly.
3. Review the new added sizes, and save as a new avatar .mod file name.