Setting Up the Plotter
Once your pattern is finalized and you are satisfied with your results, you can now use the PDS to plot your pieces.
To setup the plotter:
-
From the PDS main toolbar, go to File > Plotter.
-
Define the settings of the plotter. For more information about the settings, see Plotter/Cutter Setup.
-
Click Ok.
The Plot dialog is displayed.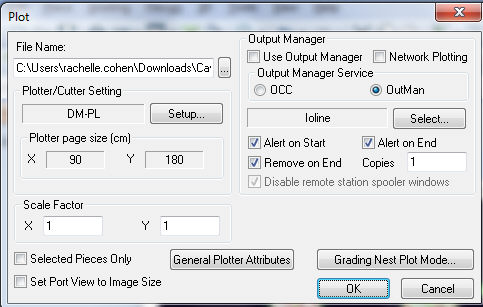
-
Define all the properties of the Plotter. For more information, see The Plot Dialog.
-
Make sure you select the Set Port View to Image Size checkbox. This is to make sure that the Plotter is defined correctly for a fabric pattern:
-
Frames will not include the gaps area (frame equal to the image size only)
-
Only frames with pieces in them will be plotted.
-
Page will start at (0,0) of the frame.
-
Each frame will be plotted in a separate page.
-
Image boundaries (not including gap) will be marked (“corner” sign). corner size will be 5% of image size.