Taking Snapshots of Your 3D Sample
You can take a snapshot of your 3D sample when you want to create an image and share it with others. This allows you to save the image according to the quality you see on the screen. After your 3D sample is ready (either after using HQR, PR3D, etc.), you can take a snapshot.
 Note:
Starting from version O/19, you can generate images for multiple custom
views and colorways (variants/articles), thus producing a single image
for every combination of custom view and colorway. You can also render
multiple images at once either on a local machine or using a rendering
machine.
Note:
Starting from version O/19, you can generate images for multiple custom
views and colorways (variants/articles), thus producing a single image
for every combination of custom view and colorway. You can also render
multiple images at once either on a local machine or using a rendering
machine.
! Important: You must select a view and variant/article to start the image creation process. If no view and/or variant is selected, the Create button at the bottom of the dialog will remain disabled.
Note: The Snapshot dialog is dynamic
according to the rendering you have used; therefore some of the fields
may be disabled.
To take a snapshot of your 3D sample:
In
the 3D window, in the Render toolbar,
click Save Image  .
.
The Save Image dialog appears: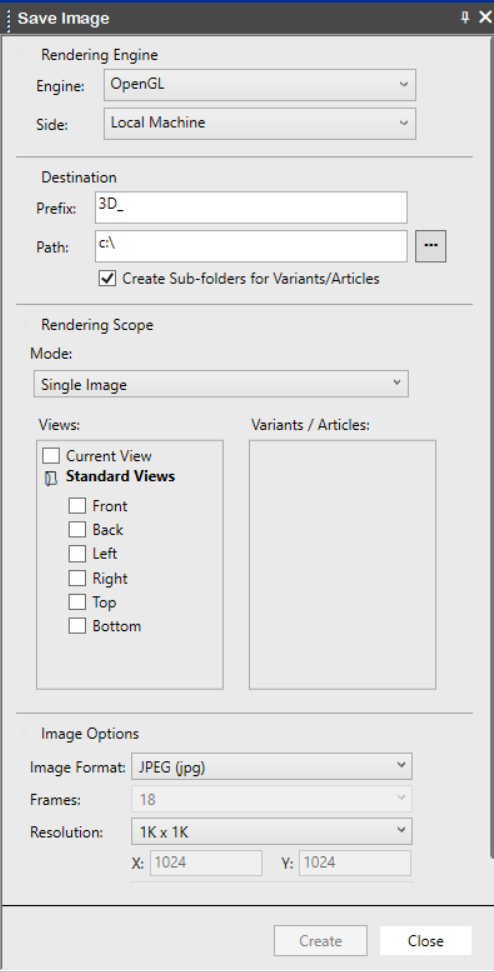
In the Rendering Engine area, define the type of rendering you require and how you want to perform the rendering - either via a local machine or a rendering server if available.
From
the Engine drop-down list, select
the type of rendering engine you require.Note:
The rendering engine that is currently being used in 3D is selected by
default. For example, if you opened the Save
Image dialog while in PR3D, Photorealistic
Rendering will be selected.
OpenGL: Renders the image/s using the open GL engine. This is the most basic rendering PDS offers.
High Quality Rendering: Renders the image/s using the HQR engine.
Note: High Quality rendering allows also Illustrative rendering.
Photorealistic Rendering: Renders the image/s using the PR3D engine.
If you selected Photorealistic Rendering, you can also define if you want to render via a local machine or via a remote rendering server. From the Side drop-down list, select where you want the rendering to be performed.
Local Machine: Renders the image/s on the local computer.
Remote Server: Renders the image/s
on a server. This is highly useful when rendering mass images and combinations
at once.
! Important
In order to use a remote server, you must first map the server in the
Windows Registry file in the following
location: \HKEY_CURRENT_USER\Software\Optitex\Optitex21\3D\3DView\Snapshot.
If no server is found you can only select the Local Machine option.
In the Destination area, define where you want to save the created images and the name of the images.
If you want to enter a prefix that appears before the file name of each rendered image, In the Prefix field, enter the prefix of the name which will appear in every created image.
In the Path field, browse to the destination folder where you want the images to be created.
Select the Create Sub-folders for Variants/Articles checkbox to enable or disable sub-folder creation during the image creation process. This option is selected by default, meaning the sub-folder structure is created by default. When this option is unselected, all images will be created in the selected folder.
In the Rendering Scope area, you can define the type of image, custom view and/or colorways.
From the Mode drop-down list, select the type of image you require:
Single Image: Creates one image of the 3D sample (according to the rendering results).
360 Degrees: Creates a series of images, taking a snapshot of each view of the 3D sample creating the look of 360 degrees. The images are taken according to the current zoom of the image.
4-Views Single Image: Creates one
image that is divided into four different views of the 3D sample.Note:This
option is not available if you selected Photorealistic Rendering.
If you selected either Single Image or 360 Degrees, you can select which views of the image you want to render.
In the Views area, select the checkboxes of the orientation and zoom you require.
Current View: Select this checkbox if you want to take images of the current orientation and zoom of the 3D model.
Standard Views: Select the checkboxes
of the specific views
you require; for example front, back, left, etc.Note:
If you selected 360 Degrees View,
you cannot choose the specific views, but rather select the Standard
View checkbox only. This provides snapshot images by rotating around
a virtual axis that passes through the 3D model. These type of images
will automatically include: front, back, left and right views.
Custom Views: If you created custom views using the Custom View tool, all custom views appear in this area. Select the checkboxes of the custom views you require.
In the Variants/Articles area, select the colorways you require. By default, all variants and articles that are currently available in the PDS file appear in this area. The currently active variant/article is selected by default. If you want to select a different variant/article, select the checkbox next to each variant/article you require.
In the Image Options area, define the format of the images and their quality.
From
the Image Format drop-down list,
select either JPEG or PNG. By default JPEG is selected automatically.Note:
The size of the image in pixels is adjusted according to the image type.
For example, if you selected JPEG, the image will be 96 dpi and 24 bit
depth.
If you selected 360 Degrees View, you can define the amount of frames you require. From the Frames drop-down list, select the number of frames: 18 or 36.
From the Resolution drop-down list, select the resolution you require. Once you select a resolution, the pixel size appears in the X and Y values so you can see the image size; you cannot edit these values. You can only edit the X and Y values by selecting the Custom option.
1Kx1K: Generates the image with a size of 1024x1024 pixels. This is the default resolution.
2Kx2K: Generates the image with a size of 2048x2048 pixels.
4Kx4K: Generates the image with a size of 4096x4096 pixels.
Custom: Allows you to define your own X and Y values. The minimum and maximum values are according to the image mode you selected above (Single Image/ 360 Degrees/4 Single Views), and will be adjusted accordingly.
If you selected Photorealistic Rendering, you can select which quality you require from the Quality drop-down list:
Standard: What you see is what you get.
Enhanced: Produces a more detailed image.
If you selected a remote server for mass rendering and want to receive notification once the rendering is completed, in the Use Email area, enter an email address. By default, the email address that was specified during PDS installation appears. Note that this is available for server-based rendering only.
Once
you are done defining all the properties of the rendered images, click
Create to start the image creation
process.
The image creation process begins and different images are created based
on the rendering engine you selected (OpenGL, HQR, PR3D), local machine
or remote server, rendering scope (view, variant/article) and image options
(format and resolution).
While the images are being created, a progress bar appears informing you
of the overall progress, as well as the current image that is being created.
Once the process is complete, a dialog appears informing you the images
have been created.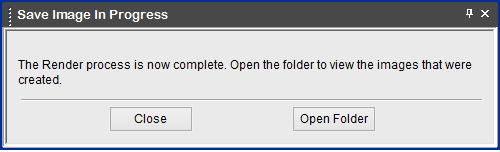
Click
Open Folder.
Here is an example of images that were created with the Current View and
three different articles: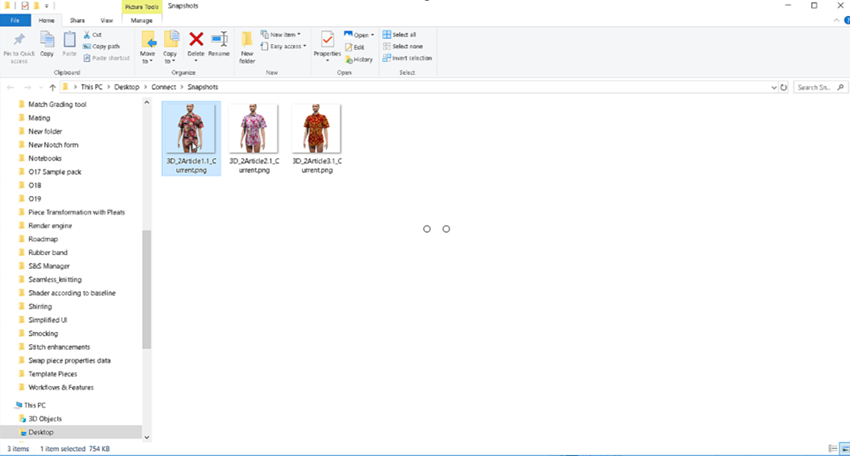 Note:
If a remote server was used and an email was defined, an email is sent
once the progress is complete.
Note:
If a remote server was used and an email was defined, an email is sent
once the progress is complete.
 See also: Saving Images and animations