Daz Texture fixes
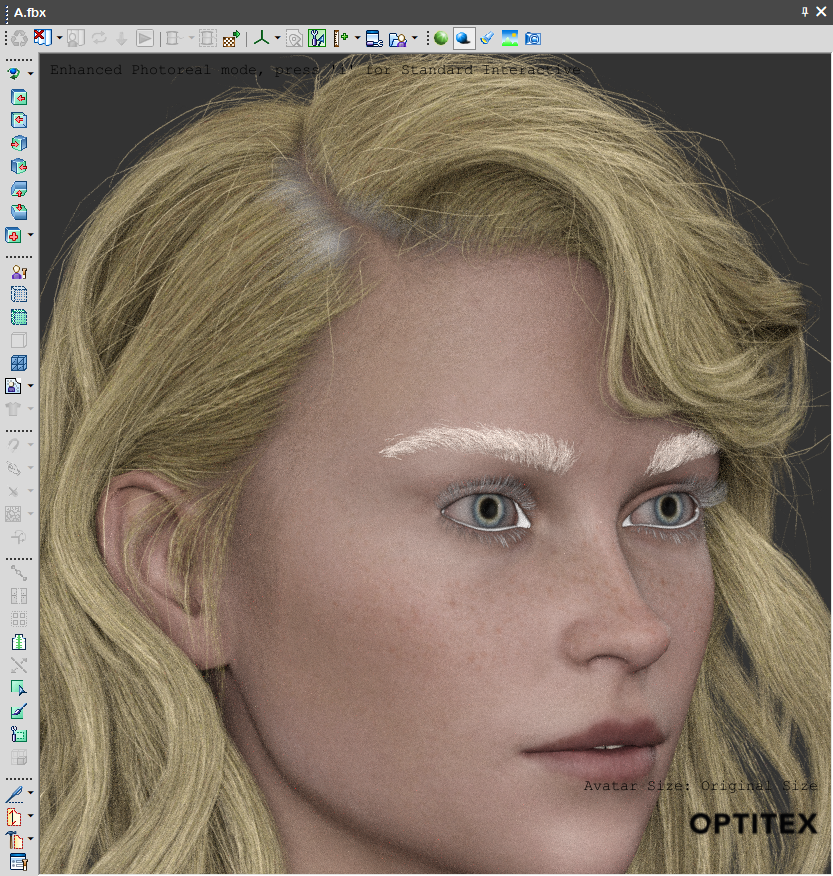
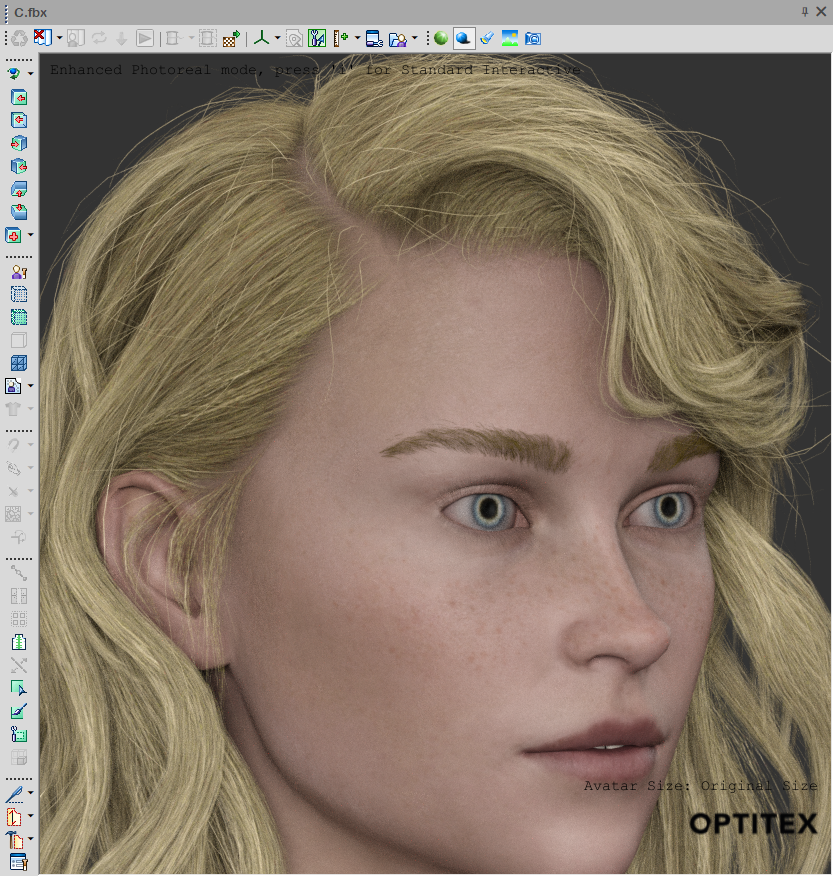
When exporting a Daz model as FBX, some texture colors may be lost, resulting in white textures
when importing into Avatar
Editor or PDS.
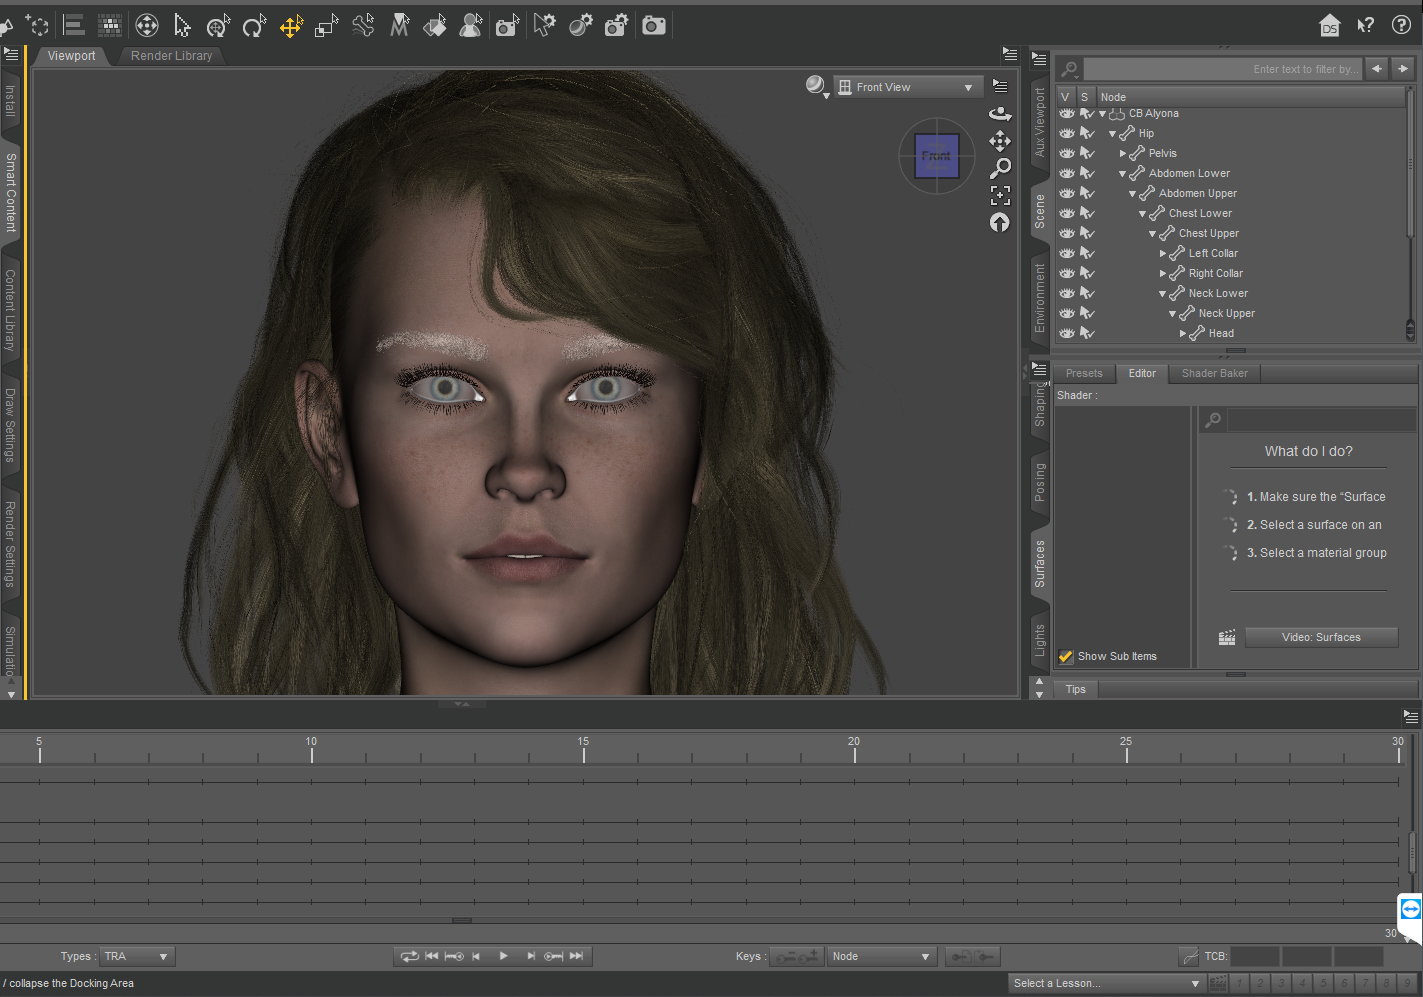
Daz
Viweport
Here
is how to fix them:
 Brows Fix
Brows
fix
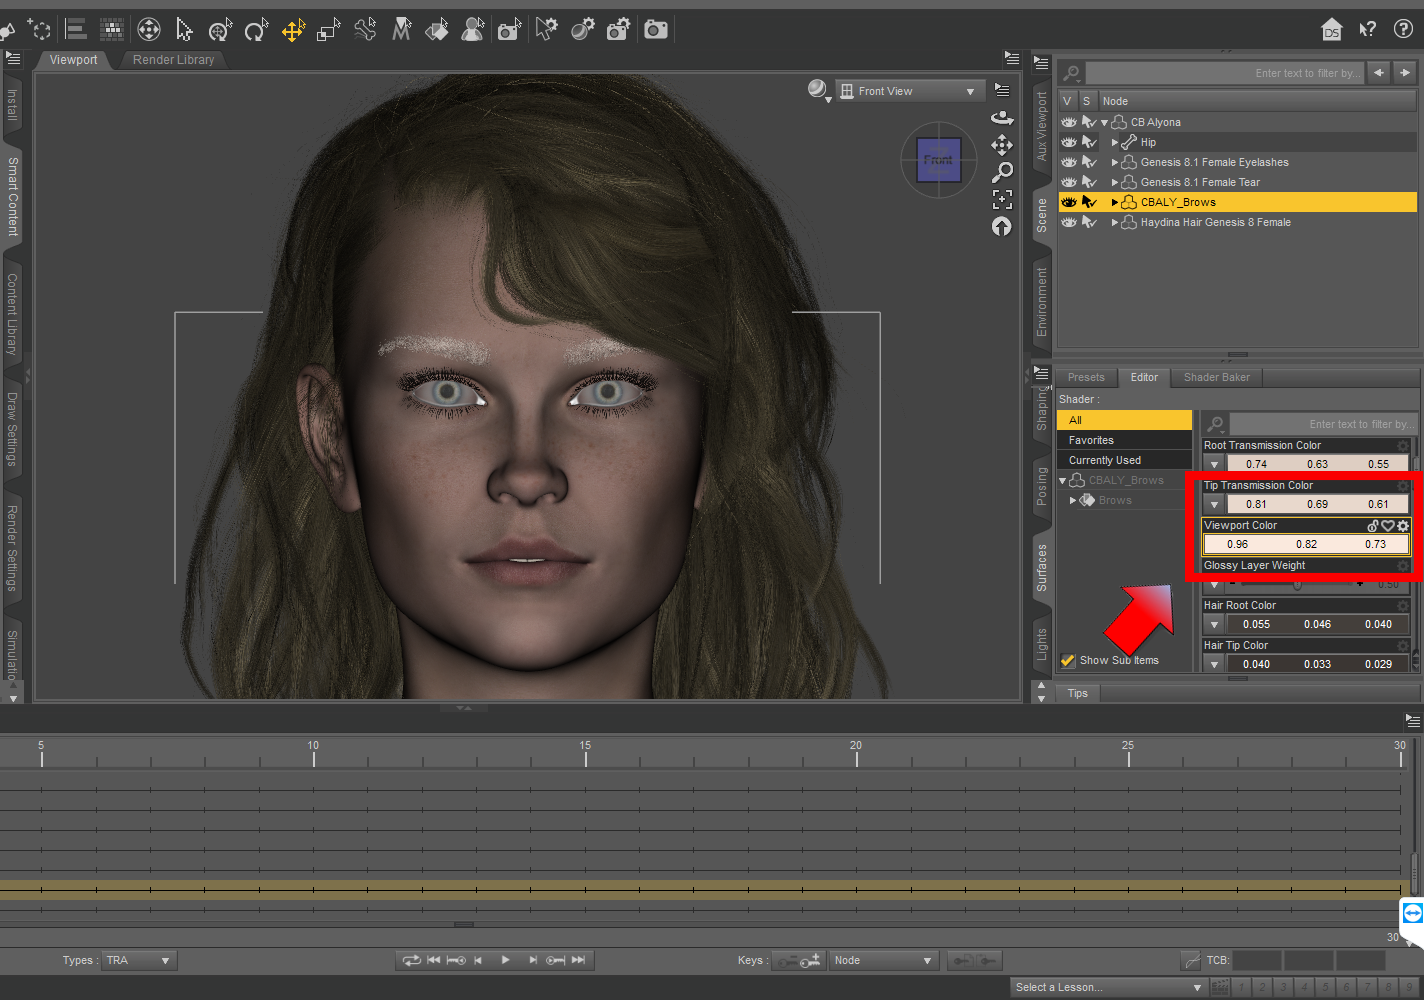
Select Brows in the Scene
tab, then select Surfaces tab and Viewport Color setting. And Change
the color as you wish:
 See also: Video
 Tears
Fix
Tears fix
-
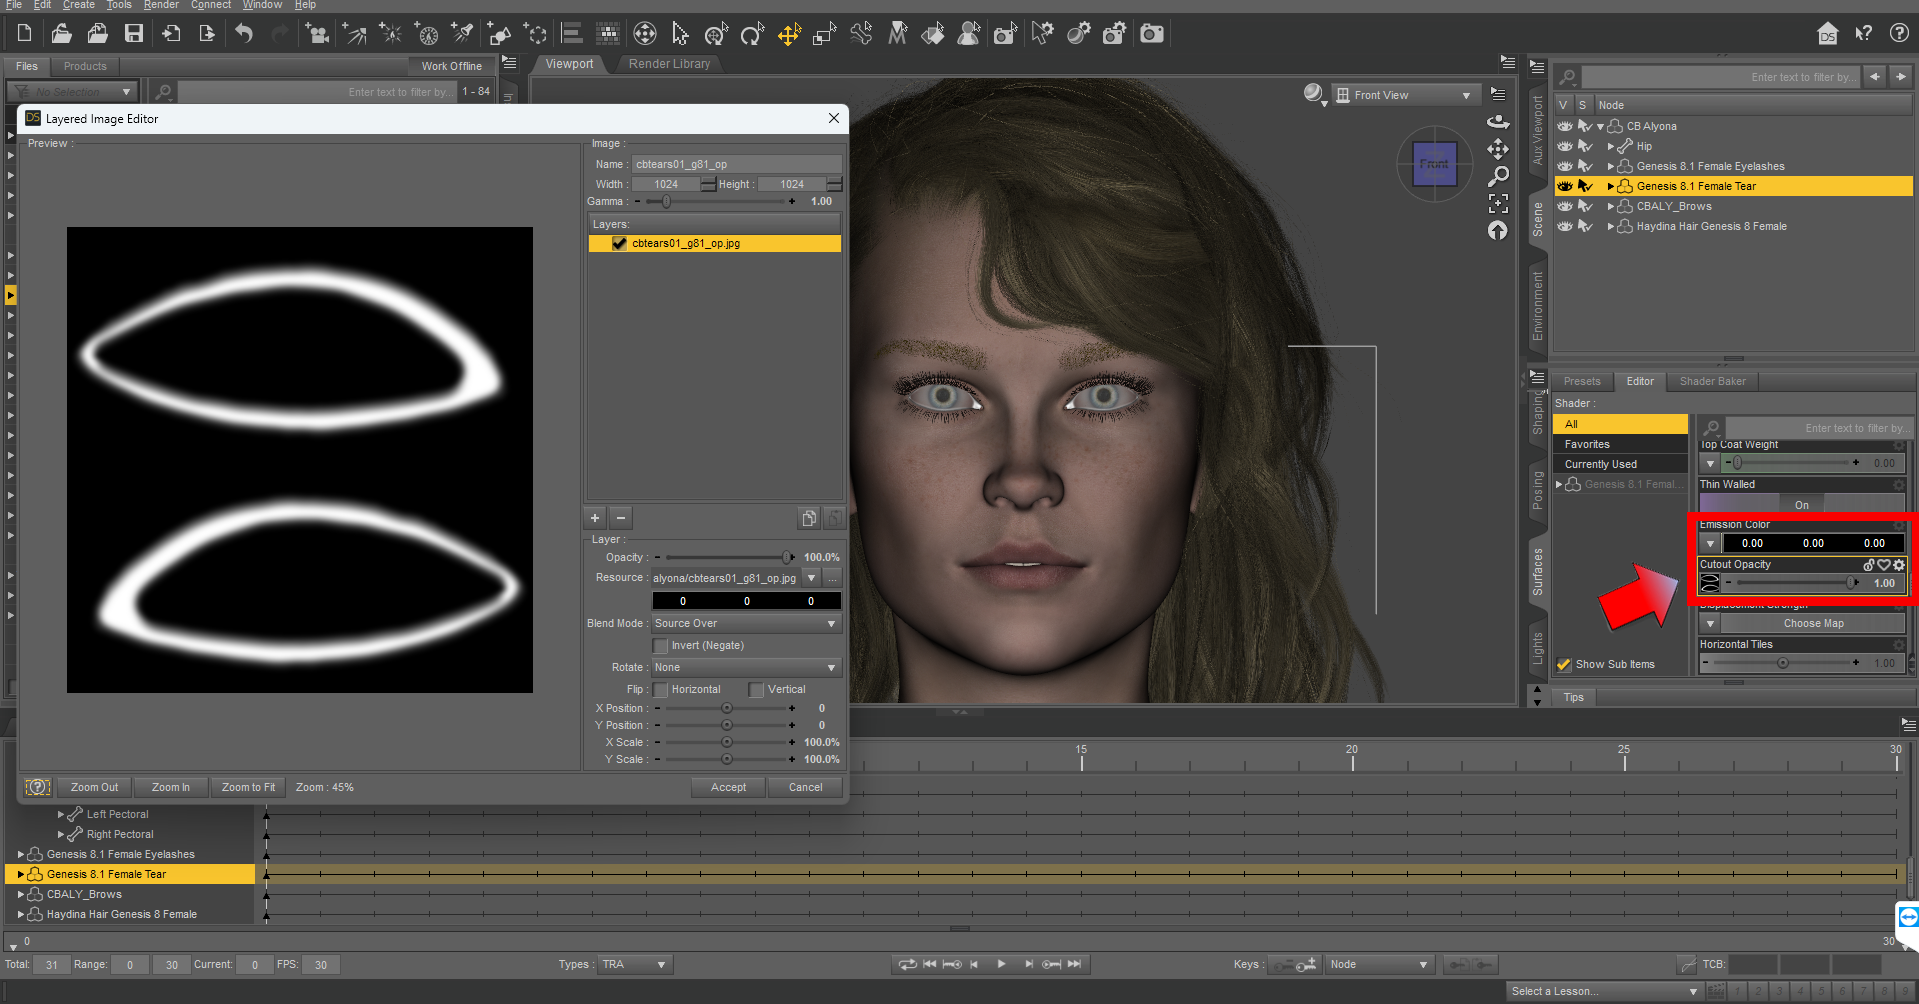
Select
Tears in the Scene tab, then select Surfaces tab and Cutout Opacity
setting.
-
Open Layered Image
Editor by clicking the Tears image icon.
-
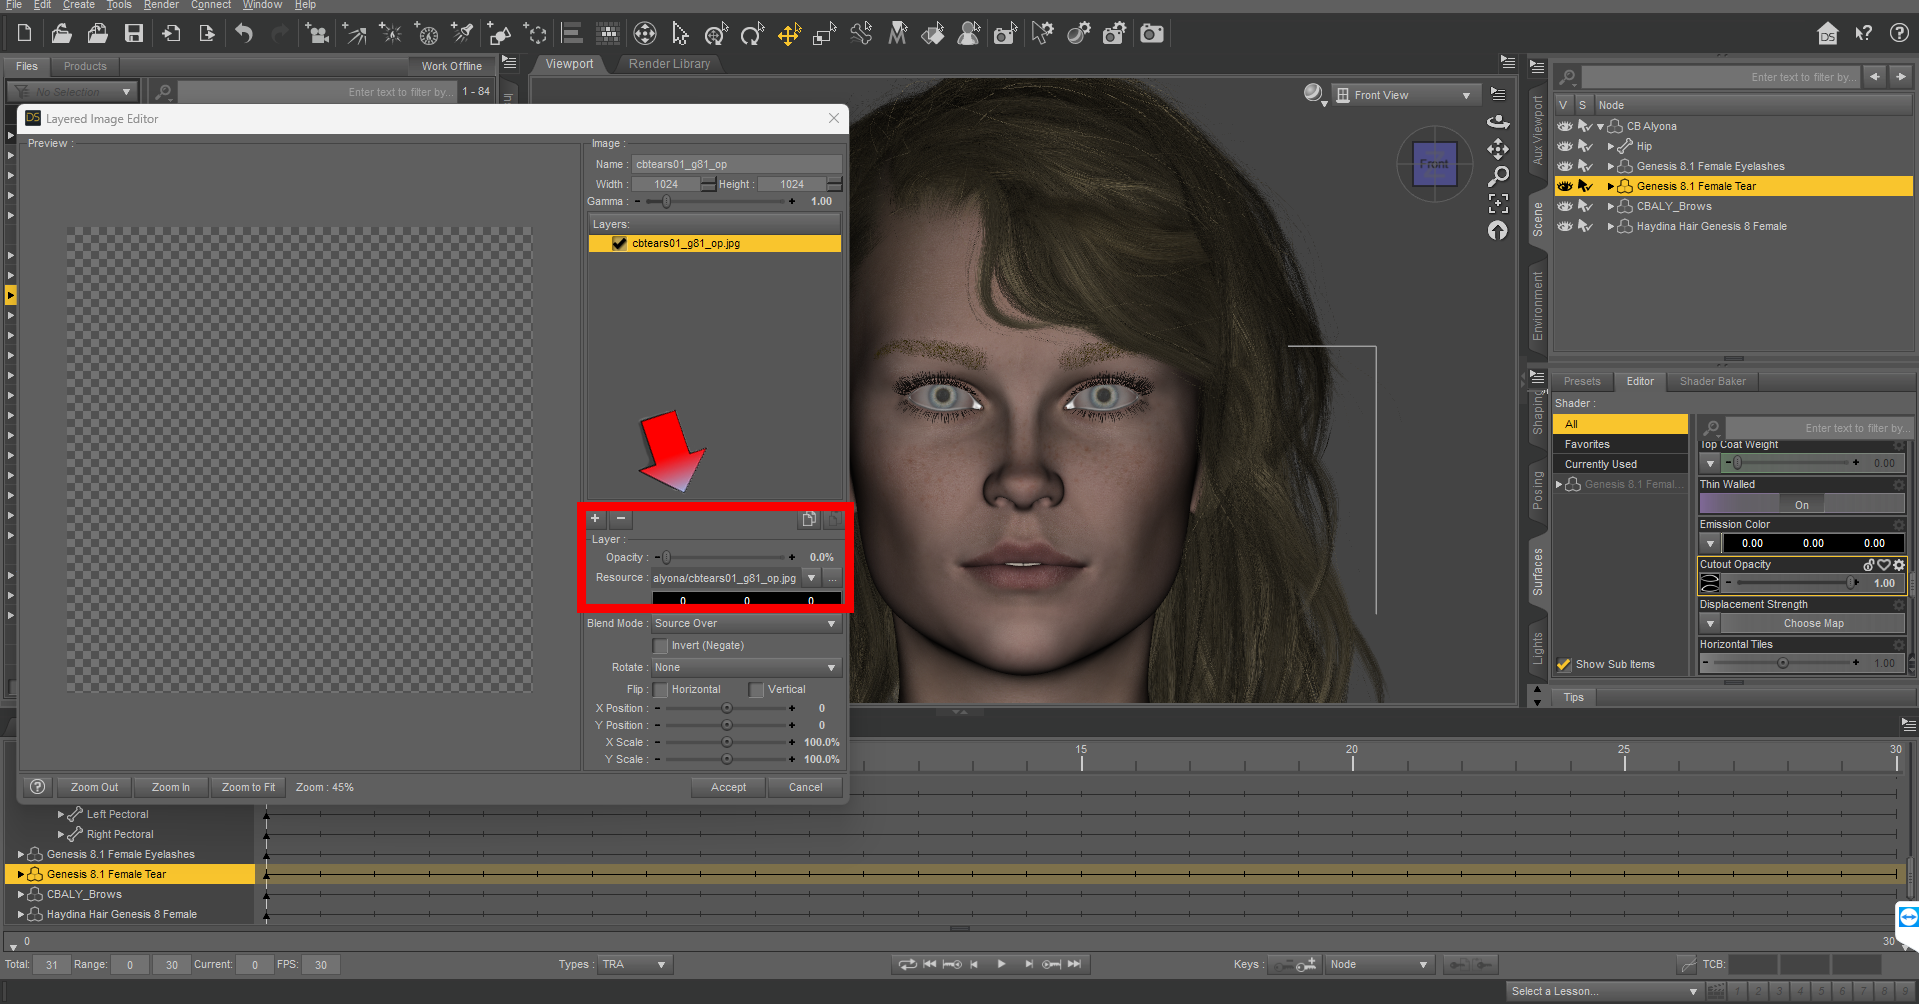
Reduce
the layer opacity to 0%. Then click Accept.
 Eyelashes
fix
Eyelashes fix
-
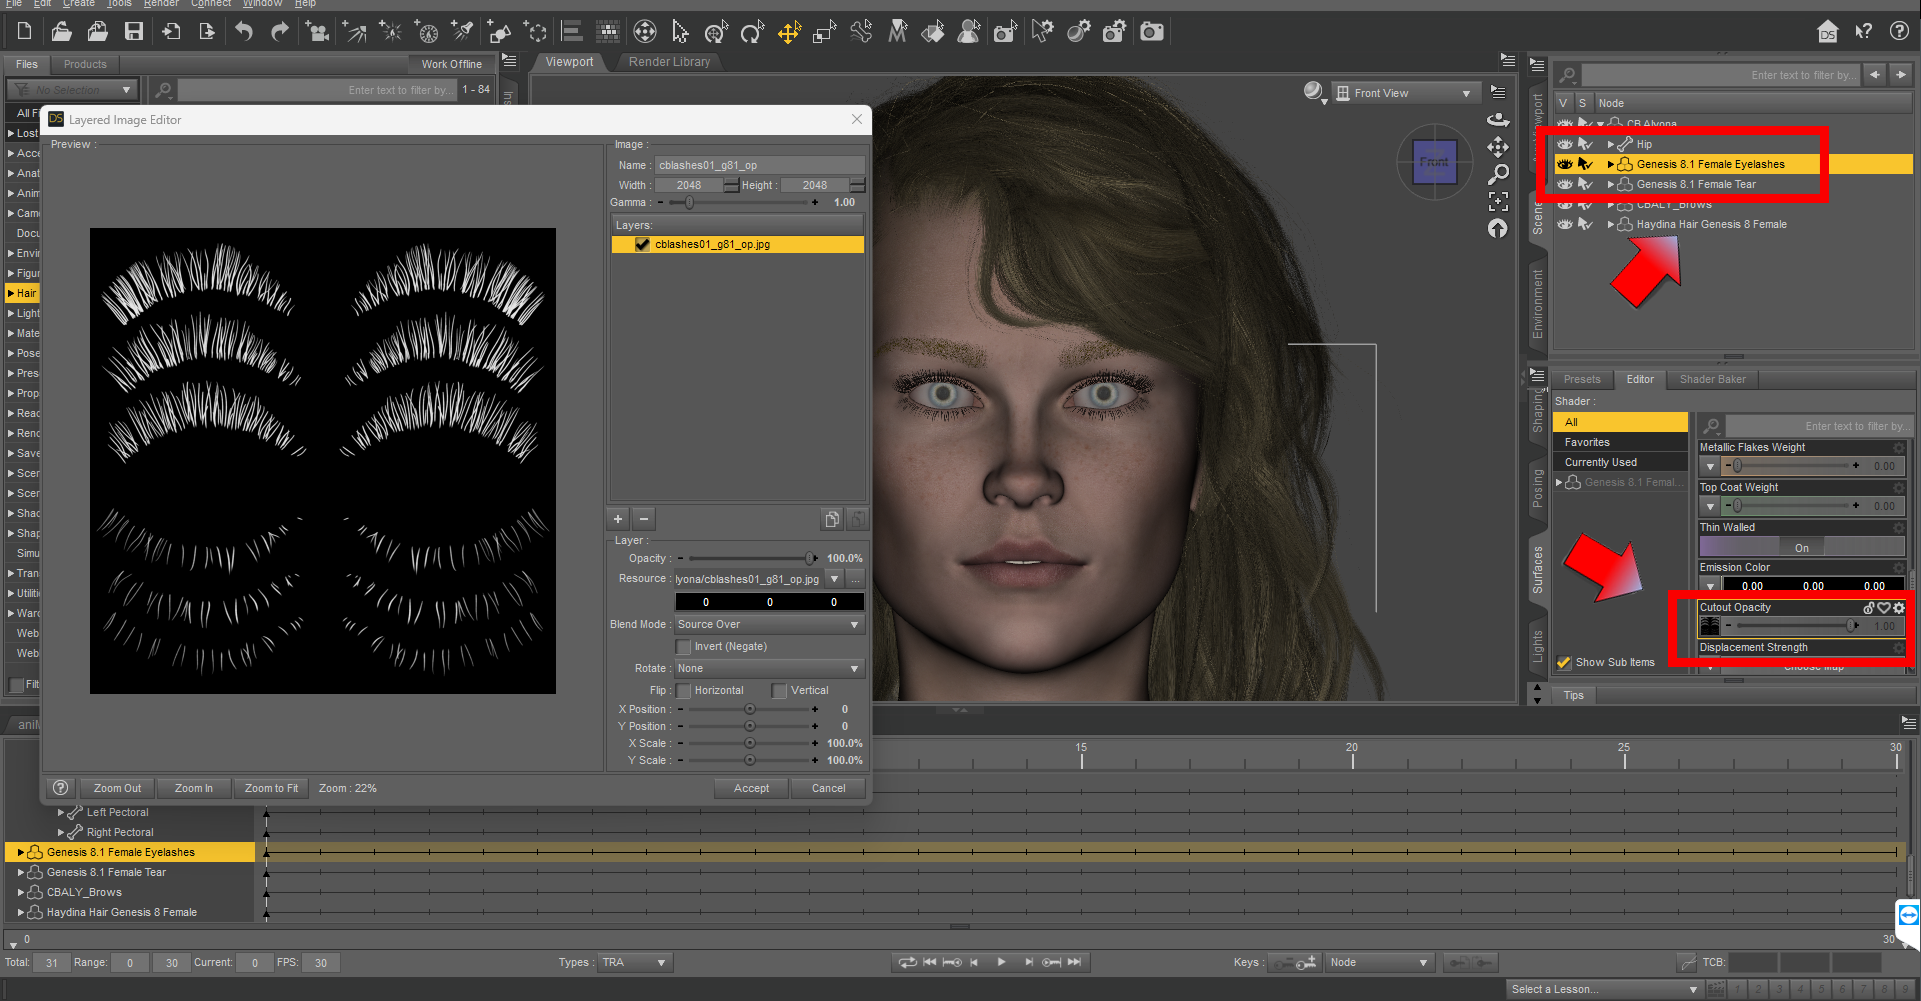
Select
Eyelashes in the Scene tab, then select Surfaces tab and Cutout
Opacity setting.
-
Open
Layered Image Editor by clicking on the Eyelashes image icon.
-
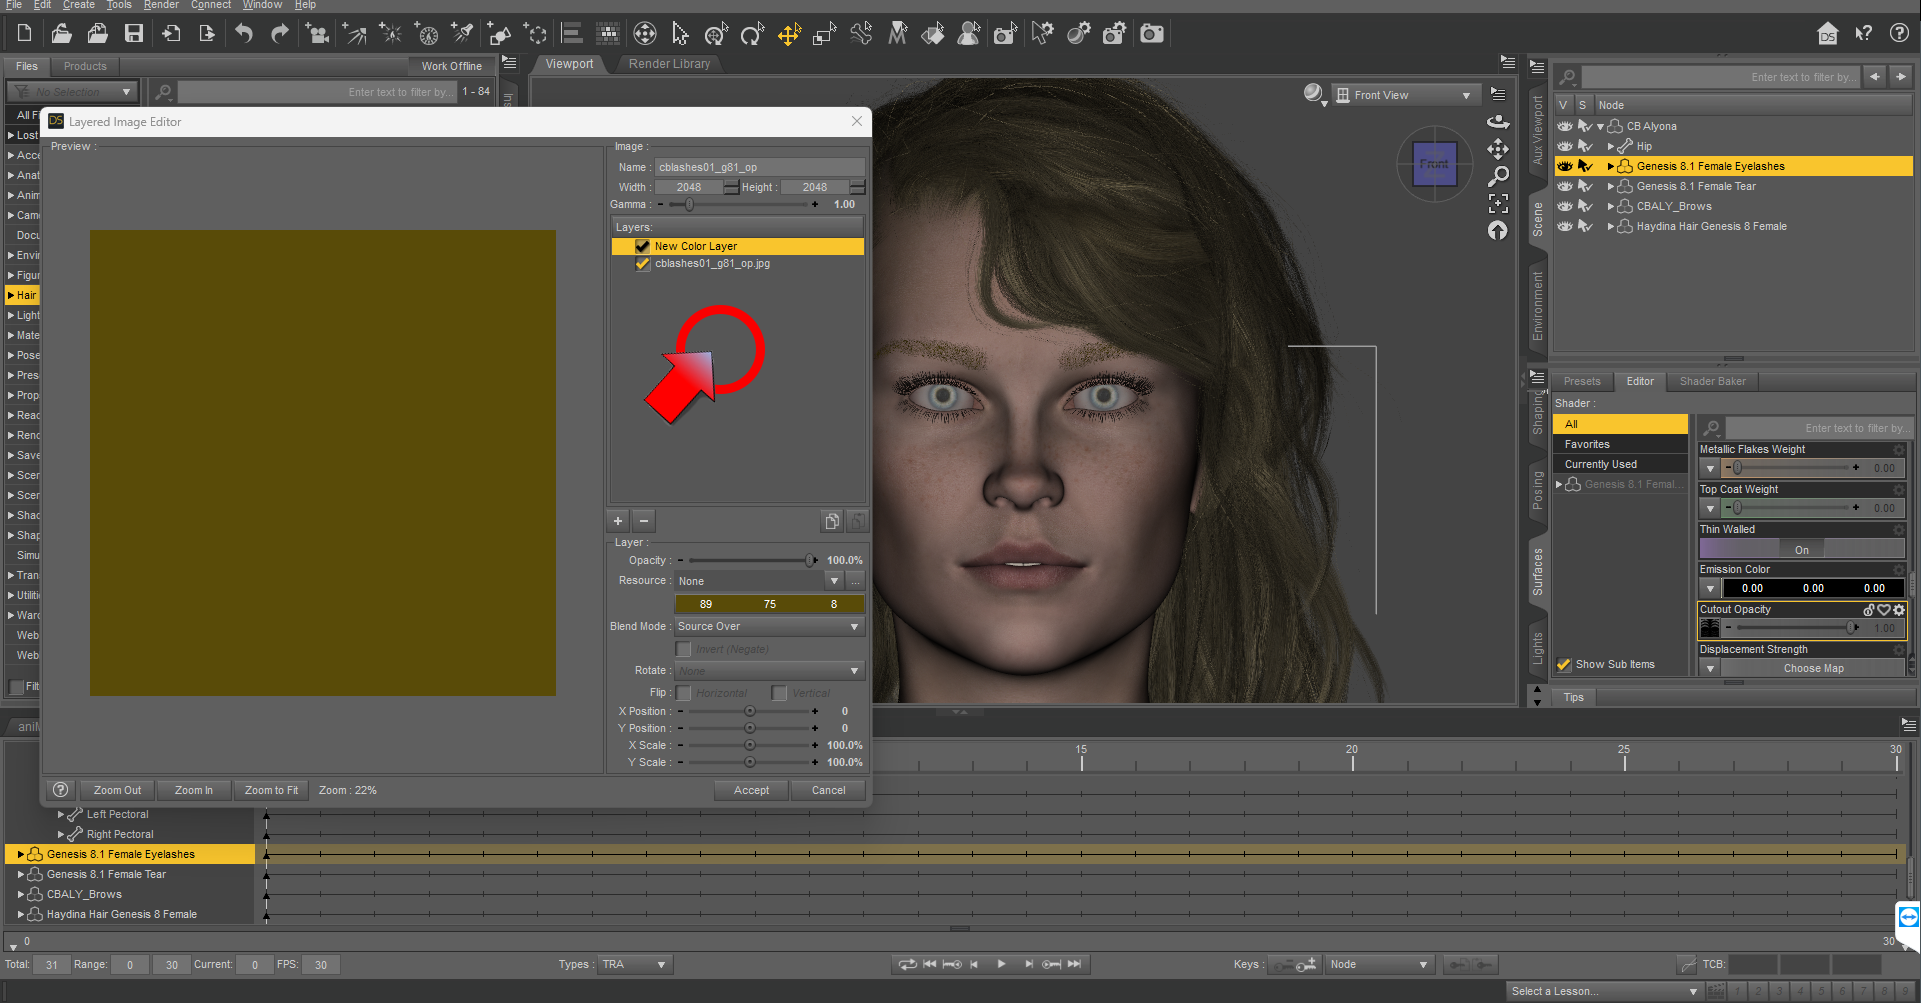
Right-click
an empty space in the layer tab and select New Color Layer, then
change the color as desired.
-
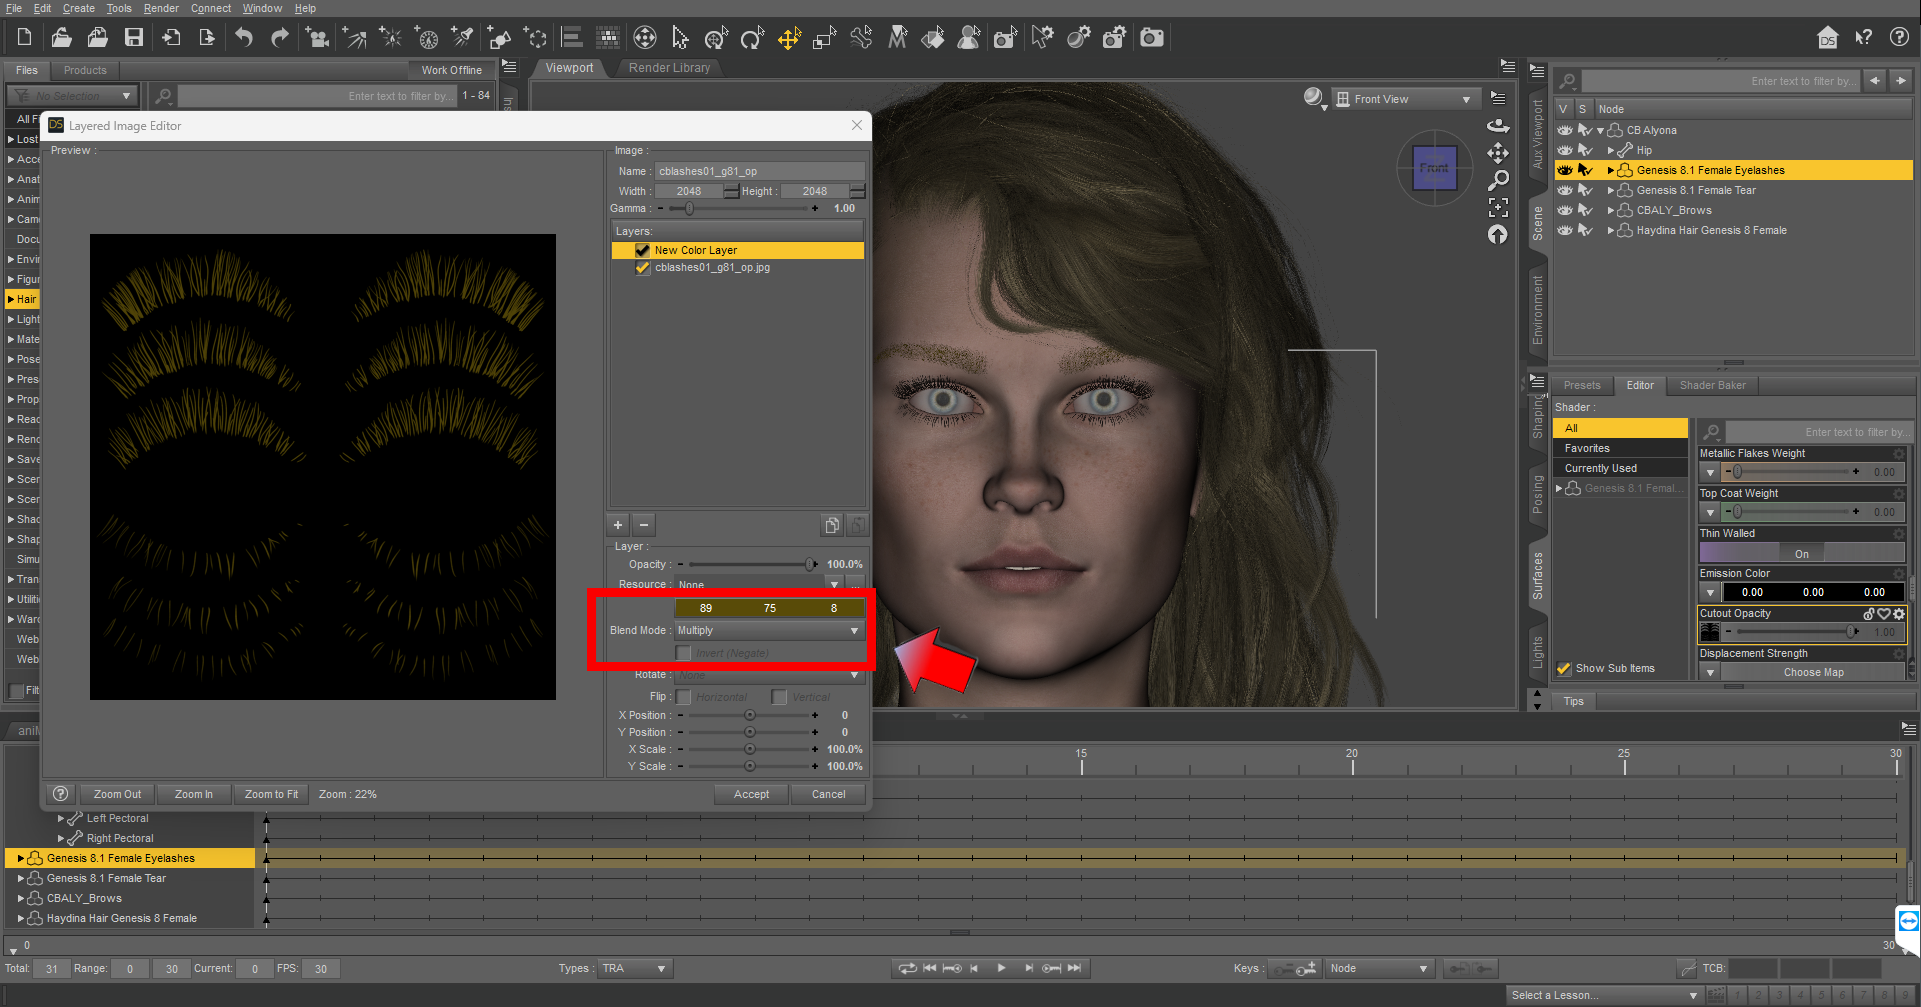
Change the setting
for Blend Node to Multiply.
 See also: Video
 Cap
Fix
Cap Fix
-
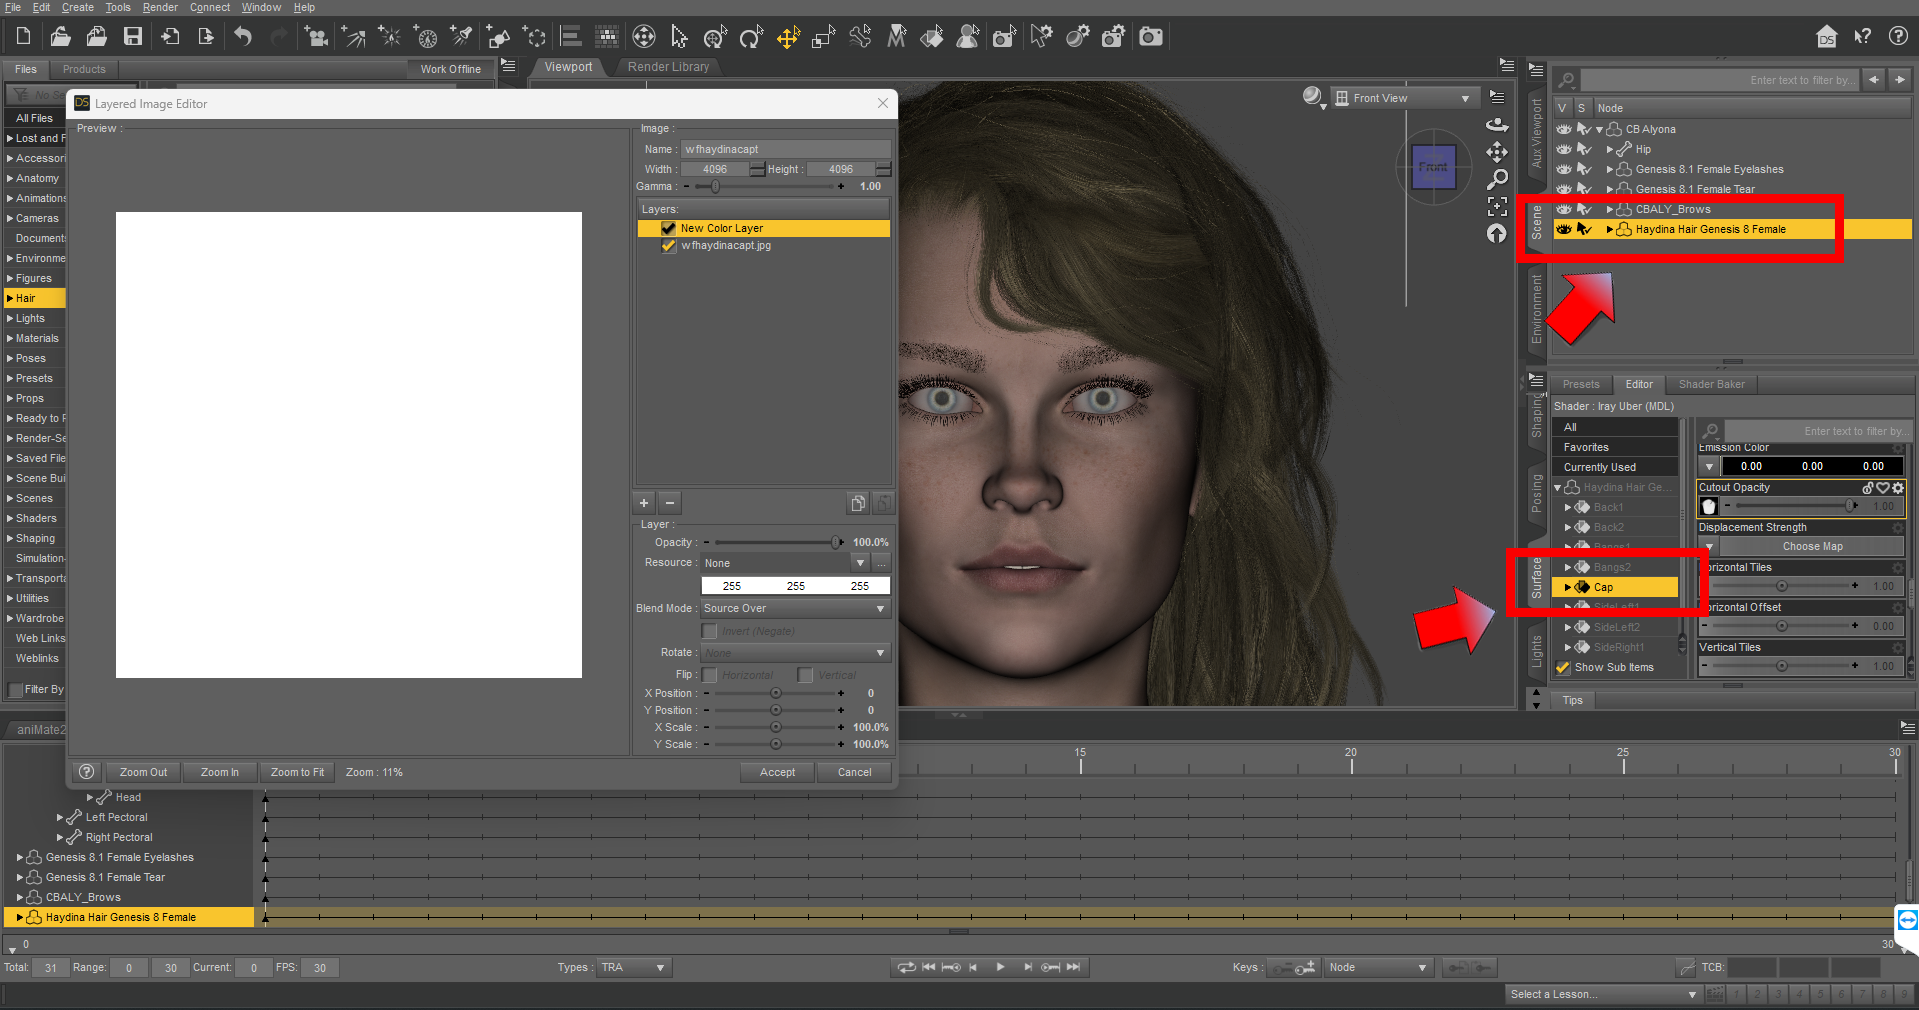
Select Hair in the Scene tab, then
select Cap in Surfaces tab and Cutout Opacity setting.
-
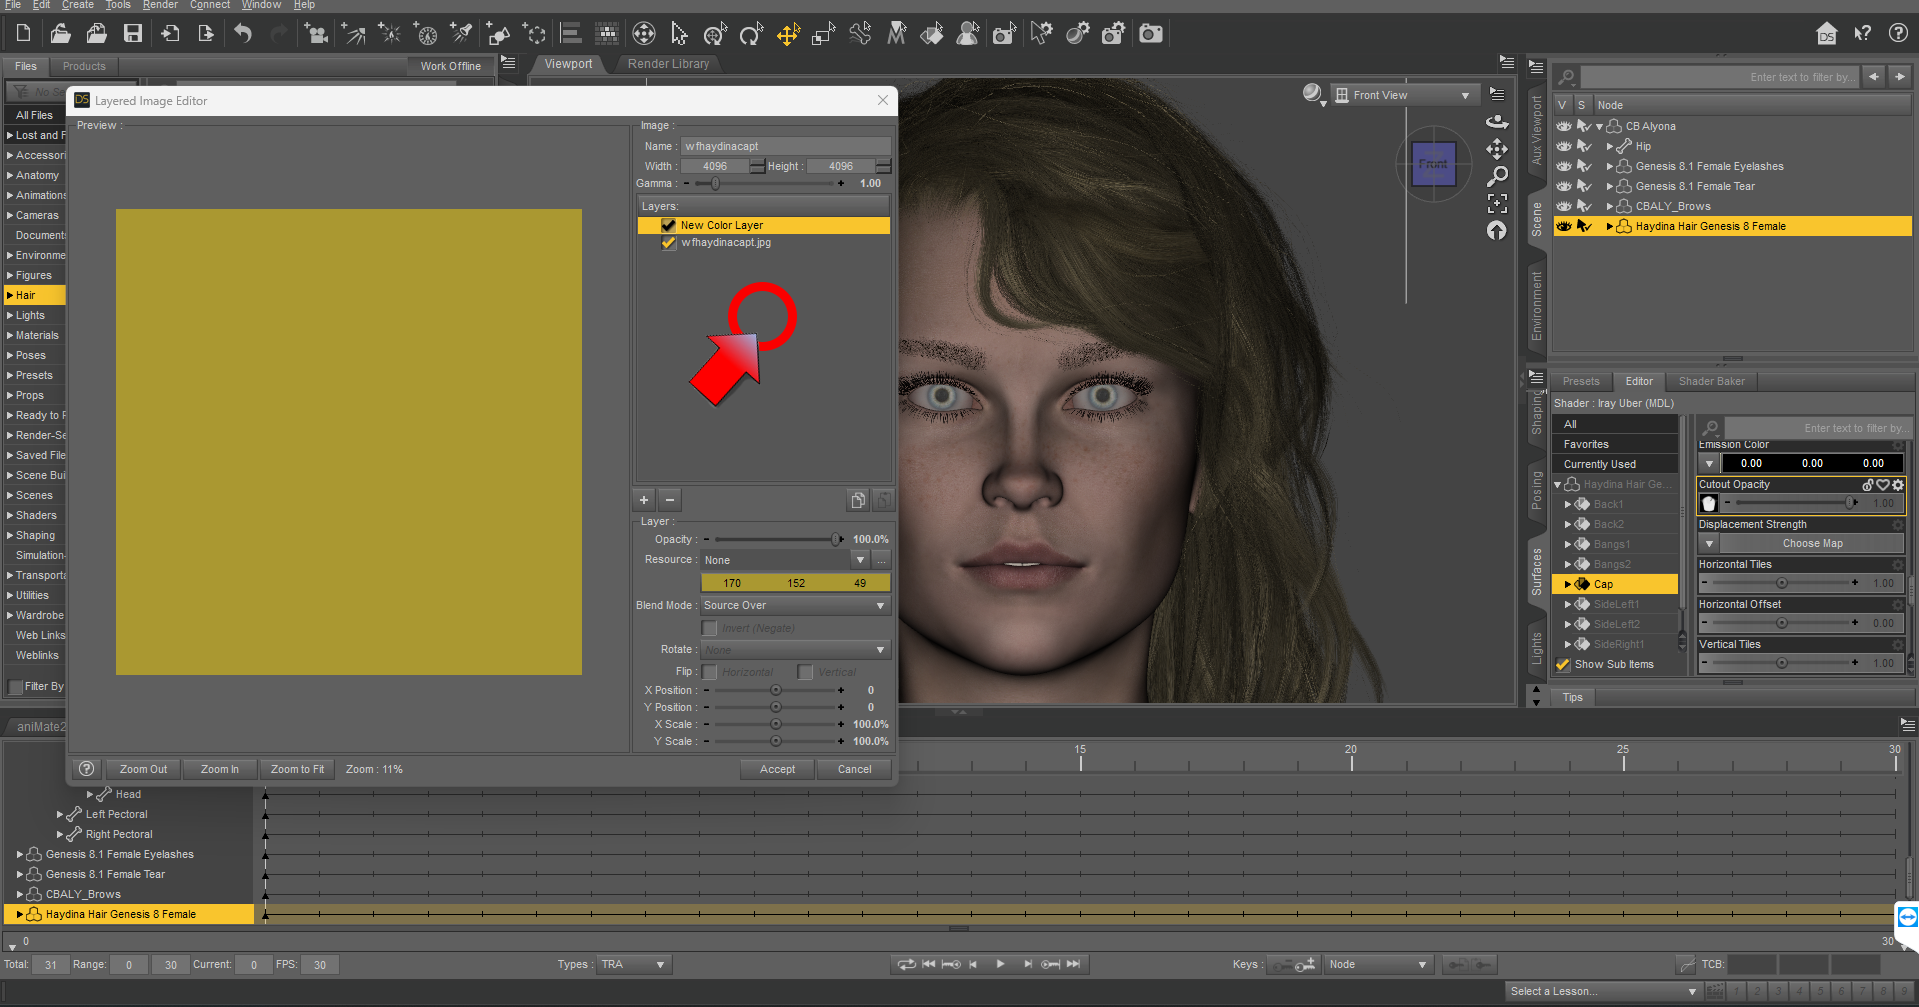
Open Layered Image Editor
by clicking the cap image icon.
-
Right-click
an empty space in the layer tab and select New Color Layer, then
change the color as desired.
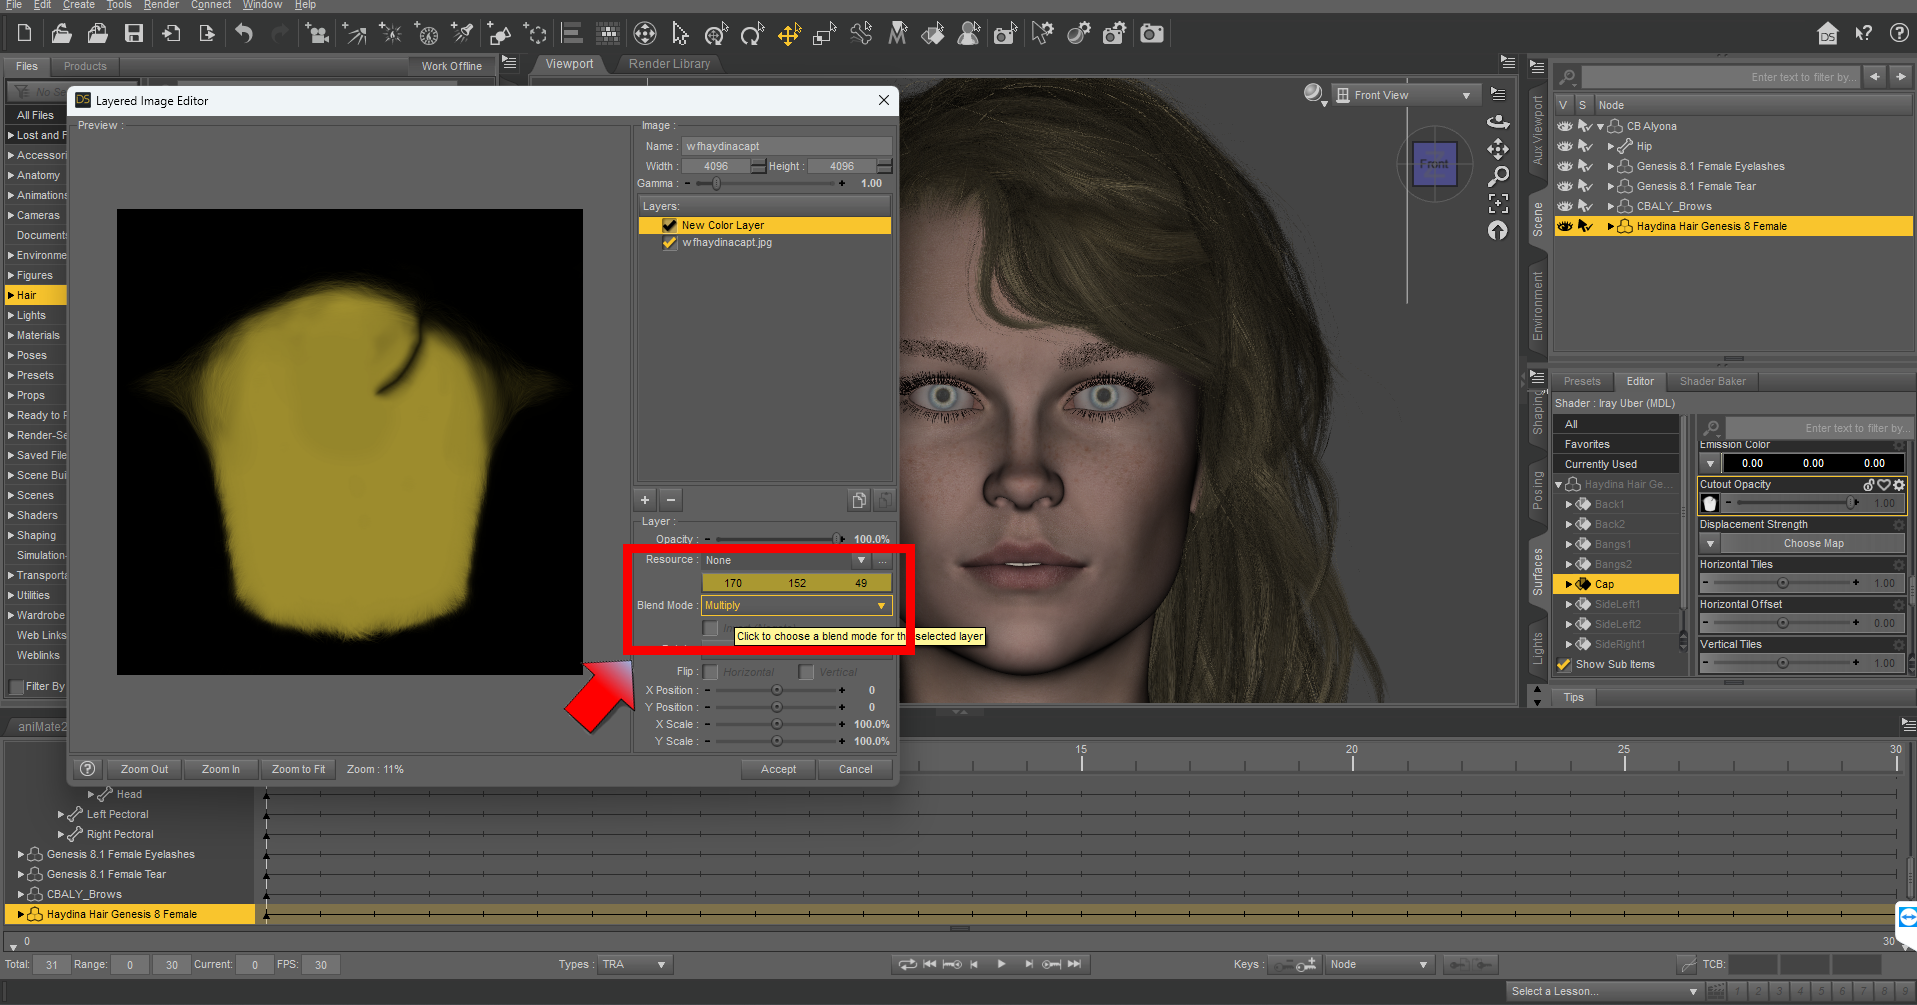
- Change the setting for Blend Node to Multiply.
 Daz
Avatr hair mode
Daz Avatar hair mode:
DAZ avatars have intricate hair
objects that must be tagged as “hair” in the Avatar
Editor.
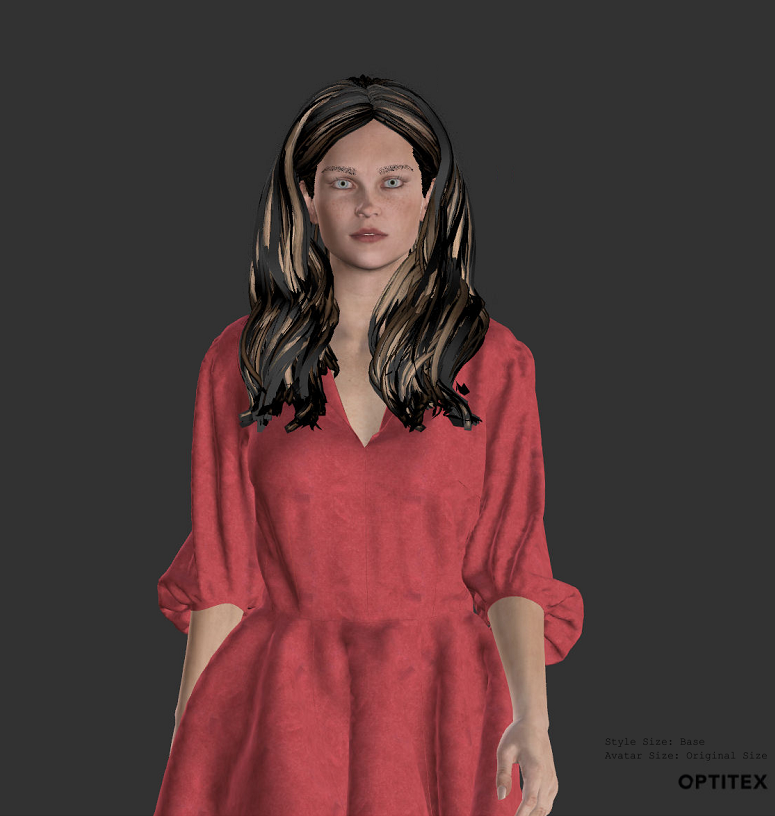
This tag will allow PDS to render these objects with specially designed
realistic hair materials (shaders) in Photorealistic mode.
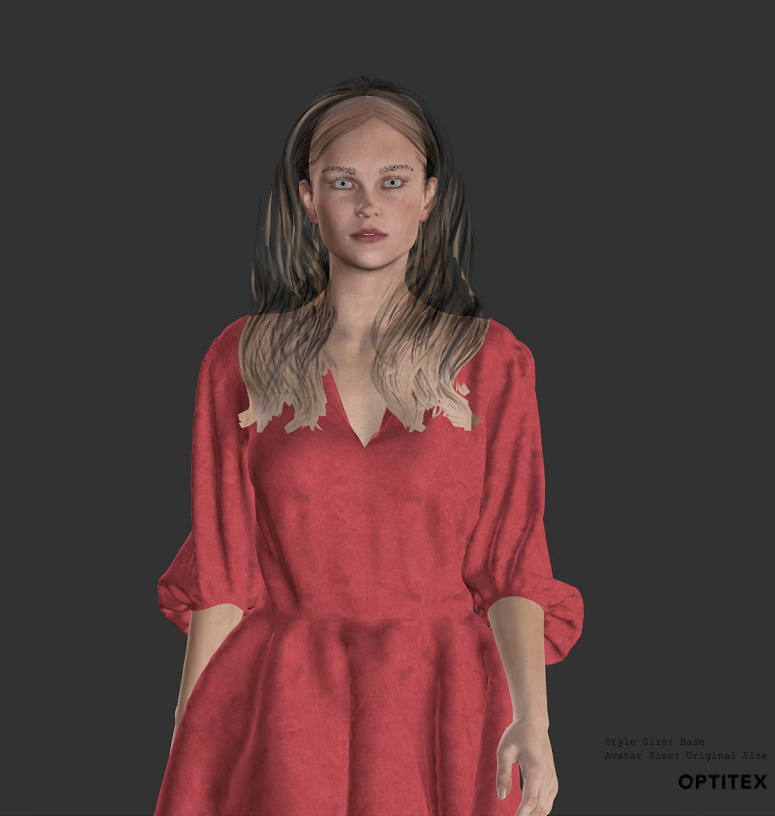
In the default OpenGL mode, DAZ hair will not have true transparency.
You can select between two hair transparency modes by adjusting the
following registry parameter:
OpaqueHairOpenGL under Computer\HKEY_CURRENT_USER\Software\Optitex\Optitex
22\3D\Settings
Hair mode = 1:

Hair mode = 0:

See the result before and after the fixes:
PDS PR3D
Before:
After:
 See also: Importing DAZ
Avatars


 See also: Importing DAZ
Avatars


