Creating a Dart Pleat
You can create a dart pleat when you want to create a dart for example in a skirt that behaves like a pleat and is closed in the middle.
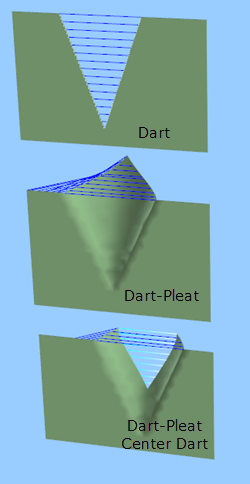
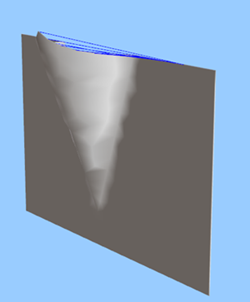
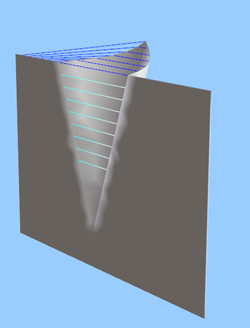
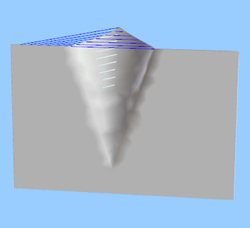
To help you understand the difference between darts and dart pleats we are going to show you what happens when you take a dart and turn it into a dart pleat.
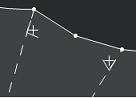
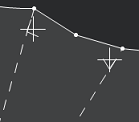
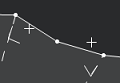
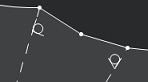
The following demonstrates the difference between a dart, dart-pleat and dart-pleat with center dart:
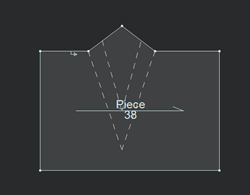
The dart-pleat has a marking to show where to close the dart-pleat. This is for production purposes. All of the closing marks can be defined so you can control the defaults, whether or not to display them, etc. See the following sections for more information on how to control the marks:
![]() To
control the defaults of these fields via Preferences, click here.
To
control the defaults of these fields via Preferences, click here.

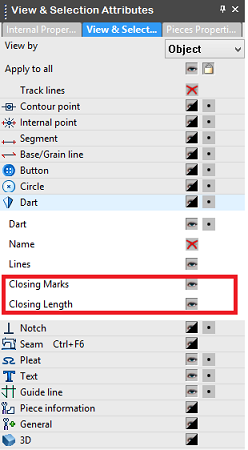
![]() To define the
appearance of the markings via View & Selection, click here.
To define the
appearance of the markings via View & Selection, click here.
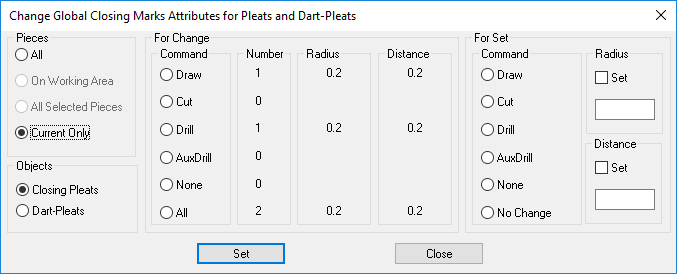
![]() To control the
global behavior of the pleat closings, click here.
To control the
global behavior of the pleat closings, click here.
To create a dart pleat:
-
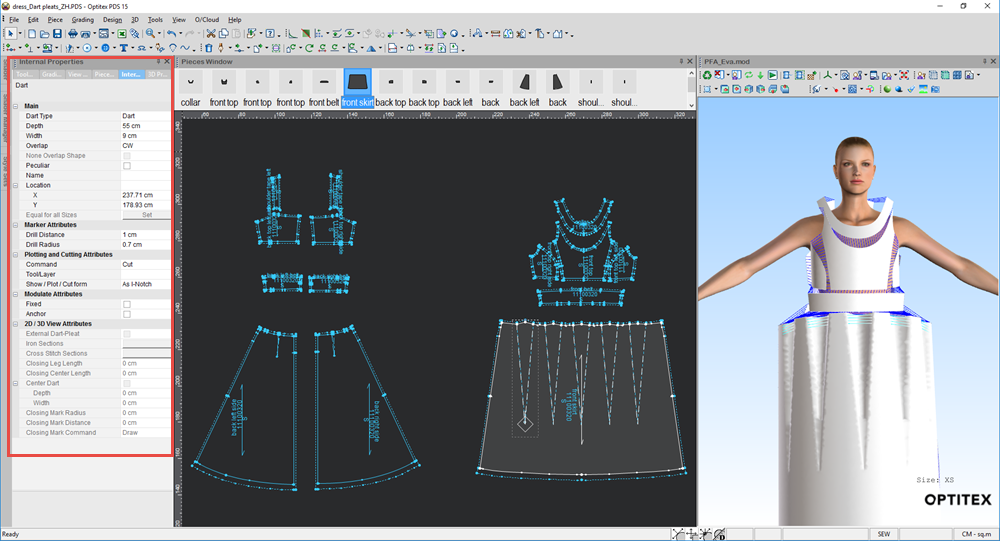
Open up the PDS file:
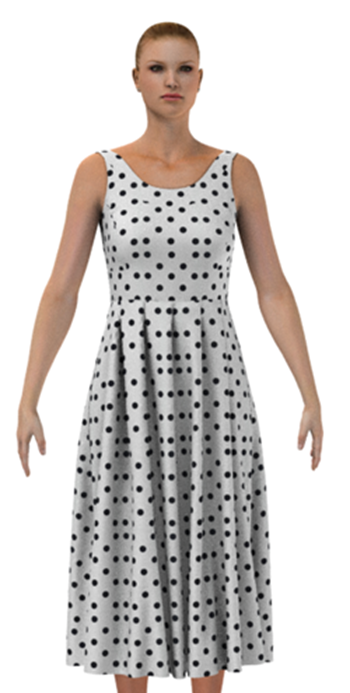
In this example we previously created a dress with dart-pleats:

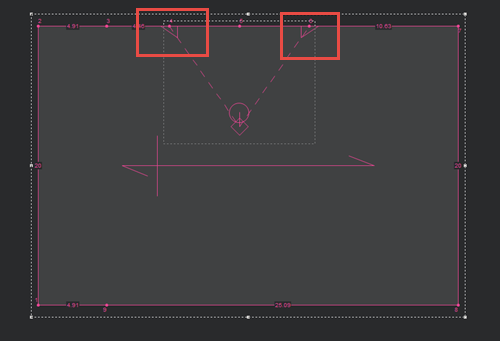
- Select a dart and double click to see the properties: (notice this is currently a dart)
-
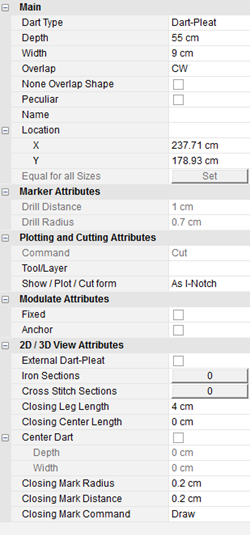
To change it to a dart pleat, from the Dart Type drop-down, select Dart-Pleat.
-
Enter the main details of the dart-pleat as follows:
|
Field |
Description |
|
Main |
|
|
Dart Type |
From the drop-down list, select the dart type: Dart Dart-Pleat |
|
Depth |
Defines the distance between the dart tip and the point between the dart-pleat's legs. |
|
Width |
Defines the distance between the first and second dart legs. If set to 0, the dart will be closed. |
|
Overlap |
Allows you to define the dart-pleat's cap.
|
|
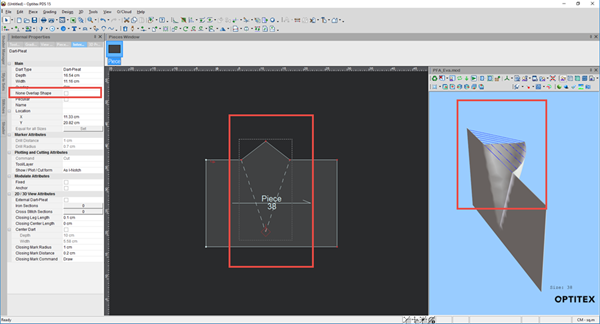
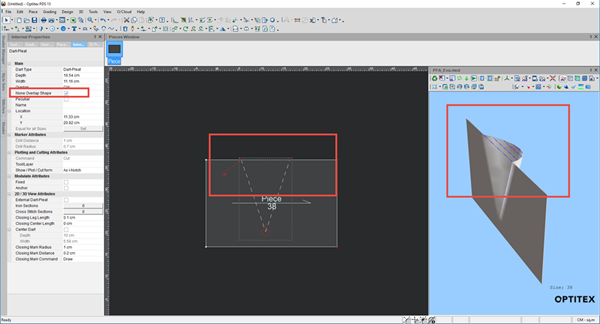
None Overlap Shape |
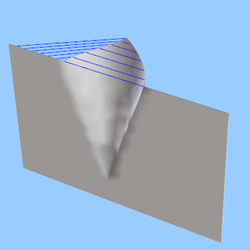
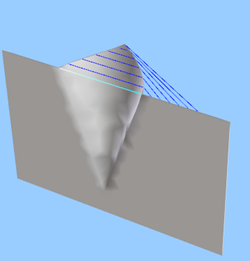
Select this checkbox, if you want the cap of the dart-pleat to fold under itself. If you turn this option on and you want to see the change in 3D, you first must click the Update Shape button in the dart-pleat properties and then click Update Now in the 3D window. None Overlap Shape Not Selected
Click Update Shape, Update Now
None Overlap Shape Reflected in 2D and in 3D
|
|
Peculiar |
Select this checkbox, if you want to set the overlapping cap of the dart. |
|
Name |
Displays the name of the dart. You can show/hide the name in the View and Selection window. |
|
Location |
Sets the location of the dart tip. |
|
Equal for all Sizes |
Select this checkbox, if you want to set the width and depth to be equal for all sizes according the base size. |

-
If you are defining Marker attributes, define them in the Marker Attributes section.
|
Field |
Description |
|
Drill Distance |
Sets the distance of the dart's drill from the dart tip. |
|
Drill Radius |
Sets the radius of the dart's drill. |
-
If you are defining Plot/Cut attributes, define them in the Plotting/Cutting Attributes section.
|
Field |
Description |
|
Command |
Enter the command of the dart's drill. This defines the tool that will be used on the object when the file is sent to a cutter or plotter machine, like Draw for a pen, Cut for a knife, etc. |
|
Tool/Layer |
Set the tool/layer name. This is mainly used for plotting, cutting, and exporting pieces. |
|
Show/Plot/Cut form |
From the drop-down list, select the type of notch form you want to use when sending to the plotter/cutter. The following options are available: I Notch
T Notch
V Notch
|
|
Notch Direction |
From the drop-down list, select the direction in which you want the form to appear: Inside: Select if you want the notch to appear inside the cloth.
Outside: Select if you want the notch to appear outside the cloth.
|
-
If you are defining Modulate attributes, define them in the Modulate Attributes section.
|
Field |
Description |
|
Fixed |
Select this checkbox, if you want to set the point as fixed in the Optitex Modulate. |
|
Anchor |
Select this checkbox, if you want to set the point as fixed. |
-
To make sure the dart-pleat simulates correctly in 3D, expand the 2D/ 3D View Attributes section and define as follows:
Note: This section in the Dart-Pleat is only available in version 15.6SP3 and later.
|
Field |
Description |
|
If you have extra fabric with the dart-pleat and you want it to appear in the front (not in the back), then select this checkbox. Internal Dart-Pleat
External Dart-Pleat
|
|
|
Iron Sections |
If you need to add an iron section, click the button to define the length of the ironing (sharp fold) that starts from the end of the closure length (can be 0 closure length) and continues along the matched neighbor lines. For more information, see Defining Iron Sections (Dart-Pleat). |
|
Cross Stitch Sections |
If you want to define a cross stitch, click the button to define the location of the cross stitch. For more information, see Defining Cross-Stitch Sections (Dart-Pleat). |
|
Closing Leg Length |
Enter the length of the closing mark of the dart-pleat. The length is measured from the closing mark to the internal line of the dart-pleat. Closing Leg Length default (0.1CM)
Closing Leg Length 10 CM
|
|
Enter the length of the center stitch of the dart-pleat. It will be stitched to the piece itself either partly or fully depending on the length. The direction and location of the stitch on the piece is dependant on the clockwise or counter-clockwise direction. Closing Center Length 10 CM
|
|
|
Center Dart |
Select this checkbox, if you want to add a center dart inside the dart-pleat. This can be used in cases where you have extra cloth that you want to remove. You can modify the depth and width if needed. Center Dart in 2D
Center Dart in 3D
|
|
Depth |
The depth of the center dart. |
|
Width |
The width of the center dart. |
|
Closing Mark Radius |
Enter the radius of the marking of the closing on the dart-pleat. For example, enter 0.5 cm to increase the radius: Closing Radius 0.2 CM
Closing Radius 0.5 CM
|
|
Closing Mark Distance |
Enter the distance of the marking of the closing on the dart-pleat. For example, enter 0.7 cm to place the closing markings closer to the end of the dart-pleat: Closing Mark Distance 0.2 CM
Closing Mark Distance 0.7 CM
|
|
Closing Mark Command |
Tells the cutter how to handle the marking of the closing. The shape of the stitch changes according to the option you select: Draw
Cut
Drill
AuxDrill
None
|

-
To view the 3D attributes of the dart-pleat, first in the 3D window, select the Select Stitch tool
 , then click on the dart
in the 2D window.
, then click on the dart
in the 2D window.
The 3D Properties dialog appears with the dart-pleat attributes. For more information about the attributes, see Navigating the 3D Properties Dialog and then expand Dart-Pleat.
-
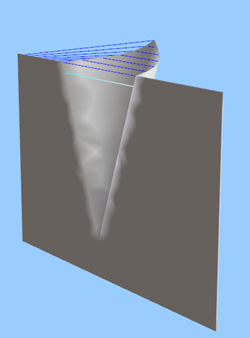
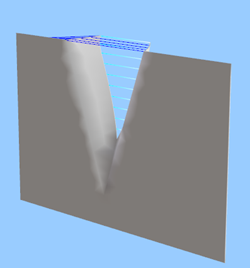
When you are done defining the pleat properties, click Simulate to see how your pleat looks in 3D.
Here is how our pleated dress looks when it is done simulating: