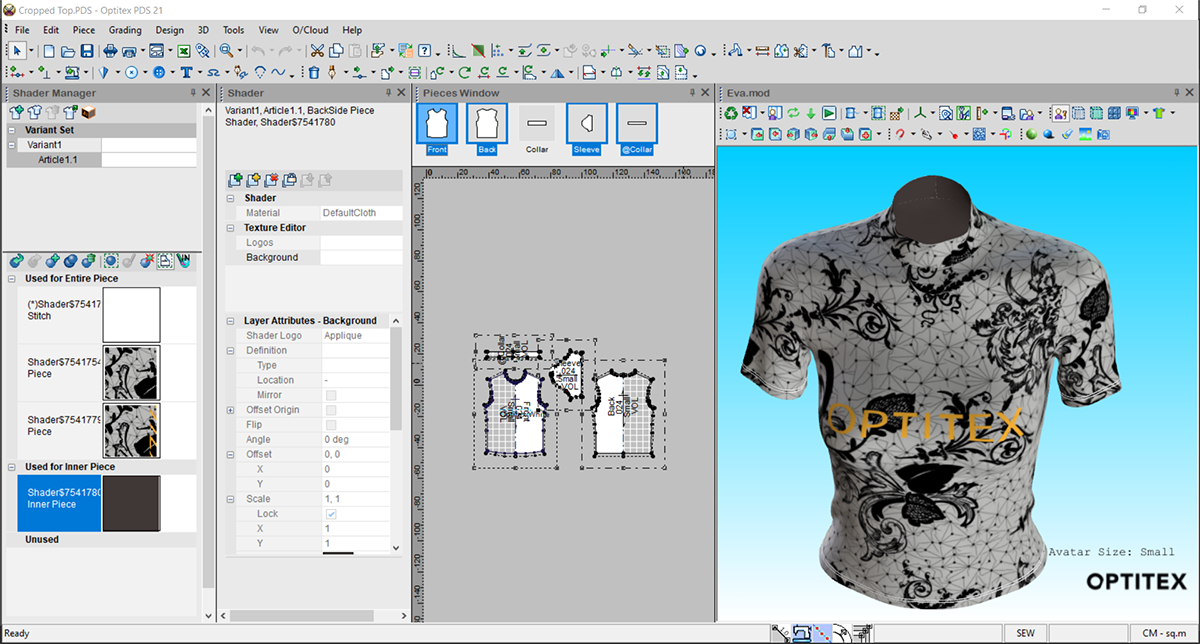
Assigning Shaders to Your Pattern Pieces
You can assign different shaders to your pattern pieces when you want to add different textures, logos, artwork etc. to your pattern, but you want the pieces to appear differently. For example, you can assign the same shader to the front and back pieces, but assign a different shader to the sleeves, or you can add a logo that only appears on the inside of the back piece (not on the entire back piece), etc.
Starting from version O/18, all shaders now follow the baseline of the piece. The baseline is used to indicate the texture's direction.
![]() Click here
to view a few guidelines you should follow:
Click here
to view a few guidelines you should follow:
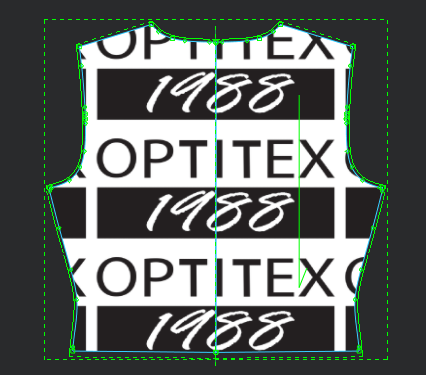

![]() Click here
to view some examples of Shader According to Baseline
Click here
to view some examples of Shader According to Baseline

To assign shaders to pattern pieces:
-
Open your pattern.
-
Open the Shader Manager.
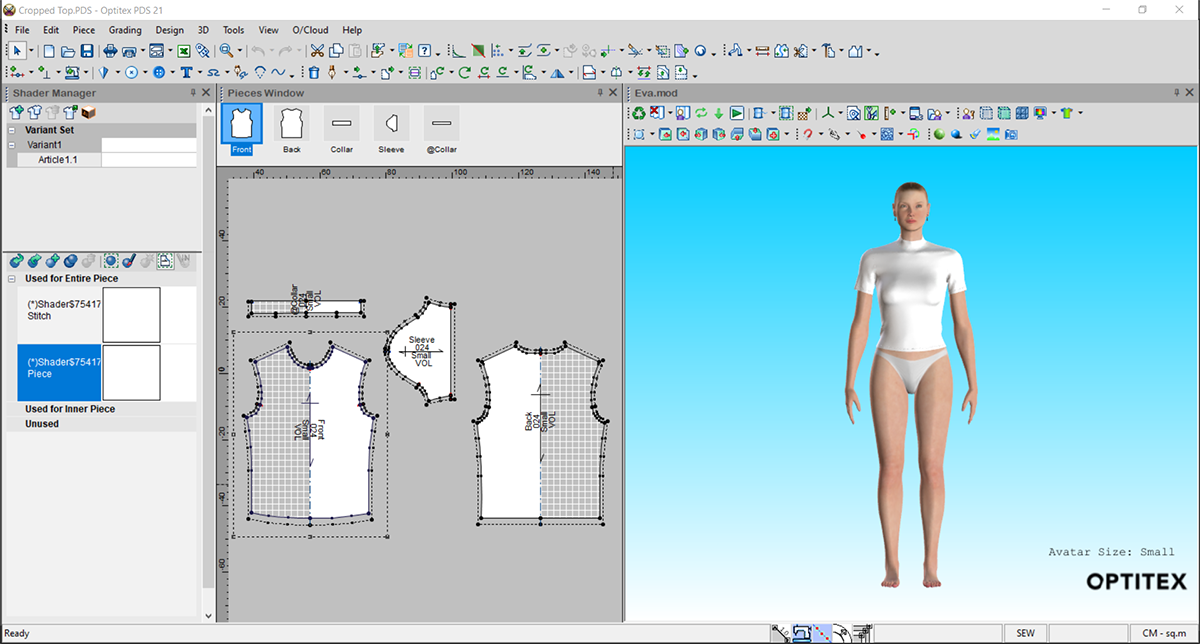
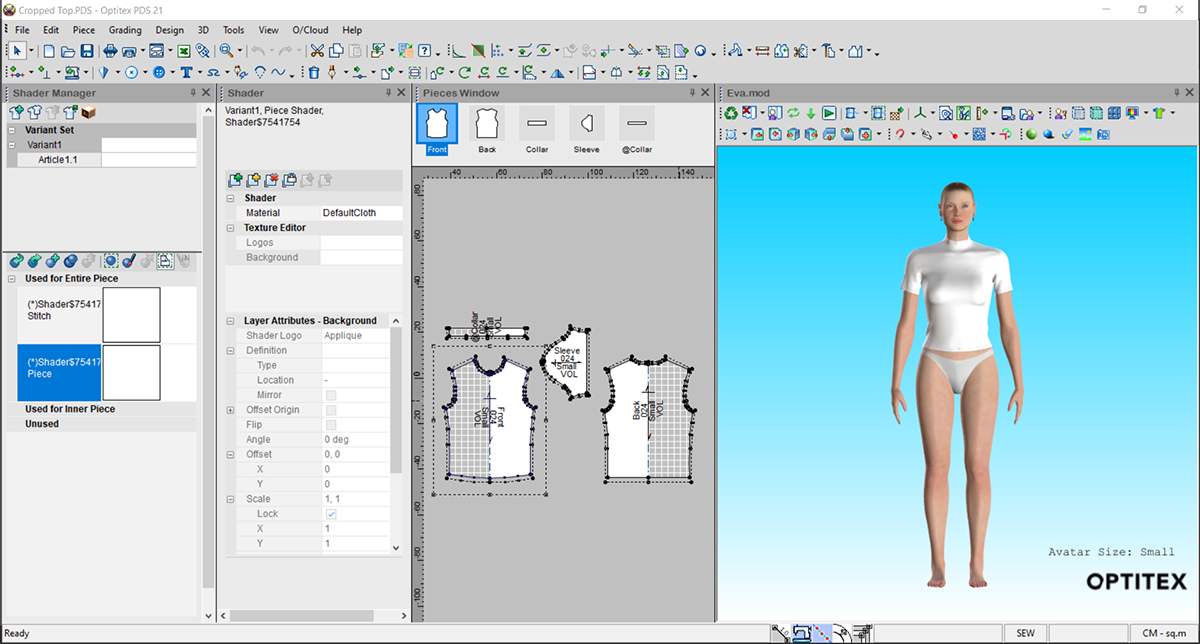
By default, all pieces are assigned a "default shader". You have a shader for pieces, buttons and stitches. -
First, let's see what happens when we add a texture to all the pieces in the pattern.
-
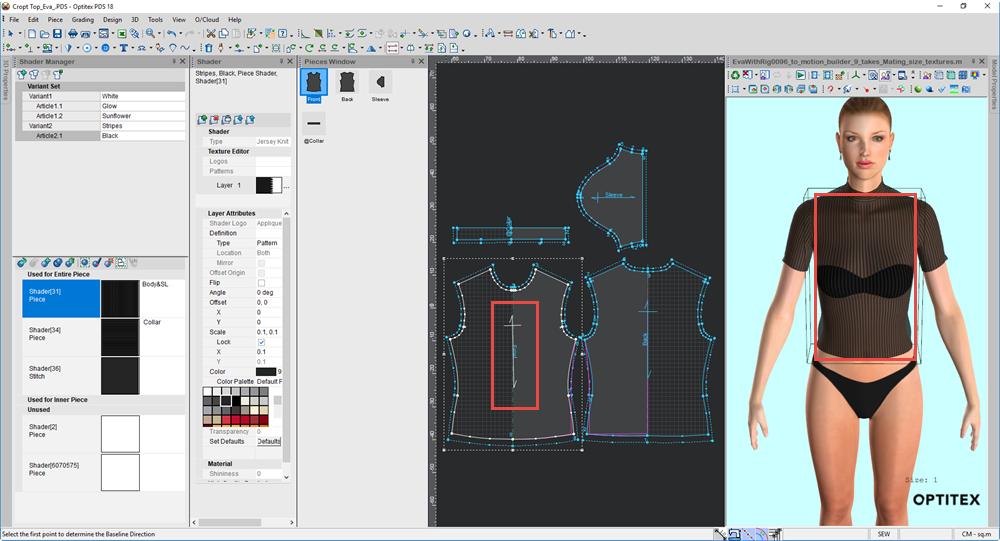
In the Shader Manager, while standing on a Variant, click on the Piece Shader to open the Shader dialog.
-
Click
 to add a new layer and then upload a texture.
Notice the texture is applied to all the pieces.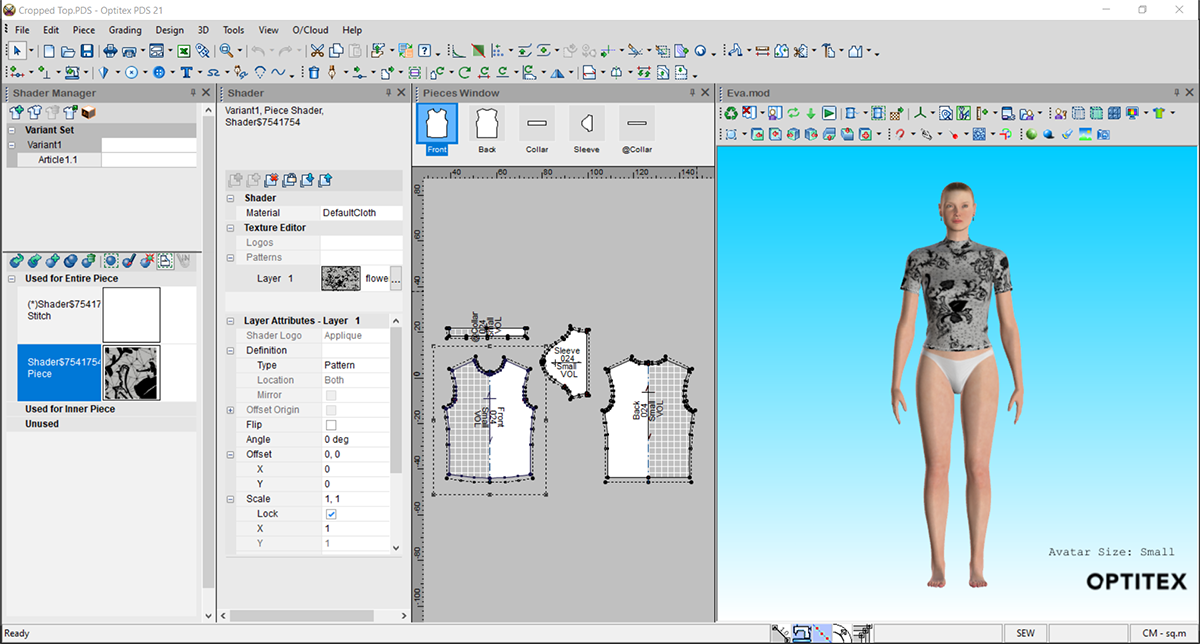
-
Now let's add a logo to the Front Piece only.
-
In the 2D window, click on the Front piece then in the Shader Manager, click
 (Duplicate),
and then click Assign so the shader is assigned to the Front piece.
(Duplicate),
and then click Assign so the shader is assigned to the Front piece. -
To add the logo, stand on the Article, not Variant then in the Shader dialog, click
to add a new layer and add a logo. You can
change the attributes of the logo so the logo is positioned correctly
and is the correct size. For more information about the different
editing options, see Editing Shaders.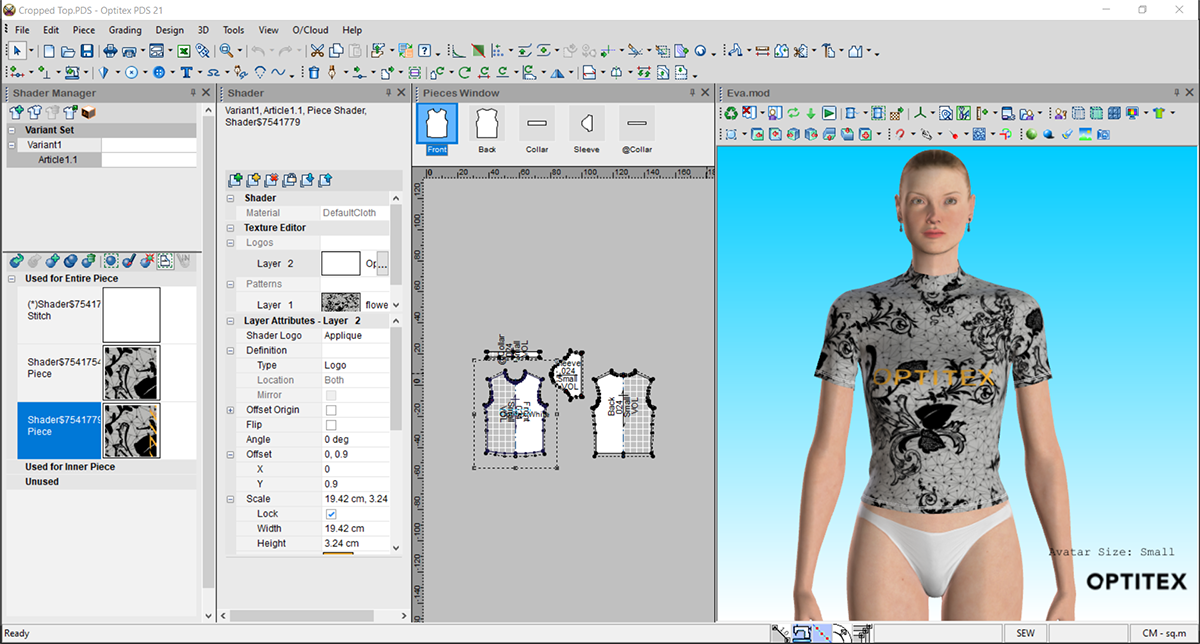
-
Now let's assign a shader to all the inner pieces. For example when you want to add a darker color on the inside of the garment only.
-
Create a new shader and add a color.
-
Select all the pieces and then click
 (Assign
to Inner Piece) as follows:
(Assign
to Inner Piece) as follows: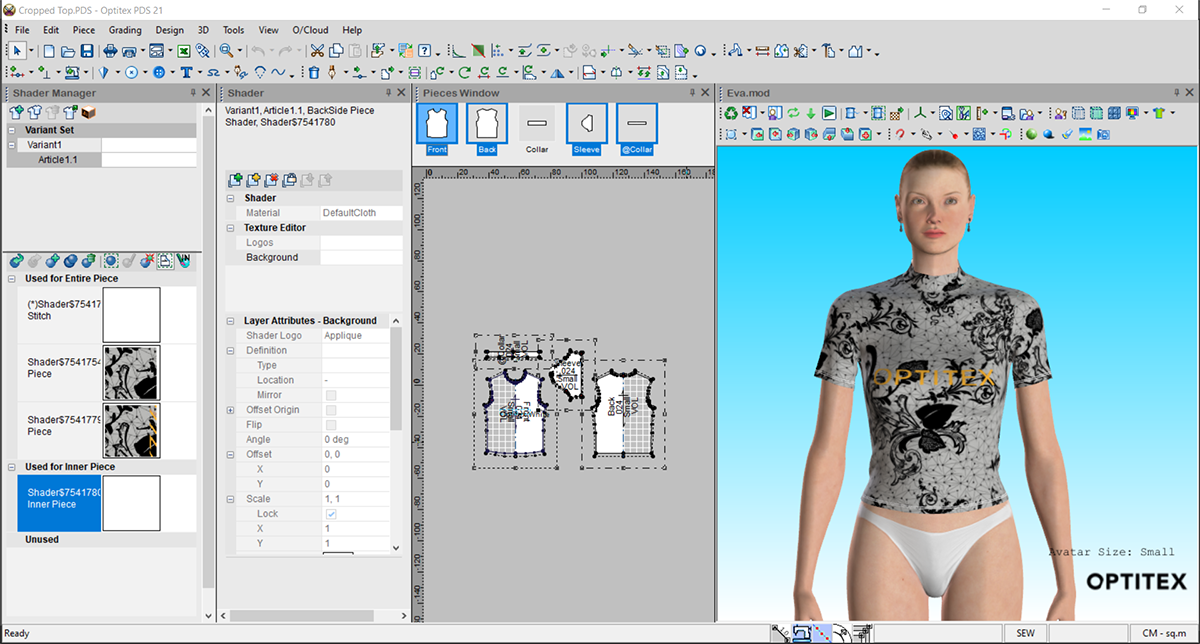 Notice the new assigned shader appears under Used
for Inner Piece as follows:
Notice the new assigned shader appears under Used
for Inner Piece as follows: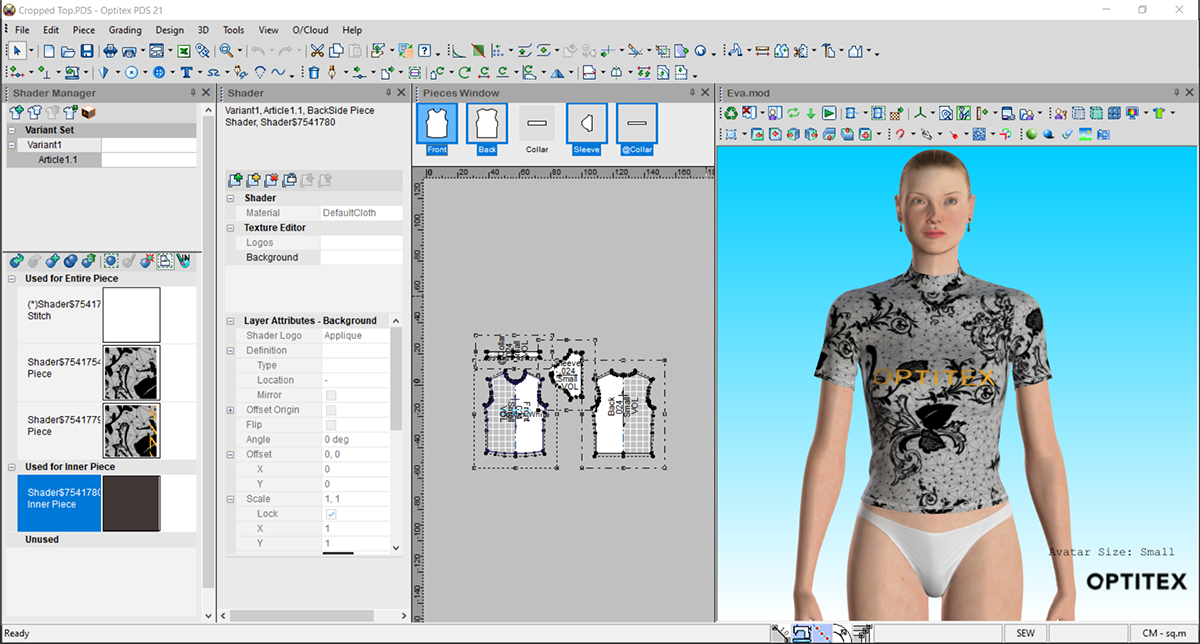
-
Let's hide the avatar so we can see how the inner pieces appear with the shader: