Adding a Floor to an Avatar
This allows you to save a variant of an avatar standing on a floor.
It can be then used when you need a floor for the simulation.
-
Run PDS, then open the 3D window, then load an avatar that you want to add the floor to.
-
Open the Load Model dialog.
-
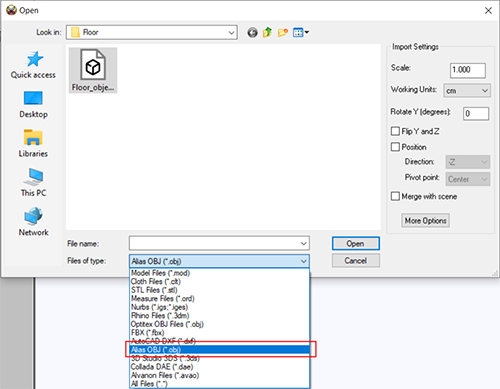
Select the file type: Alias OBJ:
-
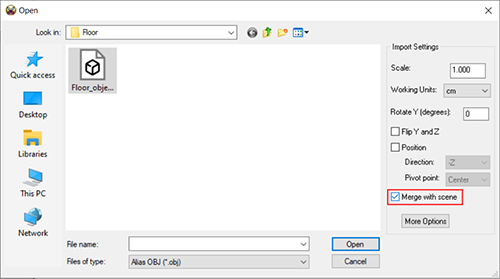
Select the Merge with scene checkbox:
-
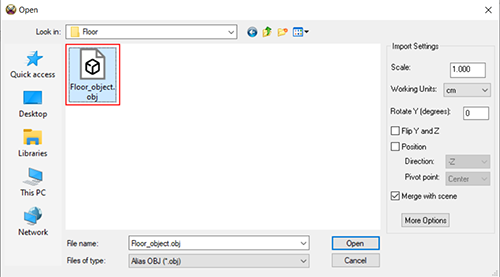
Select the floor .obj file, located in C:\Program Files\Optitex\Optitex 21\Samples\3DContent\Miscellaneous then click Open.
-
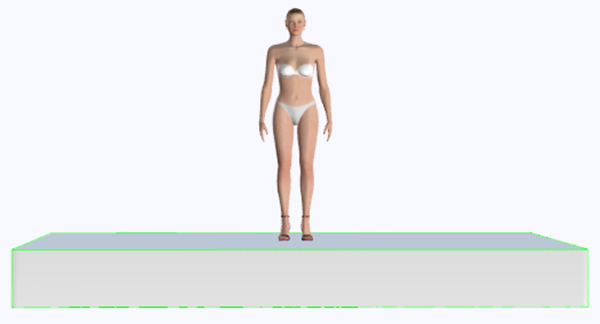
Once the floor has been added to the 3D view, double click the floor.
-
Drag & Drop the floor texture onto the floor in the 3D window.
Note: The texture is located here: C:\Program Files\Optitex\Optitex 21\Samples\3DContent\Miscellaneous\Textures\Floor\ -
Press and hold “Ctrl” + ”Alt” + press “Space” to open the Collision dialog.
-
Select the Part of the room checkbox, then click OK.

-
In the 3D window click the Front View button, then Save the Model.
-
Open the Avatar Editor, then open the avatar that you just saved with the floor in PDS.
-
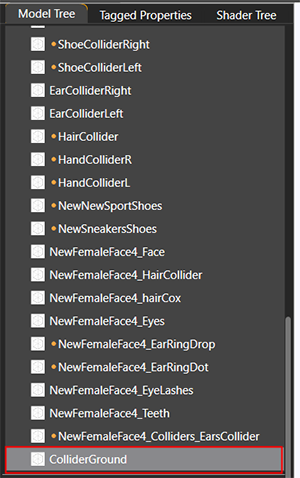
In the Model Tree tab:
-
Select the ColliderGround mesh:
-
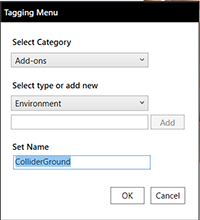
Right click to Open the Tagging Menu.
-
From the Select Category drop-down list, select Add-ons.
-
Select the Environment type, then set the name for the floor (this name will be displayed in the tagged properties tab and also in the PDS) and then click OK.
-
Select the Tagged Properties tab and then select the static pose.
-
In the Add-ons->Environment select and then deselect the checkbox again.
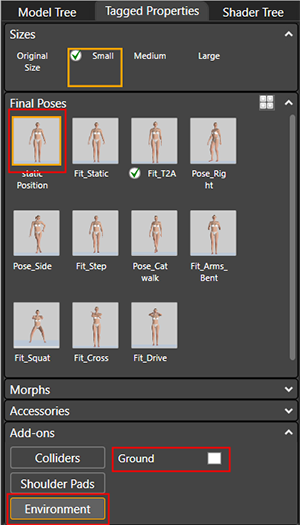
Note:
-
If you want the floor to be visible by default in the PDS, select the checkbox again (3rd time), if not, leave the checkbox un-selected.
-
You will be able to show/hide the floor in Model & simulation > Model Properties > AddOns > Environment
-
In Avatar Editor 3D window click Front View, then Save/Save as the Avatar.
Now you can use this avatar in the PDS-3D.