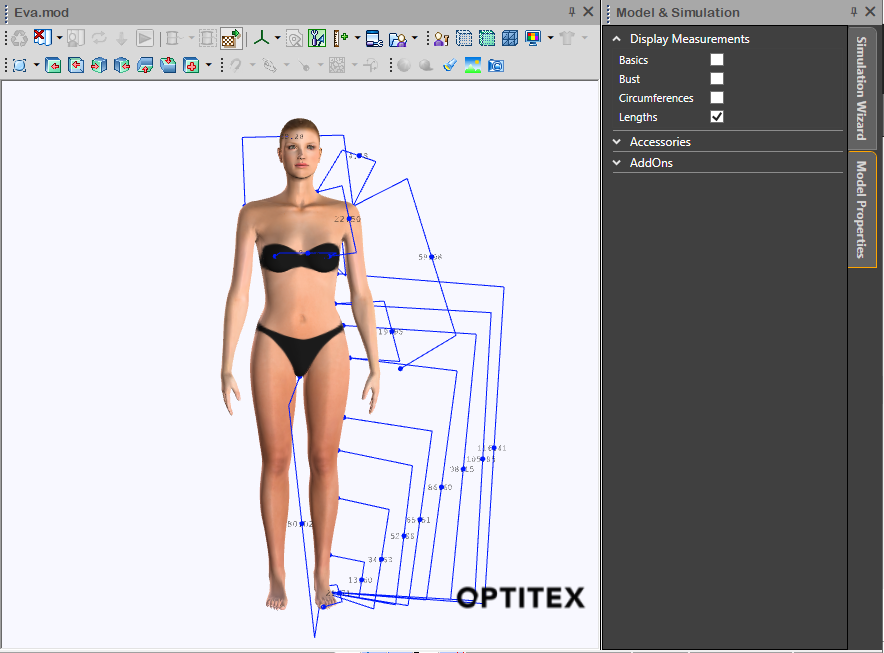
Model and Simulation Wizard
The Model and Simulation wizard provides a single simulation workflow that supports both automated and manual scenarios, and enables simulating from one pose to another pose. The panel contains the Simulation Wizard and Model Properties tabs.
-
The Simulation Wizard tab enables matching model and pattern sizes and poses to be simulated and reviewed.
-
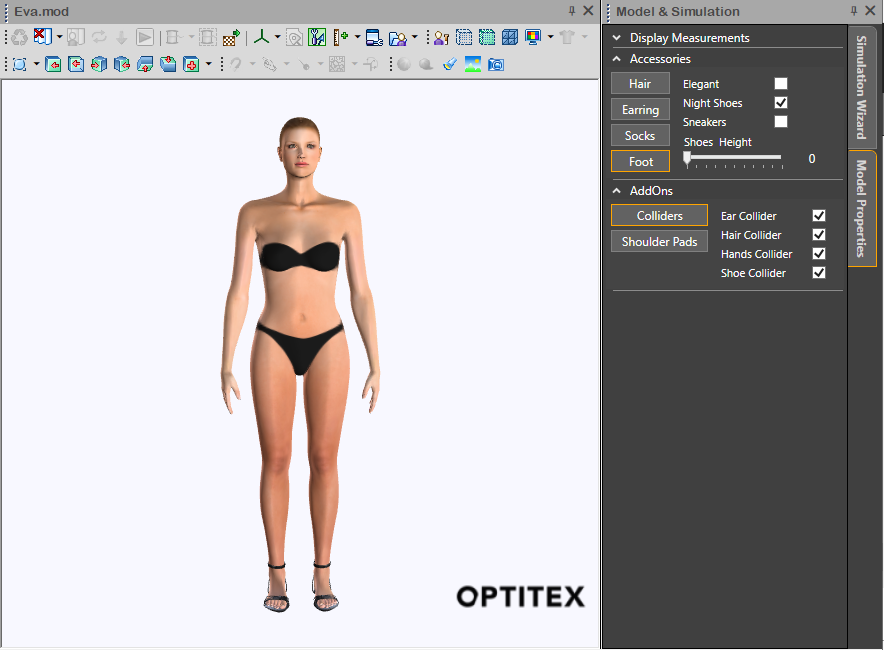
The Model Properties tab allows for control of the model content, such as accessories and add-ons.
This saves valuable time and ways to achieve your final result, especially when using Cross Size Simulation.
Click the Model & Simulation icon on the toolbar.
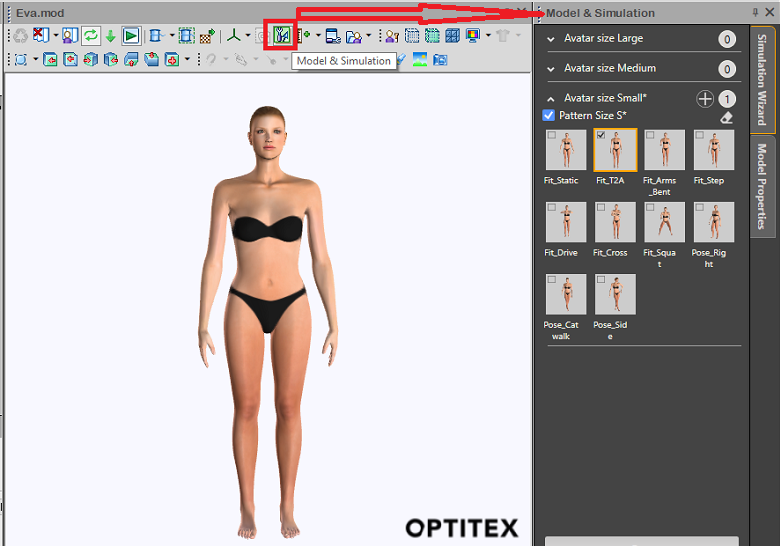
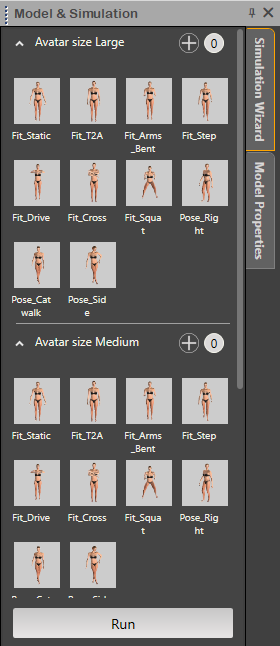
Once the avatar is loaded, the Simulation Wizard tab provides you with the avatar sizes, with each size containing all avatar poses. This tab dynamically provides options according to the loaded model. Clicking on one of the avatar size-poses allows you to review them in 3D if needed. All sizes/poses will appear in the Simulation Wizard tab. Once you open the Model & Simulation panel, only the default size is expanded; all other sizes are collapsed.
When
opening a pattern and the pattern size names are not the same names
as the avatar sizes, the matching is done automatically only for pattern
base size and avatar default sizes. All other sizes should be matched
manually as follows:
Matching
of the pattern base size is done automatically with the avatar default
size only. Only the default avatar size is expanded: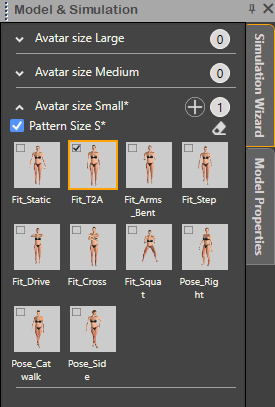
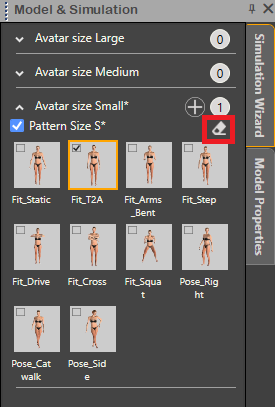
Once
you click the remove![]() icon, the matching
is removed. The counter icon
icon, the matching
is removed. The counter icon![]() is reset also,
and the match icon
is reset also,
and the match icon![]() remains. The
counter icon shows the amount of the selected poses of this specific
size that should be simulated. The match icon is useful when all sizes
match and you want to match additional sizes.
remains. The
counter icon shows the amount of the selected poses of this specific
size that should be simulated. The match icon is useful when all sizes
match and you want to match additional sizes.
If an unmatched size contains simulated garments, all simulated data
will be removed.
If you remove the auto-matched pattern base size and avatar default size, but don’t re-match sizes, the matching state is kept until you change it. If you open the same file again after saving the file with new re-matched data, the auto-matching of the pattern base size and avatar default size will not work because the custom match is done in this file and the wizard provides the information of the match that is part of the PDS file.
 Note:You can
also select the avatar size-pose, select the pattern size in 3D properties,
and click on the place cloth icon/button. This matches the selected
pattern size in 3D properties and selected avatar size and pose that
currently appears in 3D.
Note:You can
also select the avatar size-pose, select the pattern size in 3D properties,
and click on the place cloth icon/button. This matches the selected
pattern size in 3D properties and selected avatar size and pose that
currently appears in 3D.
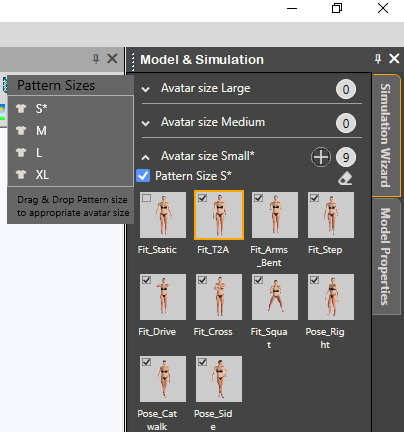
Matching of additional pattern sizes and avatar sizes is done manually, using the + icon and drag & drop:
Place Cloth- Places the matched pattern size on the selected avatar size and pose.
Refresh Cloth- Refreshes the matched pattern size on the selected avatar size and pose.
Simulate Draping- Starts, stops, or continues the simulation. If there is no pattern in 3D, this will place a pattern and simulate the matched pattern size, avatar size, and pose. If the selected pattern is already placed in 3D, this will simulate the pattern.
The RMB menu on a post-draped pattern contains three options:
Refresh Cloth- Refreshes the matched pattern size on the selected avatar size and pose.
Simulate Draping - Starts, stops, or continues the simulation. If there is no pattern in 3D, this will place a pattern and simulate the matched pattern size, avatar size, and pose. If the selected pattern is already placed in 3D, this will simulate the pattern.
Delete Cloth- Deletes a simulated garment. The garment will be deleted, and the thumbnail will automatically be replaced with the initial (default) one, and the checkmark will be removed.
When you have finished selecting the sizes and final poses you want to simulate, click Run. The Save as dialog appears, allowing you to define the name and location where you want the file with the simulated data to be saved. You can now view the final simulation results by clicking on each thumbnail. When you click on a thumbnail that's been simulated, you’ll see the simulated pattern size and matched avatar size in the 3D.
Once you run the simulation, the Run button will change to Stop. You can click the Stop button at any time to stop the automation process.
Automatic vs. Manual Simulation
The processes for automatic and manual simulation are similar; however, if you want to use automatic simulation, your pattern size names and avatar size names must be identical. Otherwise you will have to manually match sizes.
When both the size and avatar are opened and the matching is not done automatically, you can match pattern sizes and avatar sizes manually. You can manually select the required final poses you want by clearing any checkbox, and then selecting the checkbox of each thumbnail you want to be simulated. You can then click on the Run button to start the process (see above).