Rotate Segment
You can use the Rotate Segment tool to alter a section by rotating it around a pivot point. The pivot point can be placed anywhere on the piece, or out of the piece. This can also be used for slashing and spreading purposes.
Icon & Location
To use the rotate segment tool:
-
Select the Rotate Segment tool.
The cursor changes to:

-
Click to place the pivot point, anywhere in or out of the piece. An 'X' shows the marked spot.

-
Click first and last point in a clockwise direction to select the segment to Rotate.
Alternatively, drag around the the whole segment you want to select
The selected segment's points are highlighted.

-
Click one of the selected points.
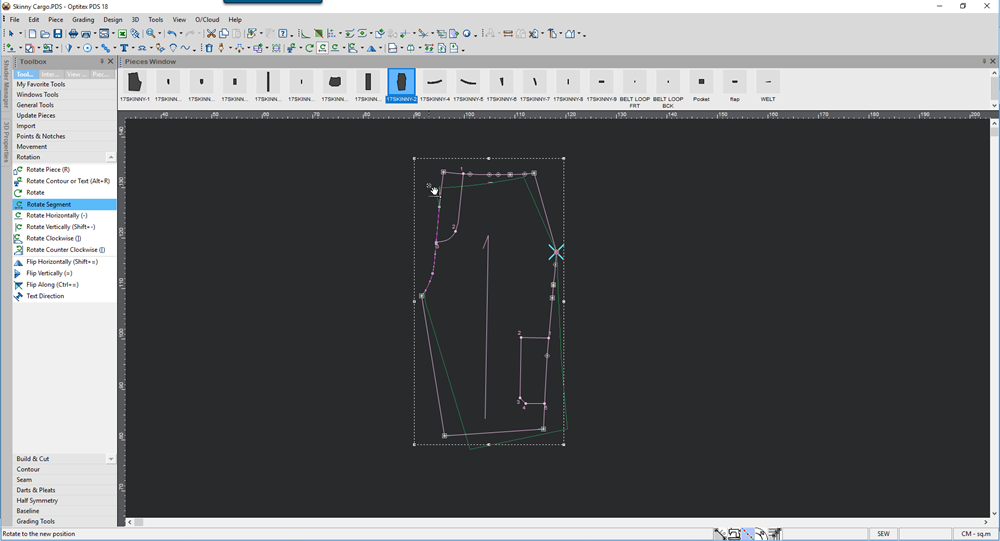
The selected segment now moves along with the mouse so you can rotate it interactively around the preset pivot point.
-
Click to anchor the rotated segment.
The Rotation dialog appears: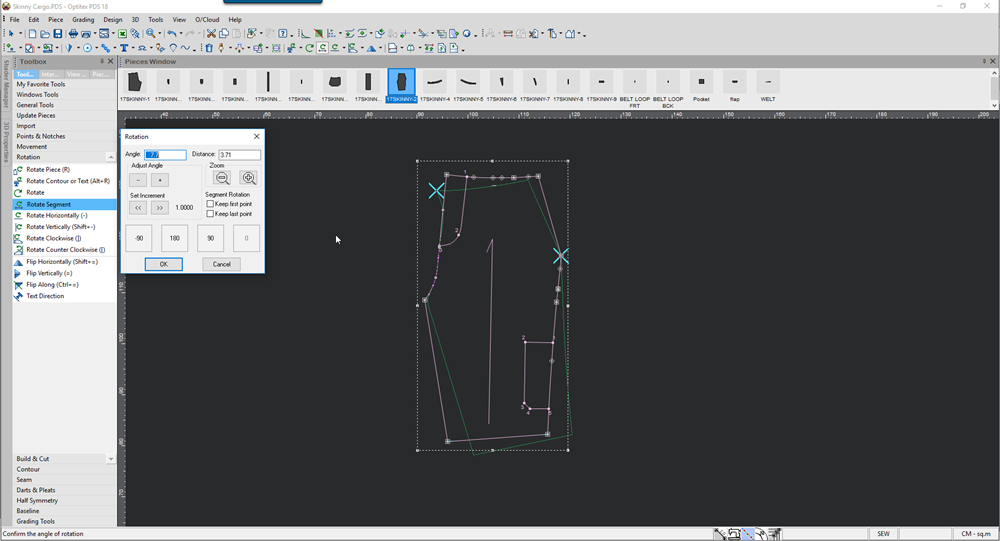
-
In the Angle field, enter the angle of rotation you require.
-
To adjust the angle, click the + and - buttons.
-
To change the distance, enter a value for the distance.
-
If you want the first/last point to remain fixed (and not to move with the segment when it is rotated), select the Keep First Point or Keep last Point check boxes.
-
If you want to rotate according to a defined degrees, you can click one of the pre-defined buttons, for example 90.
Each time you make a change, you can preview the change in the Working Area. -
Click Ok when you are done:
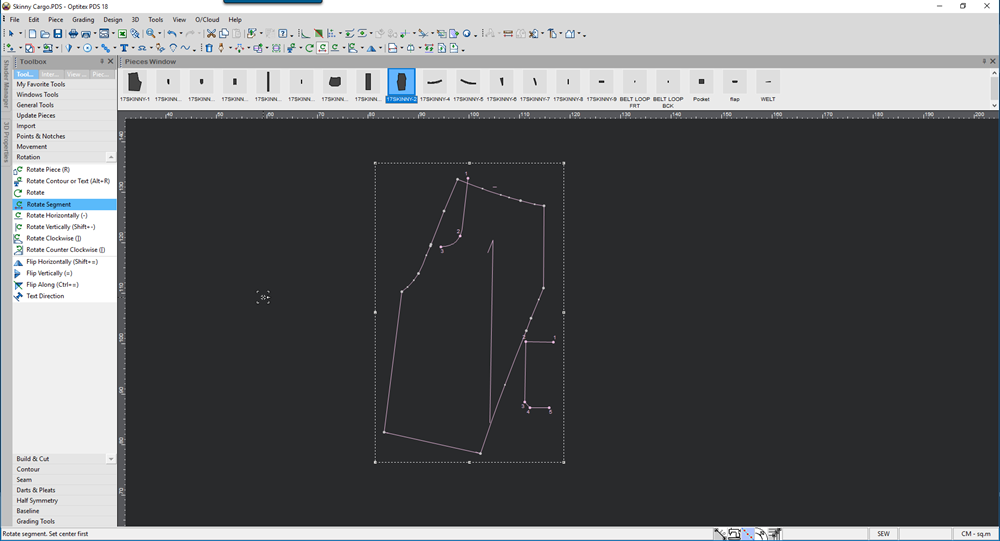
The segment is rotated.
 See also: Using PDS Functions: 2D rotating