Notch Properties
You can use the Notch Properties dialog when you are creating/modifying a notch.
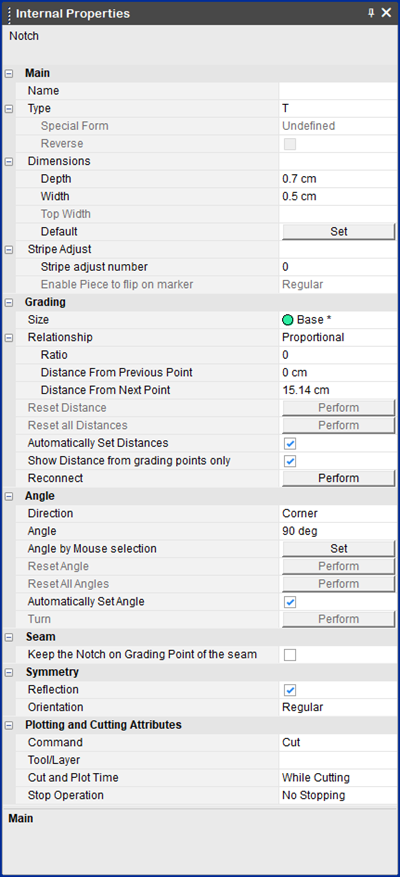
View the fields as follows:
|
Field |
Description |
|
Main |
|
|
Name |
Enter a name for the notch. You can show/hide the notch names via the View and Selection dialog. |
|
Type |
Select the type of notch: T
V
I
L
U
V
Box
|
|
Special Form |
If you selected a U type notch and you want to define it as a special form, this field appears with "U", otherwise it appears as "Undefined". You must then make sure you do the following: Go to Preferences> Notch> Settings and select the Show special notch types when "U" notch is selected checkbox. |
|
Reverse |
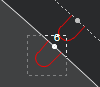
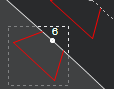
If you selected "L" notch, then you can change the direction by selecting this checkbox. Reversed
|
|
Dimensions |
Set the dimensions of the notch type. |
|
Depth |
Enter the depth of the notch: Depth 0.7cm
Depth 2cm
|
|
Width |
Enter the width of the notch: Width -0.5cm
Width 2cm
|
|
Top Width |
Enter the top width of the notch. This is only available for box notch types. Top Width 0.5cm
Top Width 1cm
|
|
Default |
Click Set, if you want to use the default dimensions that are defined for notches in your pattern. This is according to your preferences: Preferences>Notch>Notch Type>Dimensions. |
|
Stripe Adjust |
If you are working with stripes and/or plaids, you can define the number so all same type pieces are adjusted in the Marker. You can turn on/off this option via the View and Selection dialog. |
|
Enable piece to flip on marker |
If you defined Stripe Adjust, you can then enable the notch to flip in the Marker: X Flipped: Flips the piece in the X direction. Y Flipped: Flips the piece in the Y direction XY Flipped: Flips the piece on both directions |
|
Size |
Select the size of the piece to which the notch location and angle refer. Every size can have the angle and notch positioned differently. |
|
Relationship |
Set the distance between the notch and the point: Proportional: Sets the notch proportional to the point. From Previous Point: Sets the notch from the previous point. From Next Point: Sets the notch from the next point. |
|
Ratio |
Enter a proportional ratio to define the distance between the points. Number can be between 0 and 1. A ratio of 0.5, means 50% distance between the points. |
|
Distance from Previous Point |
Enter the distance of the notch from the previous point. |
|
Distance from Next Point |
Enter the distance from the next point. |
|
Reset Distance |
Click Perform, if you want to reset the distance of the notch in the selected size according to the base size. This is only available if you are using grading. |
|
Reset All Distances |
Click Perform, if you want to reset all the notches in all the sizes according to the base size. |
|
Automatically Set Distances |
Select this checkbox, if you want to automatically set the notch distance according to the base size. |
|
Show Distance from Grading Points Only |
If selected, ignores non-grading points when calculating the notch distance. |
|
Reconnect |
Click Perform, if you want to reconnect the notch to the nearest point . |
|
Angle |
|
|
Direction |
Sets the direction of the angle of the notch: Corner: Sets the direction of the angle on the corner point. Previous Segment: Sets the direction of the angle according to the previous segment. Next Segment: Sets the direction of the angle according to the next segment |
|
Angle by Mouse Selection |
Click Set, if you want to define the angle of rotation by clicking on the area with your mouse. This will automatically update the Angle and Direction fields. |
|
Reset Angle |
Click Perform, if you want to reset the angle of the notch in the selected size according to the base size. This is only available if you are using grading. |
|
Reset All Angles |
Click Perform, if you want to reset angles of all the notches in all the sizes according to the base size. |
|
Automatically Set Angle |
Select this checkbox, if you want to automatically set the notch angles according to the base size. |
|
Turn |
Click Perform, if you want to toggle the notch direction from the Previous Segment to the Next Segment when the notch is on a corner point. |
|
Seam |
|
|
Keep Notch on the Grading Point of the Seam |
Select, if you want the notch to be connected to the point regardless of the angles. You can set a default value in Preferences> Notch> Settings If the notch is connected to a point with a ratio of 0 or 1, it will remain on the grading point of the seam even after changing the angle. |
|
Symmetry |
|
|
Reflection |
If the piece is set to half, this enables the notch to be symmetric on the other side. Not Symmetric
Symmetric
|
|
Orientation |
Determines if the notch will be cut/plotted in all instances of the piece. Make sure the piece is defined with an even quantity, and that the orientation is set to Left/Right. Regular: On the piece Left Only: On the left Right Only: On the right |
|
Plotting and Cutting Attributes |
|
|
Command |
Select the command of the notch's drill. This defines the tool that will be used on the object when the file is sent to a cutter or plotter machine, like Draw for a pen, Cut for a knife, etc. |
|
Tool/Layer |
Sets the tool/layer name. This is mainly used for plotting, cutting, and exporting pieces. |
|
Cut and Plot Time |
Determines when the notch should be cut/plotted: Before the External Contour or After the External Contour |
|
Stop Operation |
Determines whether to stop the cutting operation before cutting the notch. |