Matching Seams For Comparison
You can use the Match Seam tool when you want to match seam allowance for overlapping pieces. This can be useful when you have extra seam allowance and you want to cut it so you have the same seam allowance for the pieces.
Note: The Match Seam tool is similar to the Replicate Seam tool, but includes the "Walk" option during the process, whereas with the Replicate Seam tool you have to walk your pieces manually.
To use the match seam tool:
-
Open your PDS file.
-
If you do not have seams add them now. For more information see Adding a Seam.
-
Select the Match Seam tool. (Go to Toolbox > Seams).
-
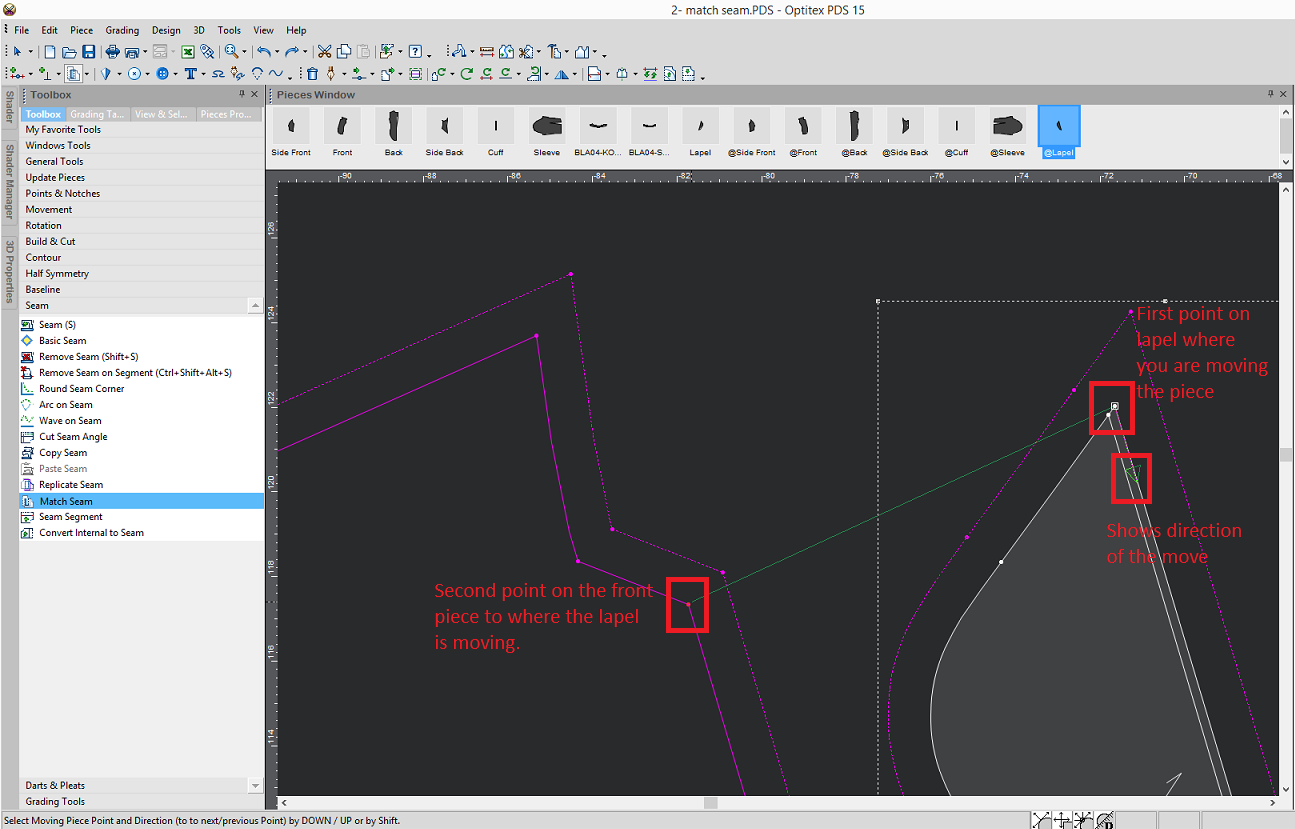
Go the piece for which you want to match seams. In this example we will go the lapel.
-
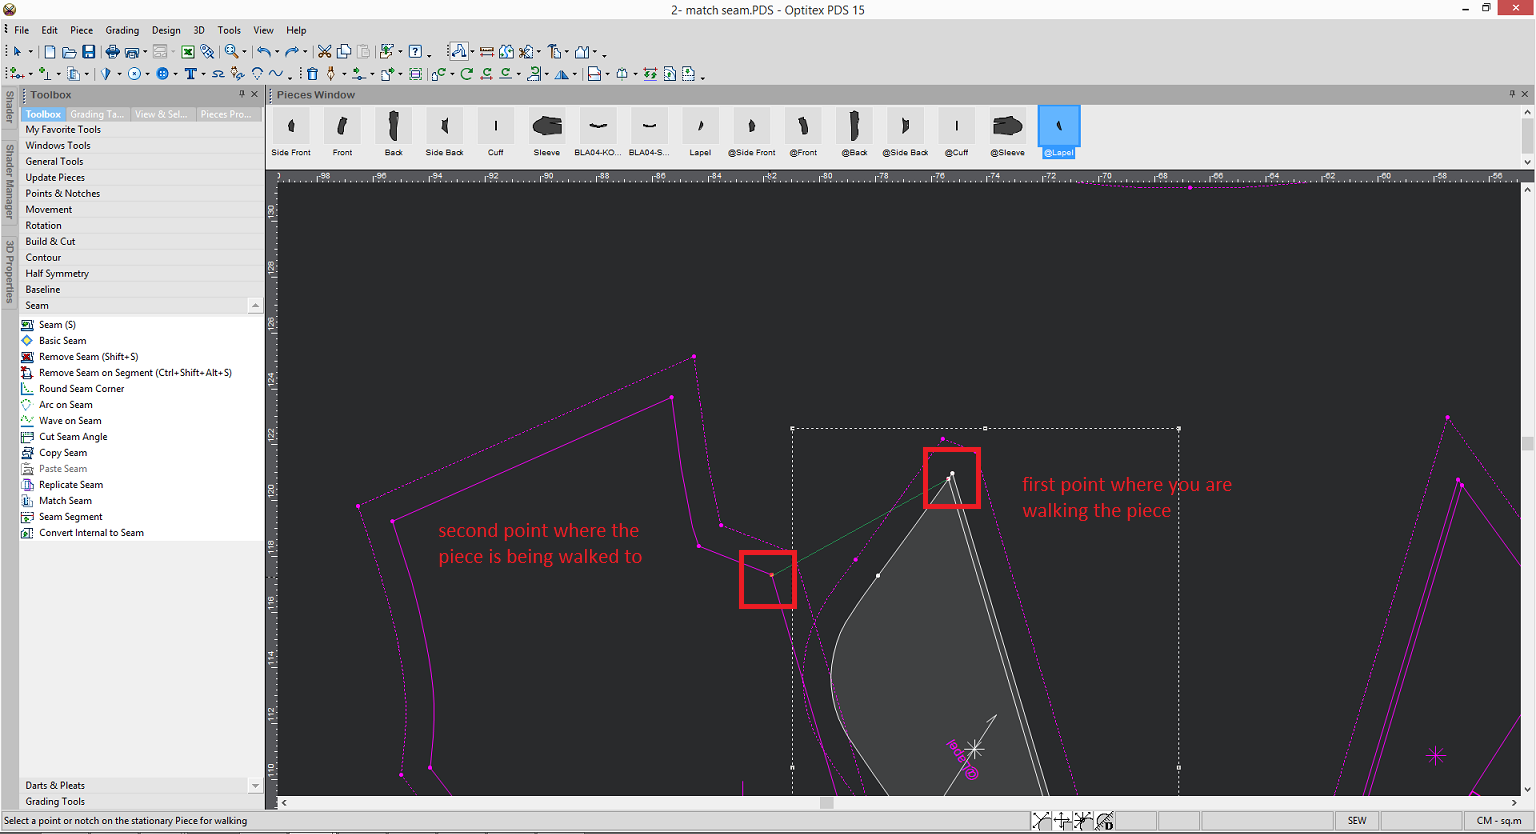
Select the first point from where you are walking the piece.
-
While holding down the mouse move to the point on the second piece where you are moving to as follows:
The Move Piece on Piece dialog appears: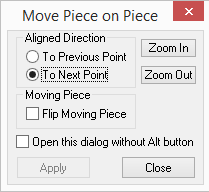
Here you can define the direction of how the pieces will move. -
In the Aligned Direction area, make sure the To Next Point option is selected, to indicate you are moving the piece to the next point.
-
Click Close.
In the example below we can see there is an overlap of seam allowance when the two pieces are placed on top of each other.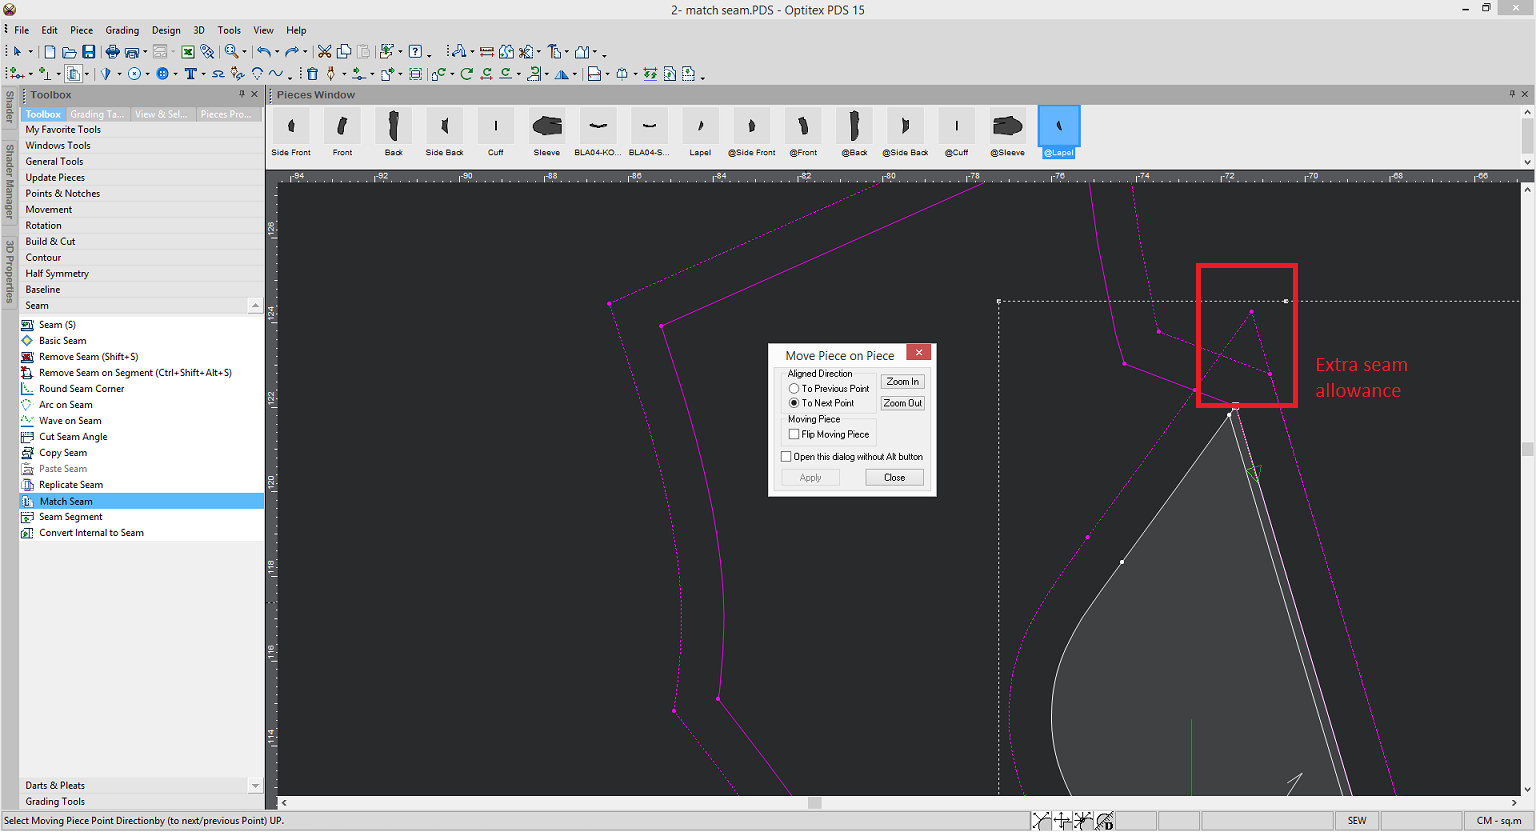
After you click Close, the sewing icon appears (allowing you to cut the extra seam). -
Go to the first point of the intersection where you want to cut.
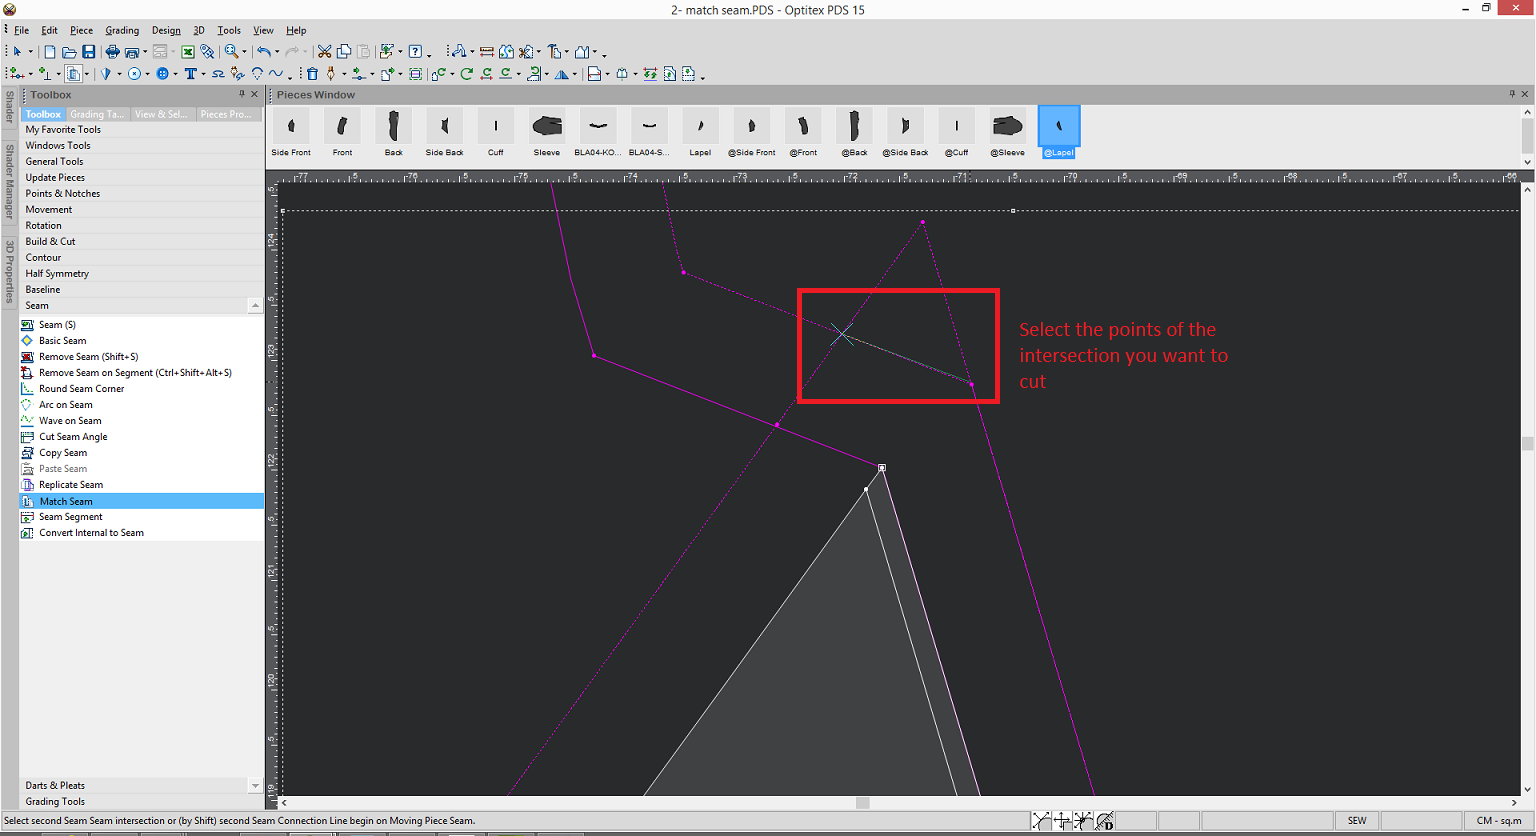
-
While holding down your mouse, move to the second point of the intersection you are cutting.
The Match and Replicate Seam dialog appears: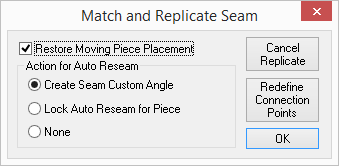
-
Select the Restore Moving Piece Placement checkbox, if you want the piece to move back to its original placement after the replication is made.
-
In the Action for Auto Reseam section, select one of the following options:
-
Create Seam Custom Angle: Select if you want the new seam to stay intact if you move a point on the piece.
-
Lock Auto Reseam for Piece: Select if you do not want the seam to stay intact if you move a point on the piece.
-
None: If you want to cancel the replicate seam function.
-
-
Click Ok when you are done.
-
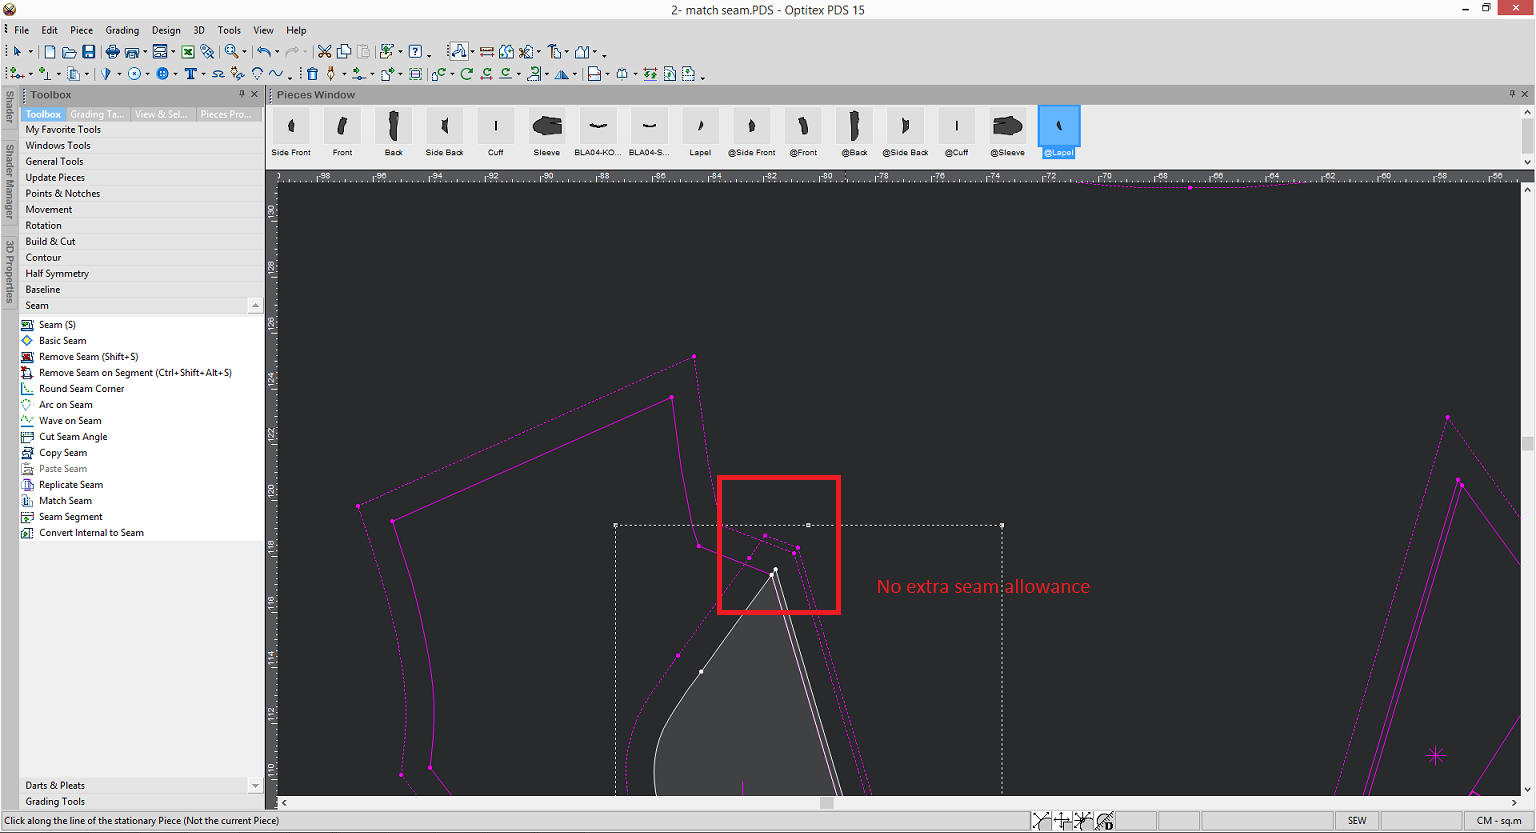
To make sure there is no extra seam allowance, use the walk tool and walk the lapel onto the front.
-
Select the Walk tool
 icon.
icon. -
Select the first point from where you are walking the piece and then select the second point to indicate where the walk should end as follows:
Once you are done walking, you can see there is no extra seam allowance: