Create Multi Pleats
You can use the Create Multi Pleats tool when you want to create multiple pleats along a selected contour. The pleats are either divided equally along the segment or are created in parallel. This tool is usually used in order to add pin tucks on piece(s).
To use the create multi pleats:
-
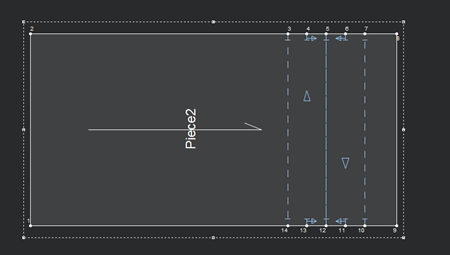
Select a segment on the contour.
-
From the main menu, go to Tools > Pleats> Multi Pleat.
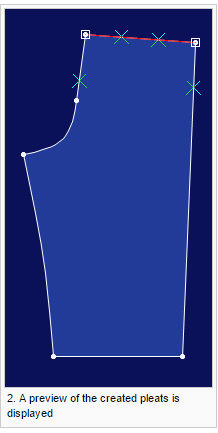
The Create Multiple Pleats dialog appears: (a preview of how the pleats will look once created appears in the 2D window as well).
-
In the Number of Pleats field, enter the number of pleats you are creating. The equal distance between the pleats is calculated automatically.
-
If you want to add a pleat on the First/Last point on the selected contour, select the required checkbox.
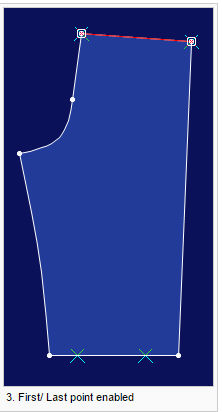
Note: Pleats cannot be created on the contour line itself. -
If you want to define an angle for the pleat (first or last), in the First Pleat Angle/ Last Pleat Angle fields, enter the angle you require.
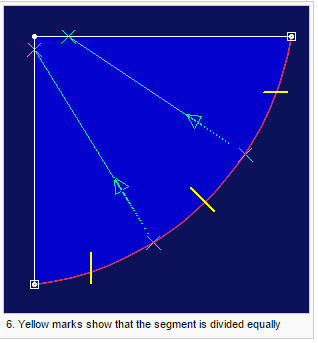
The angle is calculated from the segment. The arrow in the preview marks the Zero angle.
All angles between the first and last angle are automatically calculated. You can use this button in different ways to change the way the pleats are distributed:-
No click on the Last Pleat Angle button - the pleats are divided along the contour.
-
Click the button - the pleats are divided along the straight line from the first to the last point.
-
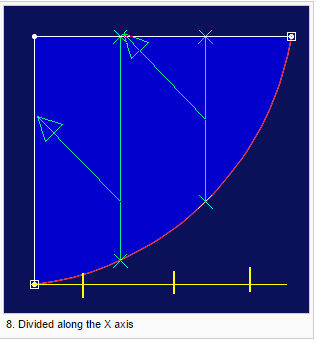
Shift + Button click - the pleats are divided along the X Axis.
-
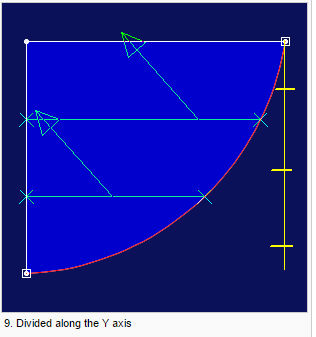
Ctrl + Button click - the pleats are divided along the Y axis.


-
-
If you want to create parallel pleats, select the Parallel Pleats checkbox. If you want to change the direction of the pleats, click the arrow, then select Horizontally or Vertically.
-
Select the radio button of the type of pleats you require: Box Pleat or Knife Pleat.
-
If knife pleat was selected, sets the direction by selecting the CCW Folded checkbox.
-
Select the Variable Pleat checkbox, if the pleats are variable pleats.
-
In the Depth field, set the depth of the pleats.
-
In the Pleat Attributes area, select the Dashed Line checkbox, if you want the pleat line to appear as a dashed line.
-
In the Notch Location, select where you want the notch to be located: Start,End or Both.
Note: Starting from version O/17 SP1, you can also define notch dimensions on darts/pleats; however when creating multiple pleats you cannot change the dimensions using this dialog, only via Preferences. -
From the Notch Form drop-down list, select the notch type you require: I-Notch, T-Notch, V-Notch, or Box-Notch.
-
From the Command drop-down list, select the plotting/cutting command: Draw, Split or None.
-
Click Ok when you are done.
The pleats are created according to the criteria you defined: