Build Piece Zones
You can use the Build Piece Zones tool when you want to create a zone, based on a specific area of your piece. This allows you to define a map zone that basically imitates the original pieces, so when making a change to a piece in the map zone, the new piece will be updated accordingly. This can be helpful when you wan to create your pattern by sketching and you want to reuse the pieces later on.
This tool is similar to the Build Piece tool; however, instead of creating a piece, it defines a zone (which can then be created and corrected).
![]() Click here to see
the differences between the Build Piece and Build Piece Zone tools.
Click here to see
the differences between the Build Piece and Build Piece Zone tools.
Icon & Location:
-

-
Toolbar: Piece
-
Toolbox: Build & Cut
To use the Build Piece Zones tool:
-
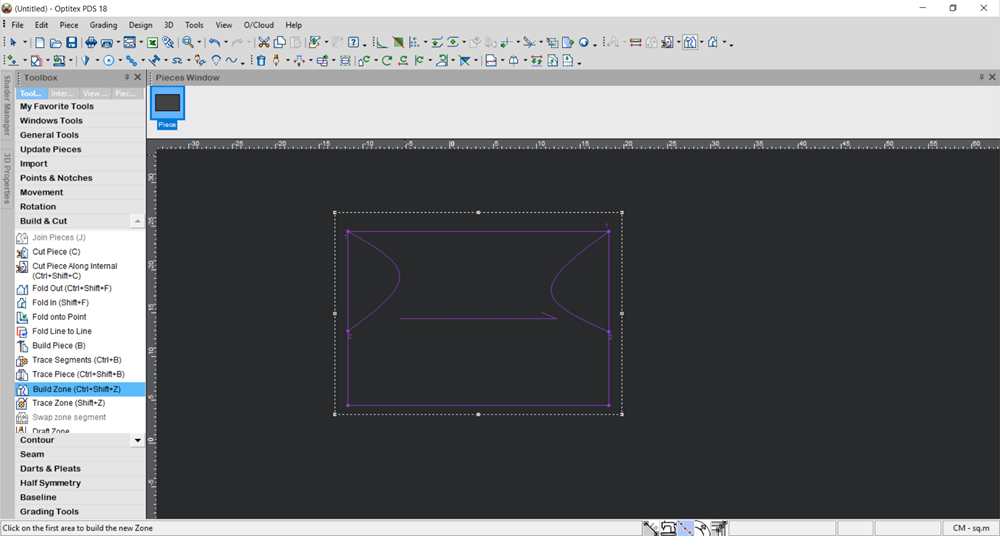
Create the piece you are going to use for your Map Zone. In the example below, we created a sketched piece:
-
Select the Build Piece Zones tool.
-
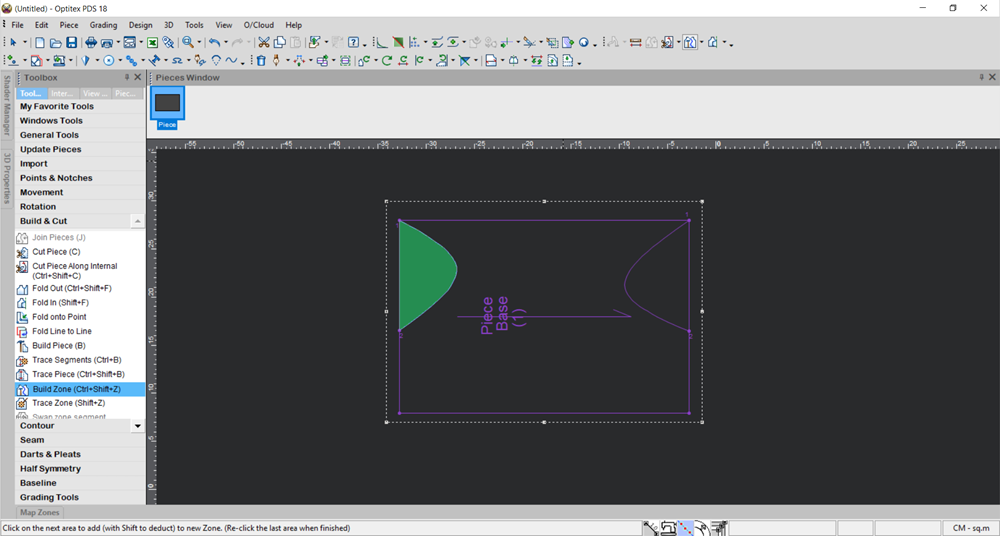
Click on the areas required to create the zone.
-
Double-click inside the selected area to create a zone.
The Map Pieces Zones window opens as follows: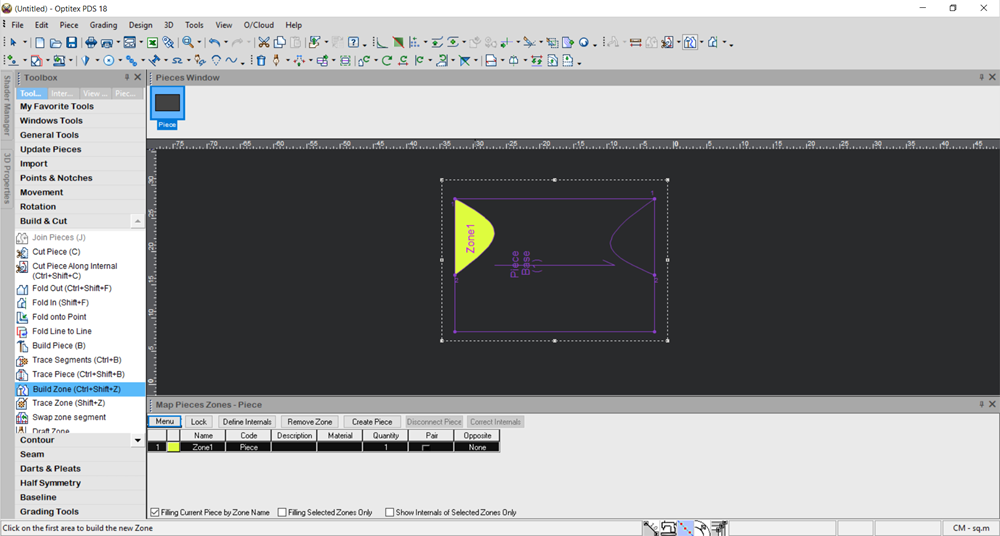
Notice a new line appears in the table with information about the zone. -
Click Create Piece if you want to transform the zone into a piece.
Notice the piece appears next to the map zone as follows: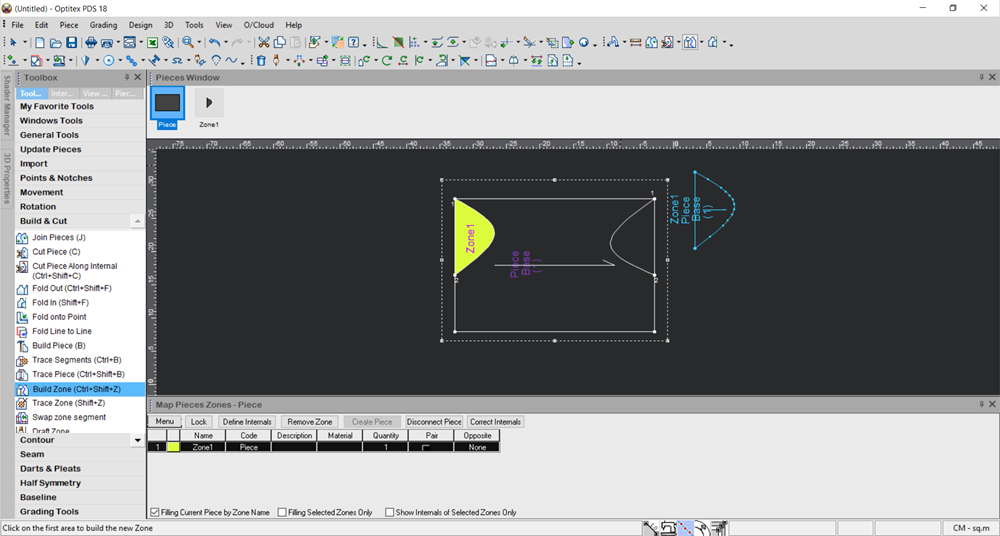
-
Continue creating the rest of your zones and pieces are required.
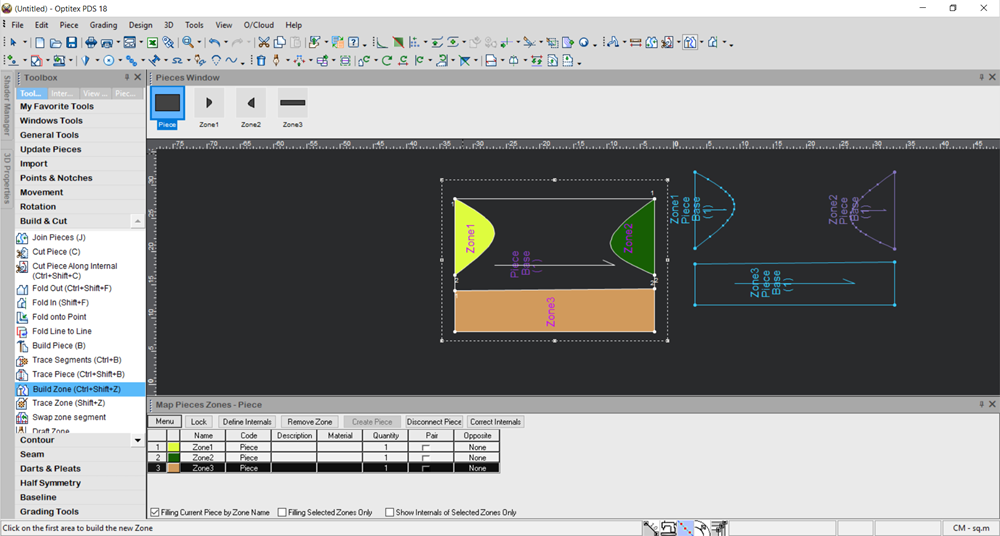
Here is an example of a completed Map Zone with pieces: