Start Auto Nesting
You can use the Start Auto Nesting option when you want to activate the nesting algorithm. The system knows how to recognize which nesting algorithm you have and nests accordingly. If you want to change the algorithm, you can do so in the Auto Nesting Setup dialog. For more information, see Nesting Your Pieces.
Icon & Location
-

-
Menu: Nesting > Start
-
Toolbar: Nesting
To start auto nesting:
-
Load a style or open a Marker file.
-
From the main menu, go to Nesting > Start Auto Nesting.
The nesting process begins.
Once the nesting has been completed, the status arrow reaches the end and the pieces are all nested: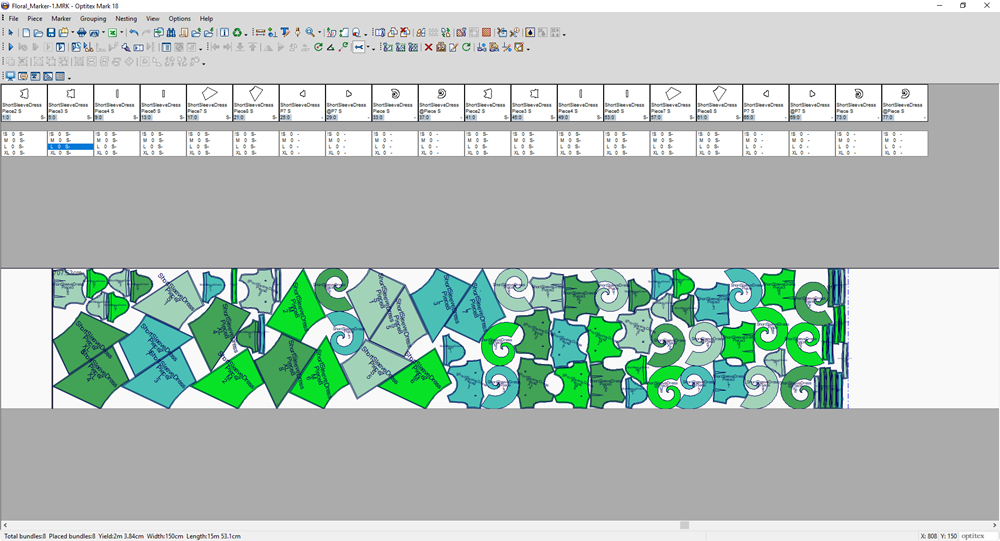
Warnings and Dialogs
-
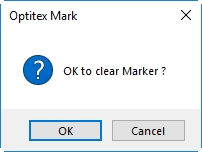
Clear Table: If the marker table is not empty, the function will start by clearing the marker, after displaying a warning message.
-
If some pieces are defined with different material names, you will have to decide if to nest them or not.
-
Click Nest those piece(s) anyway to nest all pieces no matter the material definition.
-
Click Don't nest those piece(s) to nest only matching materials.
-
Click Cancel nesting to stop the nesting.
-
-
If the total area of pieces to be nested is bigger than the marker total area, a warning message will notify you.