Navigating the Fabric Pattern Dialog
You can use the Fabric Pattern dialog when you want to either modify fabric patterns you already imported into the Marker (via the PDS file) or when you want to add new fabric patterns so be used in your Marker file.
To navigate the Fabric Pattern dialog:
-
From the main menu toolbar, go to Marker > Fabric and Stripes > Fabric Pattern.
The Fabric Pattern dialog appears:

-
If you want to define how the fabric pattern will display, in the View Fabric area, select one of the following options: (you can either do this before or after you have selected your fabric image)
-
Disable: If you do not want the fabric pattern to appear in your marker.
-
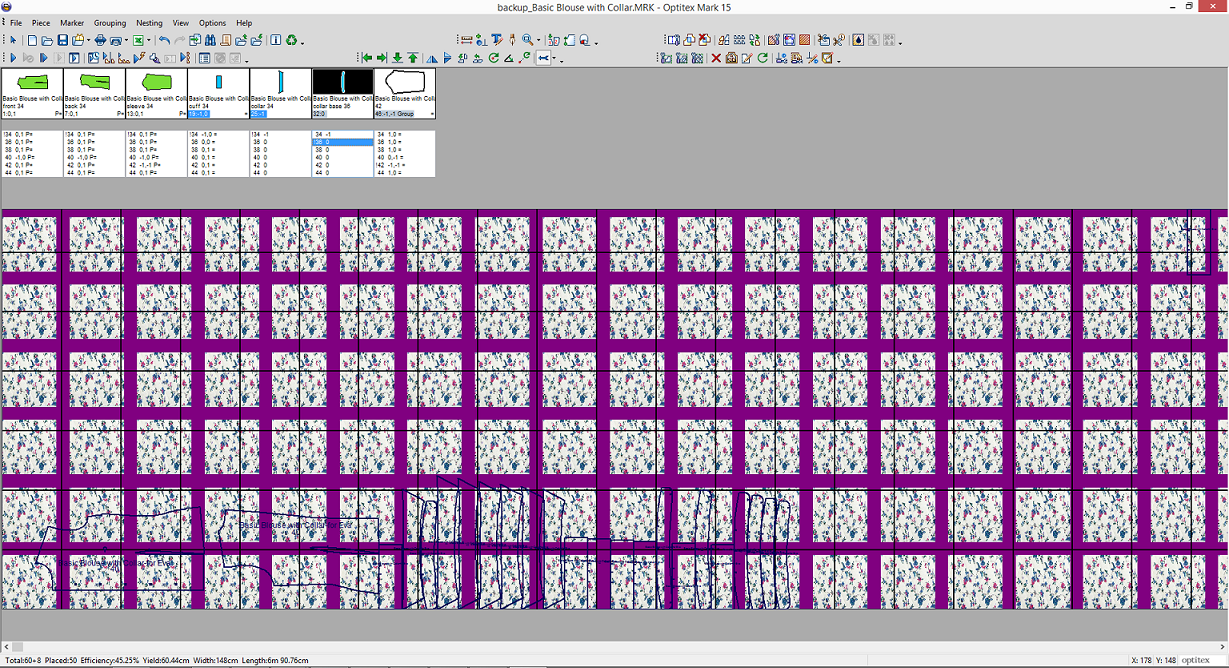
As Marker Background: If you want the fabric pattern to appear as the background as follows:
-
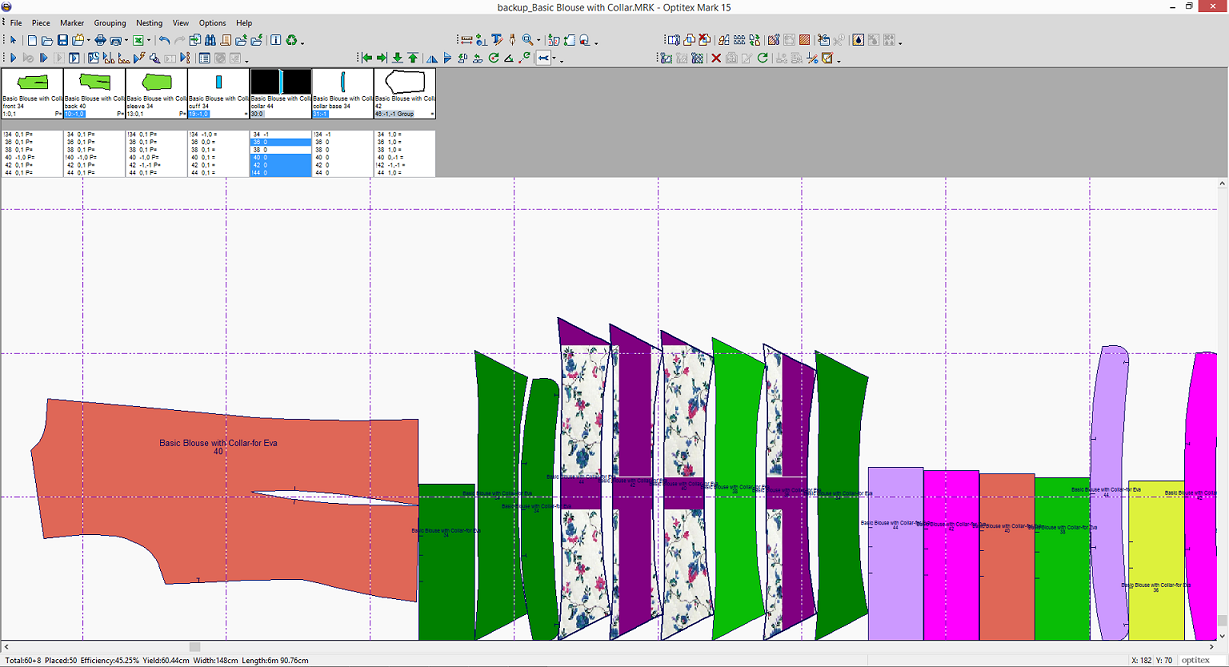
Fill Selected Piece(s) Only: If you want to only fill the pieces you previously selected as follows:
-
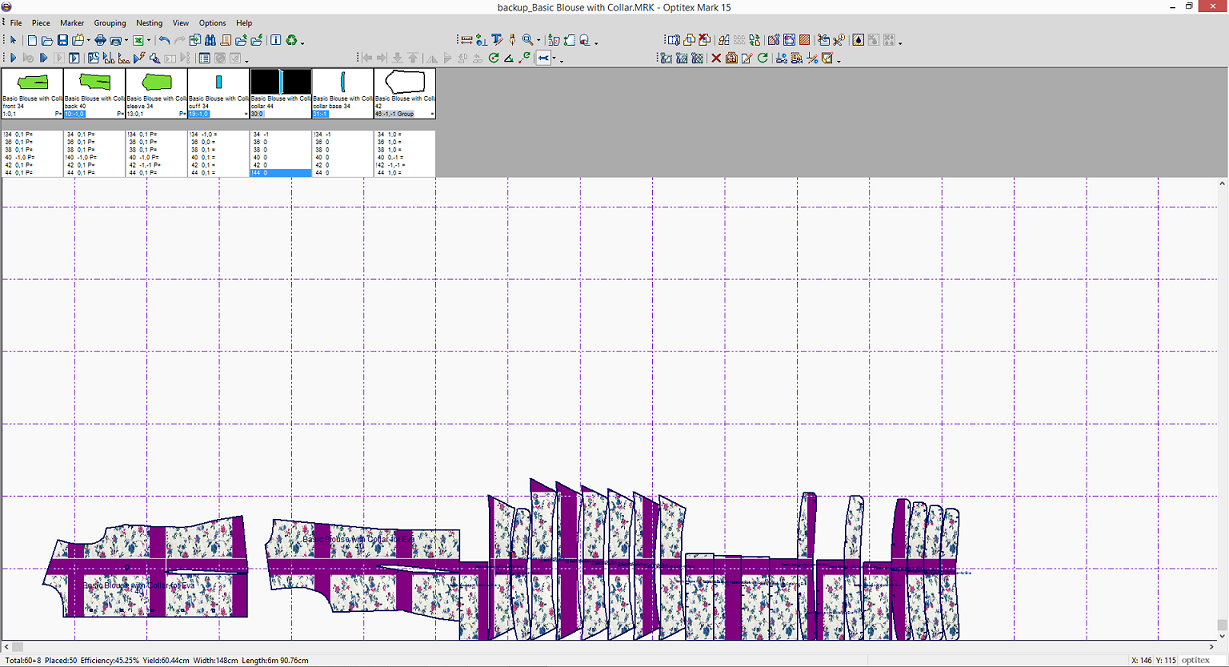
Fill All Pieces on Marker: If you want all pieces to appear with the fabric pattern as the filling as follows:
-
Display Different Fabrics: If you have selected more than one fabric and you want to display them in your marker.
-
To modify/add a fabric pattern, click Load Fabrics.
The Fabric Pattern dialog is displayed:
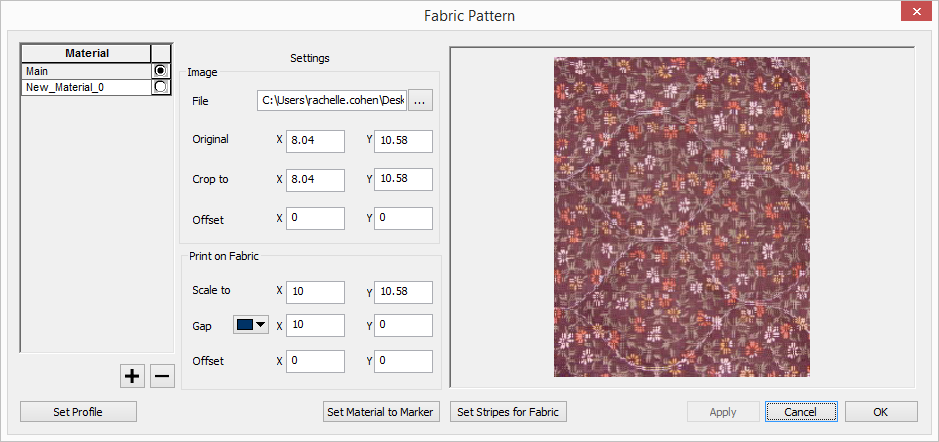
The following fields are available:
|
Field |
Description |
|
Material |
Use the + and - to add or remove materials. Select the Main radio button to indicate which material is active. |
|
Set Profile |
Select to create an FPF (Fabric Pattern Profile) so you can save the fabric pattern. This file is used to coordinate settings between the PDS and the Marker. |
|
Settings |
|
|
Image |
|
|
File |
Click
the Note: You can only upload 24 bit JPG files. If you require a 32 bit image, save as a PNG file instead.
|
|
Original |
Defines the width (X) and height (Y) of the actual print size of the image. |
|
Crop To |
Defines the width (X) and height (Y) of the area in the image that will be printed. |
|
Offset |
Defines the offset of the printed image according to the X and Y axis. |
|
Print on Fabric |
|
|
Scale to |
Defines
the size of the printed image, width (X) and height (Y), in comparison
to the Crop to dimensions defined above. You can scale the image
proportionally, using the Locked
and Unlocked states. In
the Unlocked state |
|
Gap |
Defines the gap between the repeated image (X and Y directions). |
|
|
From the drop-down list, select the color for which you want to represent the gaps in your fabric pattern. |
|
Offset |
Define the offset of the image to determine the horizontal and vertical distance that starts the image repeat. |
|
Set Material to Marker |
Click this button to set the fabric pattern as the material (otherwise the Marker will recognize the fabric pattern as an image). |
|
Set Stripes for Fabric |
Click to define stripes on your fabric. This allows you to define the way the pieces are laid out within the boundaries of the stripes. For more information, see Defining Stripes on the Fabric. |

 , when changing the X value,
the Y value is independent and vice versa. In the
, when changing the X value,
the Y value is independent and vice versa. In the  , when
changing the X value, the Y value changes proportionally and vice
versa. The proportion is calculated according to the original
size. Once you select
, when
changing the X value, the Y value changes proportionally and vice
versa. The proportion is calculated according to the original
size. Once you select 