Launching the Marker Creation Wizard
The Marker Creation Wizard can be used when you want to create and define Marker files all in one place. You can access the Marker Creation Wizard through the main menu. There is a direct correlation between what you define in the Marker Creation Wizard and the data that is displayed when the created Marker file is opened in the Marker, this includes styles, marker types, table and overlay definitions, global piece information, single piece information, etc.
To launch the Marker Creation Wizard:
-
From the main menu, go to File > Marker Creation Wizard.
You must first select style files in order to access the actual wizard; therefore the first step is selecting the style files.
After you have selected your Style files, the Marker Creation Wizard appears: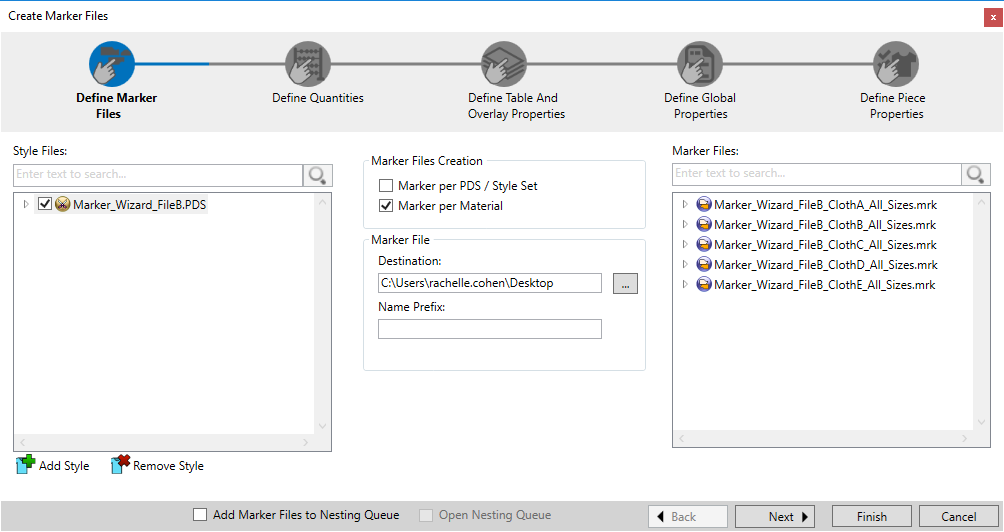
You can see at the top of the dialog there is a map showing your progress. Each step in the process is chronological and dynamic according to what you defined in the previous step. -
To move on to the next steps, click Next.
-
To go back to previous steps, click Back.
-
To create Marker files (at any time during the process) click Finish.
-
To close the dialog, click Cancel or click the red X at the top right of the dialog.
You can now begin the Marker File Creation process. Proceed to the first step, Selecting Style Files.