Color Shading in Markers
If you have fabric with non-uniform shading across the fabric roll, you could take it into consideration during nesting. In result, piece groups will be placed within a single shading area where the color deviation is considerably minor.
The Shading (Horizontal Groups) option allows you to control the nesting in shaded areas.
Note: This option is only available when using Nest ++2 or Nest ++Pro and requires the Shading license module.
To use color shading in Markers:
-
Open a marker file.
-
Go to Nesting > Auto Nesting Setup.
-
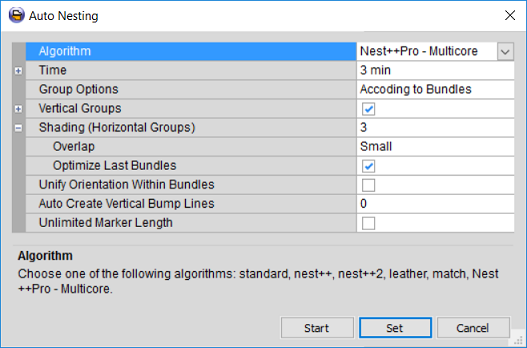
The Auto Nesting dialog opens:
-
From the Algorithm drop-down list, select Nest ++ 2 or Nest ++ Pro.
-
From the Group Options drop-down list, select either According to Bundles or According to Sizes (refer to Nesting Your Pieces topic for more information)
-
Select the Shading (Horizontal Groups) checkbox and enter the number of shading zones across the fabric roll, for example 3.
Note:Prior to version O21.0 , the number of shading areas was limited to 4. Starting from version O21.0, the number of shading areas is increased to 6, allowing you more flexibility in shading zones definition.
-
From the Overlap drop-down list, choose an appropriate option (e.g.) Small. The overlapping allows you to control the overall nesting efficiency by defining the tolerance between the groups.
-
In case you have a number of bundles which is not a multiple of shading areas, select the Optimize Last Bundle checkbox to place the last bundle to be nested across the fabric roll (regardless to shading areas). This allows you to increase an overall marker efficiency.
-
Click Set, then Start when you are ready to nest.
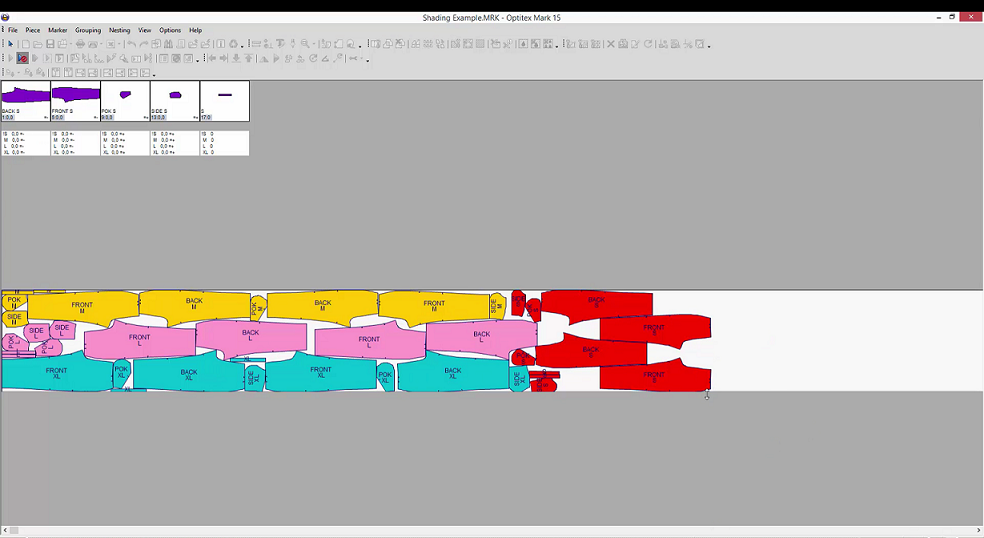
The marker is nested in bundles and according to shading groups: