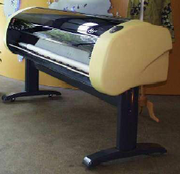
Lectra Alys30 Plotter
The following topic describes how to configure the Lectra Alys30 plotter.
Note: The Plotter/Cutter Setup dialog is dynamic according to the plotter/cutter type you select; therefore you may not see all the available commands. For more detailed information about all the available commands see Plotter/ Cutter Setup.
You need to setup the plotter before you can define the plotter settings,![]() click here to see how to define the plotter.
click here to see how to define the plotter.
Open a file in the Marker or PDS.
Open the Plot dialog, go to File
> Plot (Ctrl+L).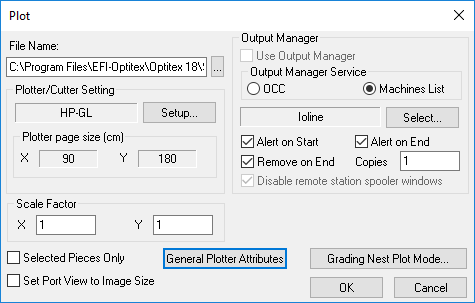
In the Output Manager Service area, select
the OCC radio button.
Note:
If you do not have a default Plotter/Cutter defined, a warning message
appears informing you: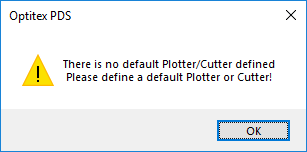
Click Ok.
The Queue Wizard Dialog Box
dialog appears: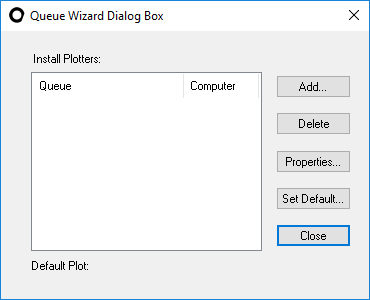
Click Add.
The Add Plotter dialog appears: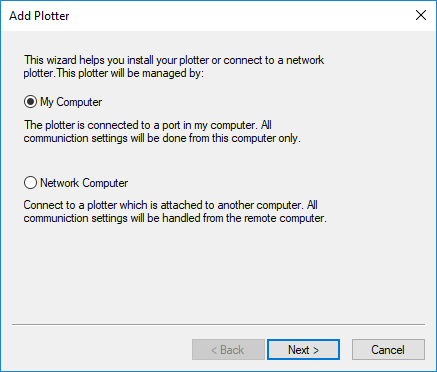
Select one of the following options:
Select
My Computer, if the plotter
is connected directly to your computer or connected directly to the
network (using a network card).
OR
Select
Network, if the plotter is
connected to another computer on the network and then continue with
the network setup directions.
Note:
This does not apply to HP plotters that are connected to the network
directly.
Click
Next when you are done.
The Communication Settings
dialog appears: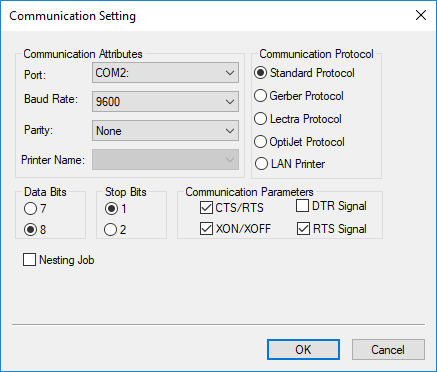
In the Communication Protocol area, select the Standard Protocol radio button and select the printer in the Printer Name drop-down list.
Click
Next.
The Local Plotter Setting dialog
appears: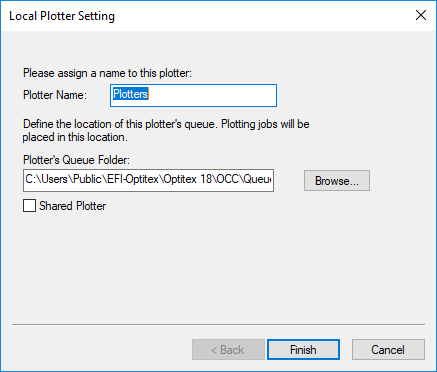
Enter a Plotter Name.
Select the Shared Plotter checkbox, if other computers in the network need to plot to the same plotter.
Click
Finish.
The Queue Wizard dialog appears
again with the newly defined plotter: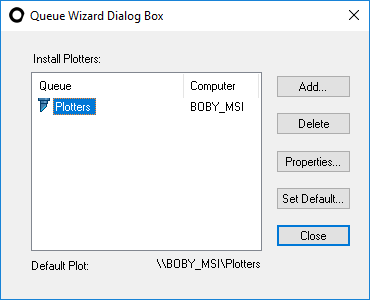
Click
Set Default and then close
the dialog.
Once defined correctly, you can see the jobs via the OCC: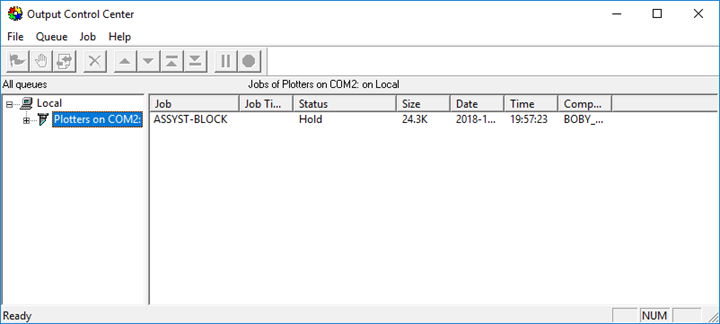
Plotter Cutter Format Setup
Driver Format: HPGL Plot-Tech
There are two ways to configure the Lectra Alys30 plotter: via the OCC or via the plotter itself.
Click on a link below to view more information:
To configure the Lectra Alys 30 plotter via the OCC:
In the PDS, go to File > Plot.
Setup
the Plot dialog as follows:
Go to File > Plotter/Cutter Setup.
Select
the General tab and define
the settings as follows:
The General tab should look
like this when you are done: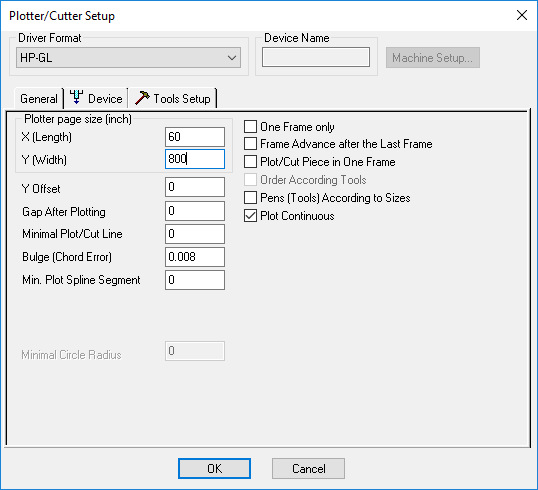
To view more information about a specific command, click on the BLUE
link below.
|
Command |
Value |
|
60 |
|
|
800 |
|
|
0 |
|
|
0 |
|
|
0 |
|
|
0.008 |
|
|
0.008 |
|
|
Unchecked |
|
|
Unchecked |
|
|
Unchecked |
|
|
Unchecked |
|
|
Checked |
Select the Device tab and define the settings
as follows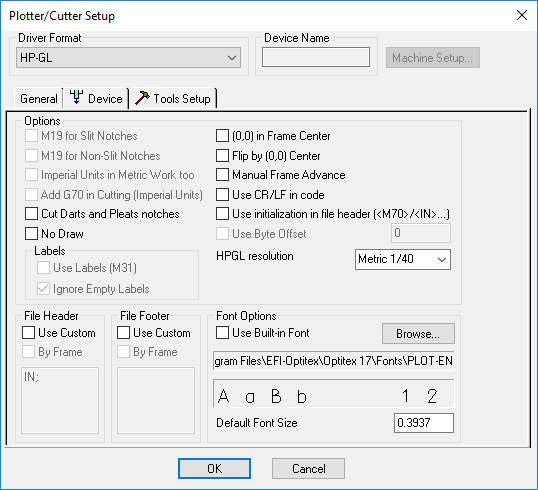
To view more information about a specific command, click on the BLUE
link below.
|
Command |
Value |
|
Unchecked |
|
|
Unchecked |
|
|
Unchecked |
|
|
Unchecked |
|
|
Unchecked |
|
|
Unchecked |
|
|
Unchecked |
|
|
Unchecked |
|
|
Unchecked |
|
|
Unchecked |
Select the ToolsSetup
tab and define the settings as follows: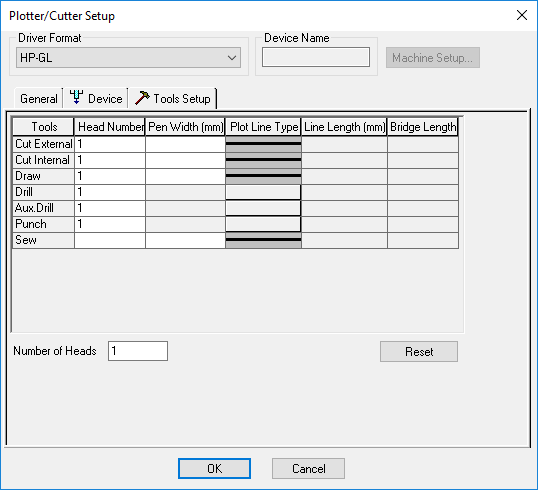
To configure via Plotter Technology:
Install the Alys Driver.
Connect
the Alys plotter with the PC.
Make sure you do not turn on the Alys plotter.
Insert
the Alys-JustPrint CD into the CDROM.
The installation process automatically starts.
Select
your installation language: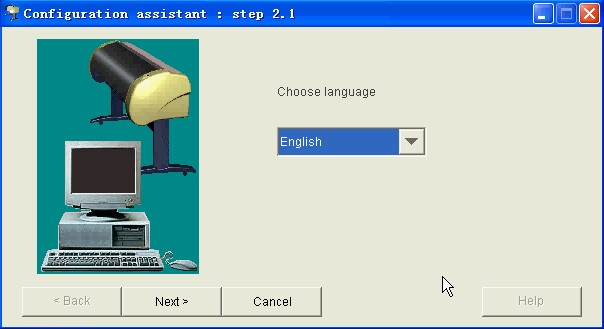
Follow
the Configuration assistant to finish installing the driver.
Once the driver is installed the connected device appears: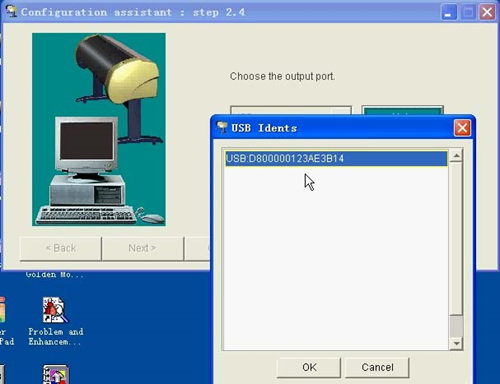
To
plot a file, right click on an HPGL file from the subdirectory to
which it was sent.
The HPGLPrint.exe is usually located
in the subdirectoryC:\Program
Files\Lectra Systemes\Printer\.
Select
the HPGL print program you want to use to open the file. 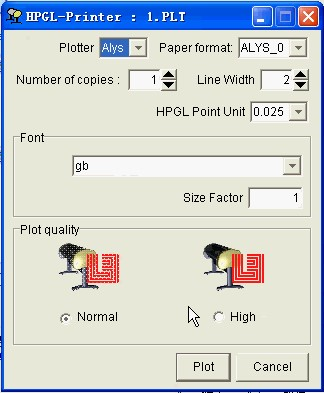
Click
Plot.
Once you click Plot, the HPGL
file is sent to the job queue as follows: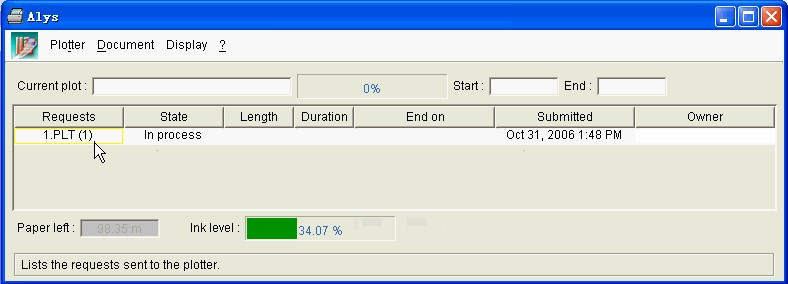
If you are not successful in plotting via the Alys driver, you may have to use the Alys Pilot Explorer instead.
![]() Configuring
via Alys Pilot Explorer
Configuring
via Alys Pilot Explorer
To use the Alys Pilot Explorer:
-
Install the Alys Pilot Explorer.
-
Click on the Alys Pilot Explorer icon.
-
Click Add.
The HPGL folder displays the available pieces/markers in HPGL format. -
Select the pieces/markers you want to print.
Make sure the Alys program is online and paper is loaded. -
Click Plot.
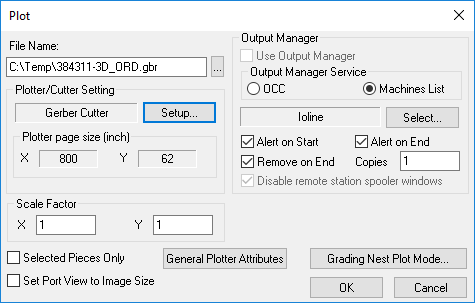
If you use Alys Pilot Explorer, you need to set the Lectra VigiPrint into CutFile mode and then configure the VigiPrint to work in RS 274D format. This format can only read Optitex GBR files, therefore it is recommended you use a Gerber Cutter plot file. -
Generate an Optitex standard Gerber file (.gbr):
-
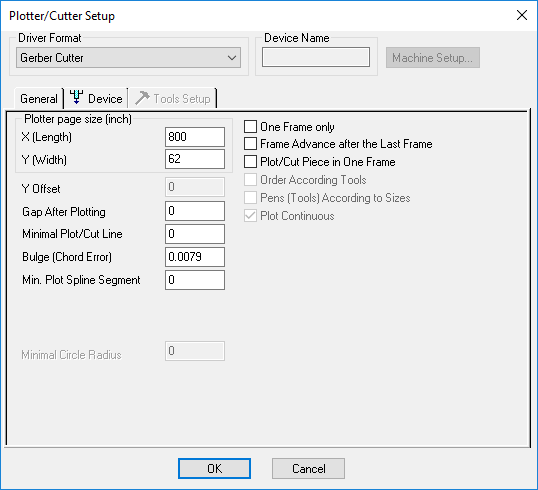
Setup the General tab as follows:
-
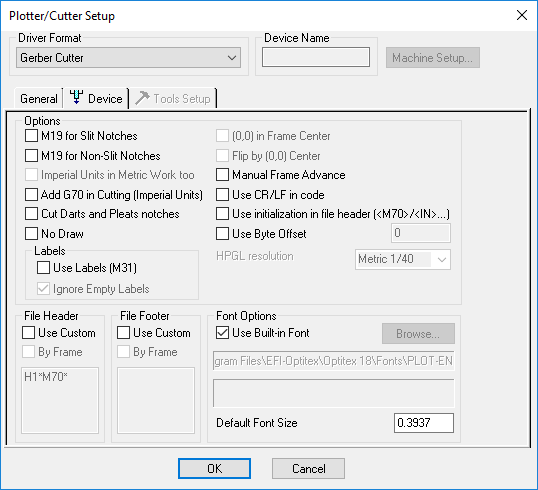
Setup the Device tab as follows:
-
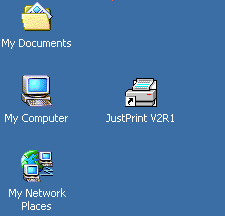
Double click on the JustPrint icon on your desktop:
-
From the main Justprint window make sure the file type is “Cutfiles” and then click Add:
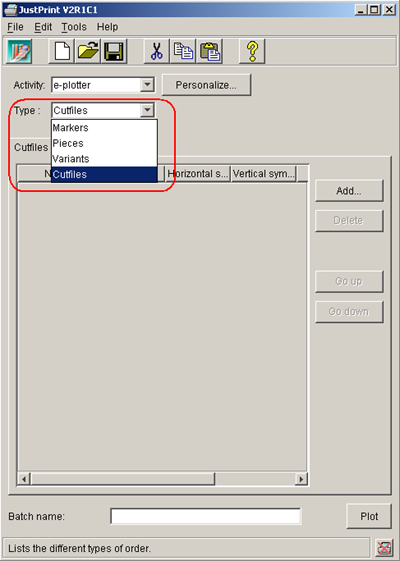
Note: If the “Cutfiles” type is not available in your Justprint version, the only way that you can drive your Lectra Alys with Optitex software is by using HP-GL files (double click) or by using the VigiPrint spooler. -
In the JustPrintbatch window select the RS274D radio button option, then browse to the directory where you saved your Optitex GBR files.
-
Choose the files you want to print, then click Add to batch and close this window.
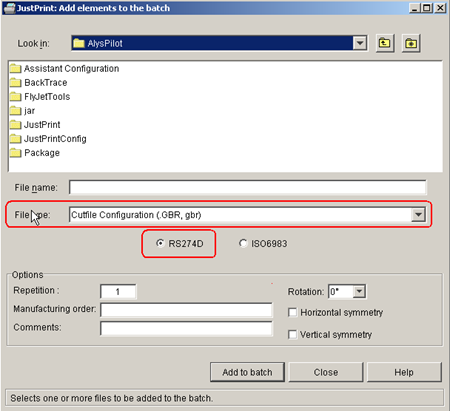
The JustPrint main window appears again: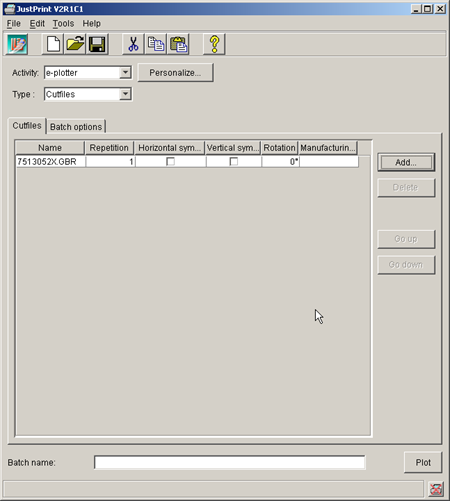
-
Select the GBR file that you just added and then click Plot.
 See also: Supported Optitex Plotters