Zund M800 Paper Cutter/Plotter
The following topic describes how to configure the ZUND M800 paper plotter/cutter.
The Plotter/Cutter Setup dialog is dynamic according to the plotter/cutter type you select; therefore you may not see all the available commands. For more detailed information about all the available commands see Plotter/ Cutter Setup.
You need to setup the plotter before you can define the plotter settings,![]() click here to see how to define the plotter.
click here to see how to define the plotter.
Open a file in the Marker or PDS.
Open the Plot dialog, go to File
> Plot (Ctrl+L).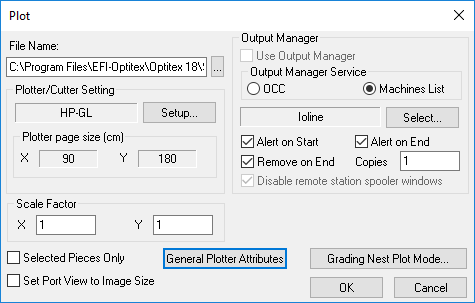
In the Output Manager Service area, select
the OCC radio button.
Note:
If you do not have a default Plotter/Cutter defined, a warning message
appears informing you: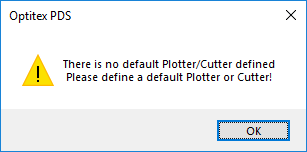
Click Ok.
The Queue Wizard Dialog Box
dialog appears: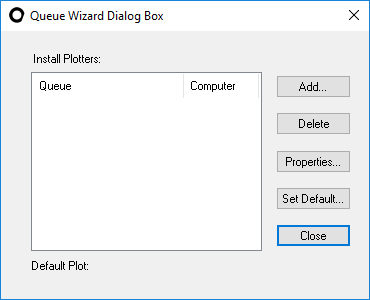
Click Add.
The Add Plotter dialog appears: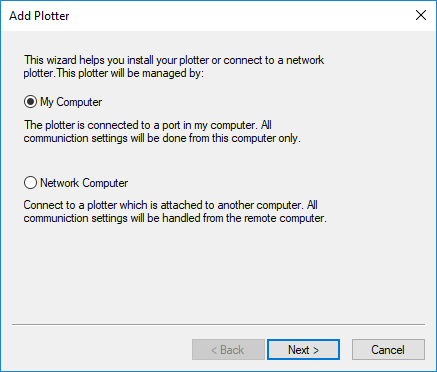
Select one of the following options:
Select
My Computer, if the plotter
is connected directly to your computer or connected directly to the
network (using a network card).
OR
Select
Network, if the plotter is
connected to another computer on the network and then continue with
the network setup directions.
Note:
This does not apply to HP plotters that are connected to the network
directly.
Click
Next when you are done.
The Communication Settings
dialog appears: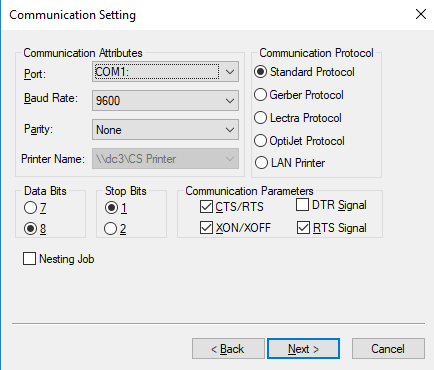
In the Communication Protocol area, select the Standard Protocol radio button and select the printer in the Printer Name drop-down list.
Click
Next.
The Local Plotter Setting dialog
appears: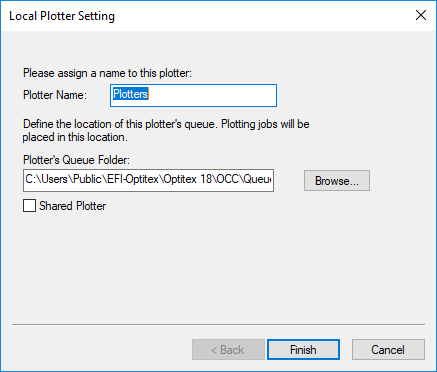
Enter a Plotter Name.
Select the Shared Plotter checkbox, if other computers in the network need to plot to the same plotter.
Click
Finish.
The Queue Wizard dialog appears
again with the newly defined plotter: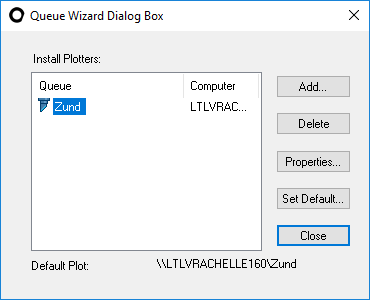
Click
Set Default and then close
the dialog.
Once defined correctly, you can see the jobs via the OCC: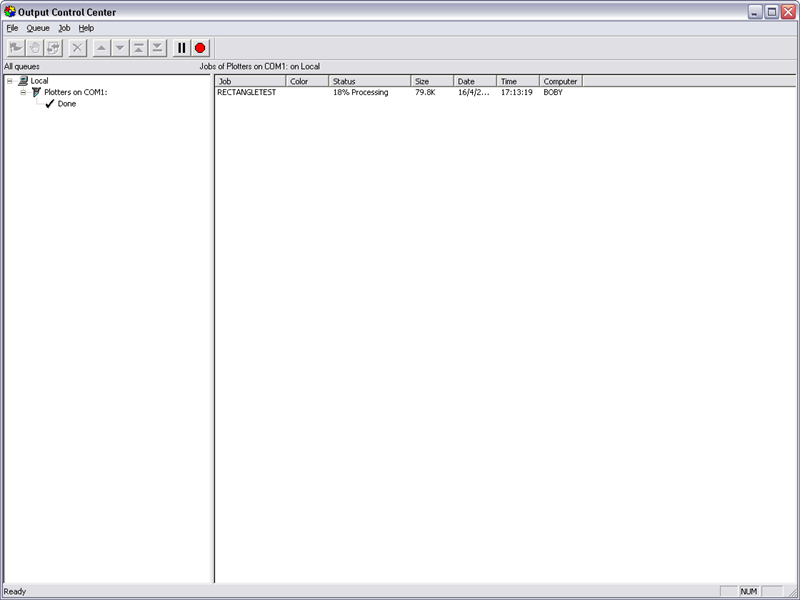
There are two ways to configure the Zund plotter/cutter: via the OCC or via the Zund Cut Center.
Click on a link below to view more information:
To configure the Zund plotter/cutter via the OCC:
In the PDS, go to File > Plot.
Setup
the Plot dialog as follows: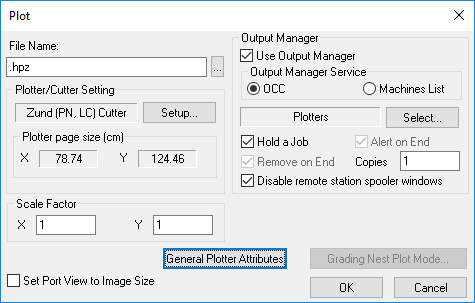
Go to File > Plotter/Cutter Setup.
Select
the General tab and define
the settings as follows:
The General tab should look
like this when you are done: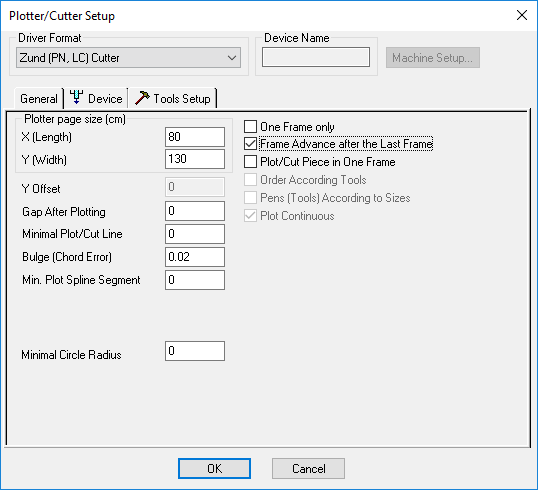
To view more information about a specific command, click on the BLUE
link below.
|
Command |
Value |
|
80 |
|
|
130 |
|
|
Optional |
|
|
0 |
|
|
0.0079 in or 0.02 cm |
|
|
0.02 cm |
|
|
Optional |
|
|
Unchecked |
|
|
Checked |
|
|
Unchecked |
Select the Device tab and define the settings
as follows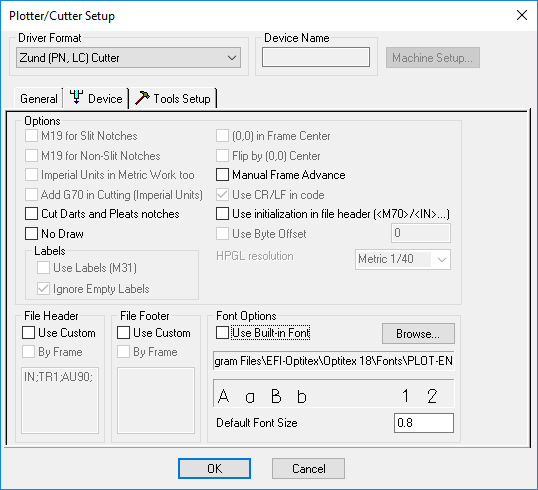
To view more information about a specific command, click on the BLUE
link below.
|
Command |
Value |
|
Unchecked |
|
|
Unchecked |
|
|
Unchecked |
|
|
Unchecked |
|
|
Unchecked |
|
|
Unchecked |
|
|
Unchecked |
Select the ToolsSetup
tab and define the settings as follows: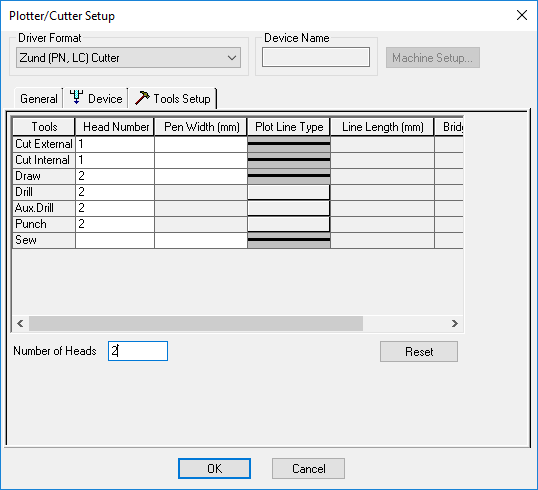
![]() Configuring
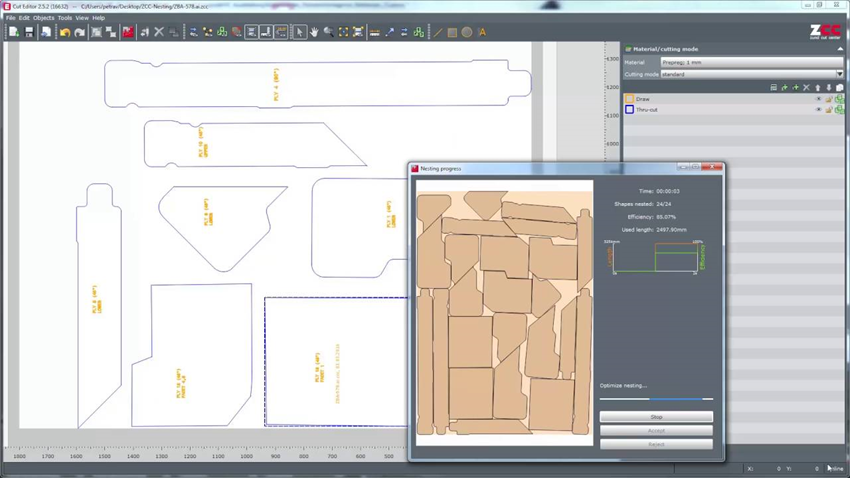
via Zund Cut Center
Configuring
via Zund Cut Center
You can create the Zund cutter/plotter file and then import to ZCC (Zund Cutter Center). For more information, contact your Zund representative.
 See also: Optitex Supported Paper Plotter Cutters