Mutoh Plotter
The following topic describes how to configure the specified plotter. This was created based on experience and knowledge and is a recommendation only.
The Plotter/Cutter Setup dialog is dynamic according to the plotter type you select; therefore you may not see all the available commands. For more detailed information about all the available commands see Plotter/ Cutter Setup.
Start Setup
-
Open a file on Marker or PDS.
-
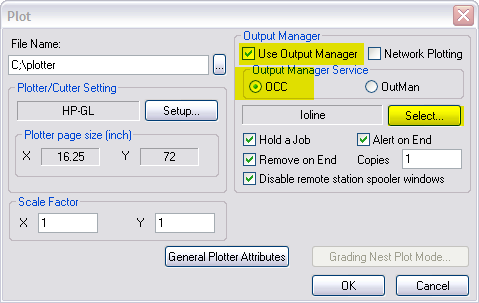
Open Plot dialog from File menu >> Plot (CTRL+L)
-
Select 'OCC'.
-
Select 'Use Output Manager'.
-
Click on the 'Select' Button.
Add A New Plotter Setting
-
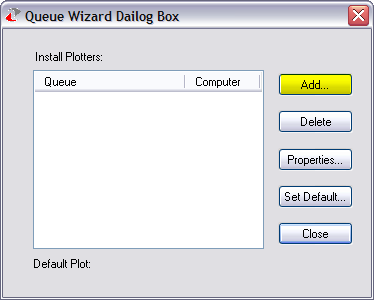
Click the 'Add' Button.
Network/Local Computer
-
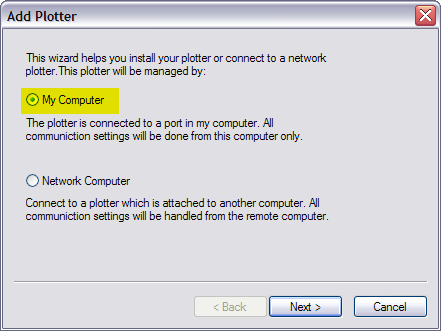
Select 'My Computer' if the Plotter is connected directly to your computer or connected directly to the network (using a network card).
-
Select 'Network Computer' if the plotter is connect to an 'other computer' on the network and continue with network setup instruction, This does not apply to HP plotters connected to the network directly.
-
Click 'Next'.
Plot Cut Communication Setup
-
Communication Parameters: have all the settings as described below
V = check X = uncheck
|
Communication_Attributes |
Communication Protocol:Standard |
||
|
Port: |
Usually Com1 or 2 |
|
|
|
Baud Rate: |
9600 |
||
|
Parity: |
none |
||
|
Printer Name: |
unchecked |
||
|
|
|||
|
Data Bits: |
Stop Bits: |
Communication Parameters |
|
|
8 |
1 |
CTS/RTS: checked |
DTR Signal: unchecked |
|
Xon/Xoff: unchecked |
DTS Signal: unchecked |
||
Name The Plotter Configuration
-
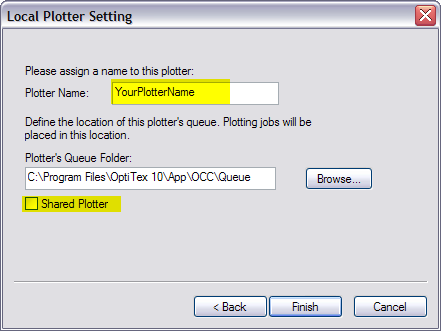
Give a name to your configuration.
-
Check 'Shared Plotter' - If other computers on the network need to plot to the same plotter.
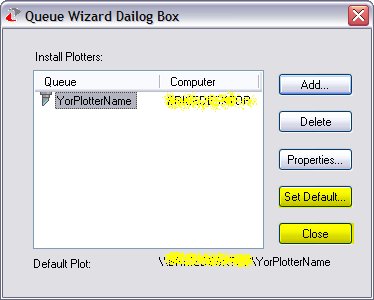
Queue Wizard Dialog Default
-
Set the plotter configuration as default and close the window
Plotter Cutter Format Setup
Driver Format: HPGL 2
General Tab
|
Command |
Value |
|
X (Length) |
Obsolete (Must not be zero) |
|
Y (Width) |
158 cm (62 in) |
|
Y Offset |
Optional |
|
Gap After Plotting |
Optional |
|
Minimal Plot/Cut Line |
0 |
|
Bulge (Chord Error) |
0.0079 in or 0.02 cm |
|
Overcut Length |
Optional |
|
Splicing Marker Origin And Size |
Optional |
|
One Frame Only |
Unchecked |
|
Frame Advance After Last Frame |
Checked |
|
Plot/Cut Piece in One Frame |
Unchecked |
|
Order According Tools |
Unchecked |
|
Pens (Tools) According to Sizes |
Unchecked |
|
Plot Continuous |
Checked |
Device Tab
|
Field |
Description |
|
M19_For_Slit_Notch |
Unchecked |
|
M19 for Non-Slit Notch |
Unchecked |
|
Use Inch Unit |
Unchecked |
|
Cut Darts |
Unchecked |
|
No Draw |
Unchecked |
|
File Header |
Unchecked |
|
Use Built-in Font |
Unchecked |
|
(0,0) in Frame Center |
Unchecked |
|
Manual Frame Advance |
Unchecked |
|
Use CR/LF in Code |
Unchecked |
|
Use Initialization in File Header (<M70>/<IN>...) |
Unchecked |
|
Use Byte Offset |
Unchecked |
|
File Footer |
Unchecked |
Tools Setup Tab
Finish The Setup
-
Click the browse button to set the plot file directory.
-
Check 'Hold A Job' if you want to confirm each job sent to OCC manually.(This does not apply) to LAN Printers
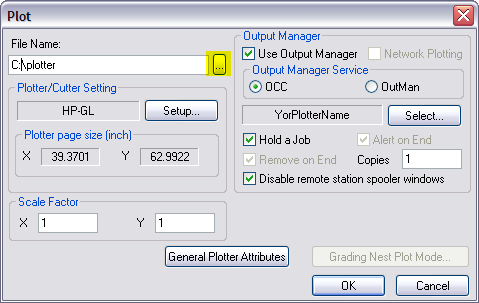
-
Click 'OK' to test the plotter setting or 'Cancel' to exit.
 See also: Optitex Supported Paper Plotter Cutters