Adding Style Files
This is the first step in the process of creating a cut order. In this step, you can add a style file, which is your input file, to your cut order. You can define sizes, style sets, and setup the input and output directories.
Note: Before you add a style file, make sure you assign a fabric to your style file and/or style sets via the PDS. CutPlan cannot work with files without assigned fabrics.
To add a style file:
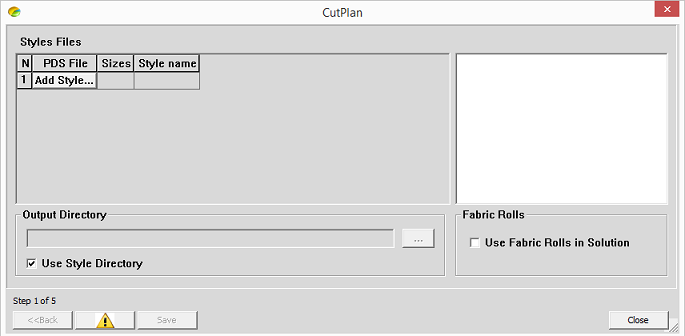
The Style Files dialog appears:

-
Click Add Style.
-
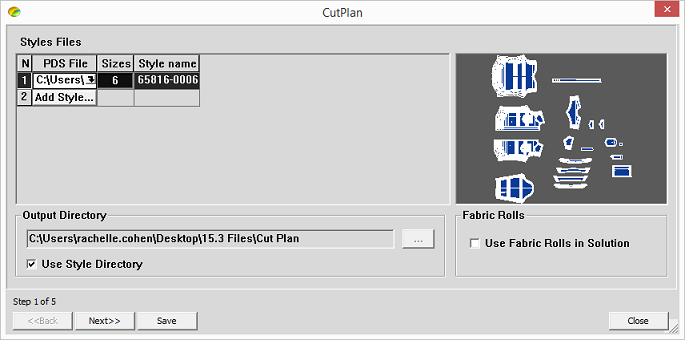
Select the PDS file you are adding.
Note: If the PDS file does not have a fabric type defined, you will receive an error message.
-
Click Add Style to add more files.
-
Repeat this step for all files you are adding.

The style file is according to how it was defined in the PDS, this includes grading and style sets.
Note: If you created a style set and it does not have material assigned to it, you will receive an error message. For more information about style sets, see Style Set.
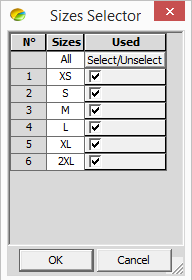
- To change the number of sizes defined per style, click inside the Sizes column.
The Sizes Selector dialog appears:

-
Select the checkboxes of the sizes you want to be included, and click OK when done.
-
To change the output directory, first select the Use Style Directory checkbox.
The browse button is enabled.
-
In the Output Directory field, browse to the desired location.
-
Click Next when you are done.