Style Set
Icon & Location
-

-
Menu: View
-
Toolbar: Views
Style set is a revolutionary approach for handling several styles in a single PDS file. You can use style sets in the following use cases.
-
A file has a shirt (Front and Back piece) a long sleeve and a short sleeve. In this case two style sets can be created: Summer – Short sleeve, Front, Back; Winter- Long sleeve, Front, Back.
-
A piece that looks exactly the same needs to be cut once in leather and twice in cotton. In that case the same pieces will be added twice to the same Style Set, but with different materials and different quantities. Later, if some editing needs to be done on the piece, it will automatically be fixed on all the piece's instances.
This approach leads us to two simple definitions:
Geometry Piece
Refers to the piece as it appears on the Working Area.
Style Set Piece
Refers to the instance of the Geometry Piece. Style Set Piece actually just holds some different attributes on the Geometry Piece, such as name, code, buffer etc'.
When loading a style file in Optitex Marker, a style set can be chosen (or no style set, meaning all pieces in the style will be loaded).
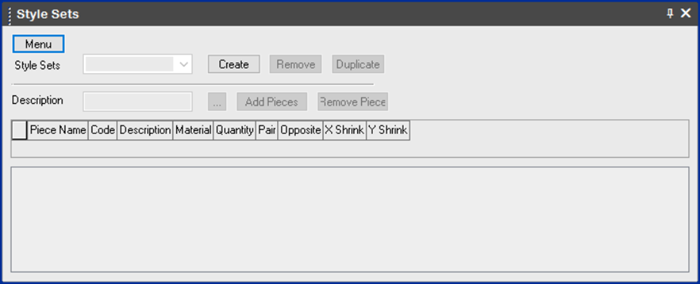
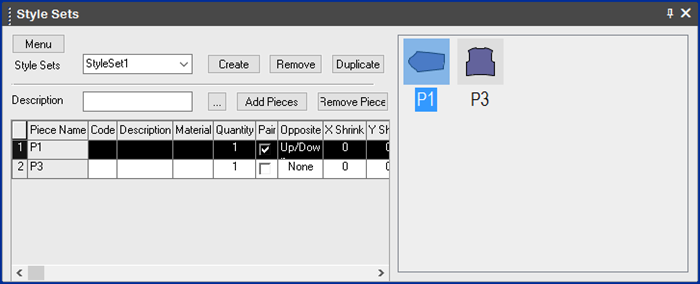
This section will cover the basic functionality of the Style Set pane.
View the fields as follows:
|
Field |
Description |
|
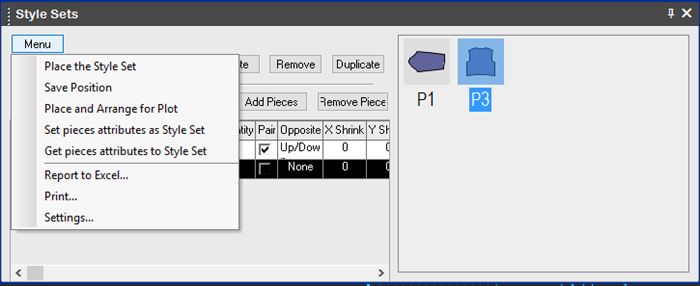
Menu |
|
|
Place the Style Set
|
Places the selected style set in the pattern
|
|
Save Position |
Saves the position of the style set in the pattern. |
|
Place and Arrange for Plot |
Places the style set and arranges itself for plotting:
|
|
Set Piece Attributes as Style Set |
Sets the piece as the style set. |
|
Get Piece Attributes as Style Set |
Retrieves the piece's attributes and applies to the style set. |
|
Report to Excel |
Creates a report in Excel. |
|
|
Creates a PDF. |
|
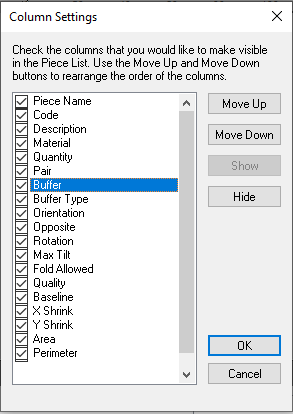
Settings |
Allows you to define the column settings:
|
|
Create |
Allows you to add endless number of style sets. |
|
Remove |
Deletes the selected style set. |
|
Duplicate |
Duplicates the selected style sets. The duplicated style set will be named '@StyleSet'. |
|
Description |
Click
the |
|
Add Pieces |
Select pieces on the Working Area, then click Add Piece, the piece will be added to the selected Style set. Remember – every piece can be added endless times to as many styles wanted. All the marker attributes can be set on every piece.
|
|
Remove Pieces |
Deletes the selected pieces from the style set. Note: This will not delete the geometry piece. |
|
Table |
|
|
Piece Name |
Displays the name of the selected piece. |
|
Code |
Displays the code of the selected piece. You can select a code from the drop-down list. |
|
Description |
Displays a description of the selected piece. Click the down arrow to add a description if doesn't exist. |
|
Material |
Displays the material of the selected piece. You can select a material from the drop-down list. |
|
Quantity |
Displays the quantity of pieces. You can enter a quantity in the field. |
|
Pair |
If selected, indicates the selected piece is a paired piece. |
|
Opposite |
Displays the direction of the selected piece. You can select a different direction from the drop-down list. |
|
If you require shrinkage in the style set, for example if the material is Lycra. Enter the X amount of shrinkage you require for the selected piece. Note: The shrinkage information will be imported into the Marker with the style set. |
|
|
If you require shrinkage in the style set, for example if the material is Lycra. Enter the Y amount of shrinkage you require for the selected piece. Note: The shrinkage information will be imported into the Marker with the style set. |
|
|
Area |
Displays the area of the selected piece, in square meters. |
|
Perimeter |
Displays the perimeter of the selected piece, according to the unit. |
 button to add a description of the style
set (not a description of the pieces). This description will appear
only in the PDS.
button to add a description of the style
set (not a description of the pieces). This description will appear
only in the PDS.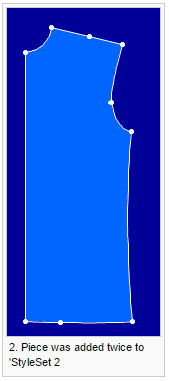
Style Sets and 3D
-
With Style Sets you are able to create a set specifically for 3D uses, a set which contains only the pieces which participates in the 3D simulation process and with the quantities needed to create a 3D model of the product. You no longer have to save 3D version of the style file.
-
Only the current Style Set will be included in the 3D actions (Place Cloth, Simulate Draping).
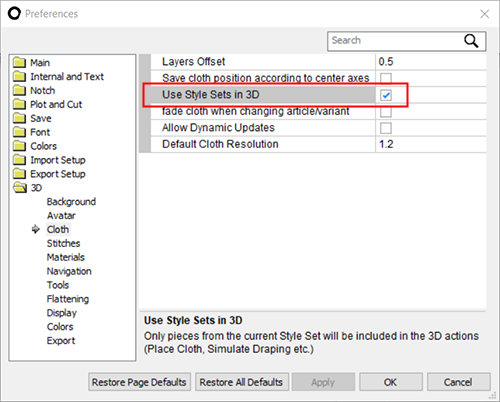
To use the active style set for 3D, do the following:
-
Open PDS Preferences->3D->Cloth
-
Select "Use Style Set in 3D"
-
Click the "Apply" button.
-
Click the "OK" button to close the preferences dialog.
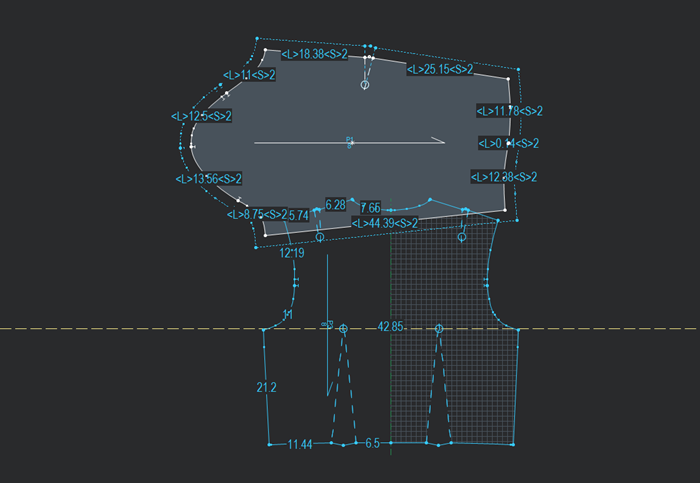
Viewing pieces of the active Style Set only in the 2D board
Click the Menu button in the Style Set dialog, then select "Place the Style Set"
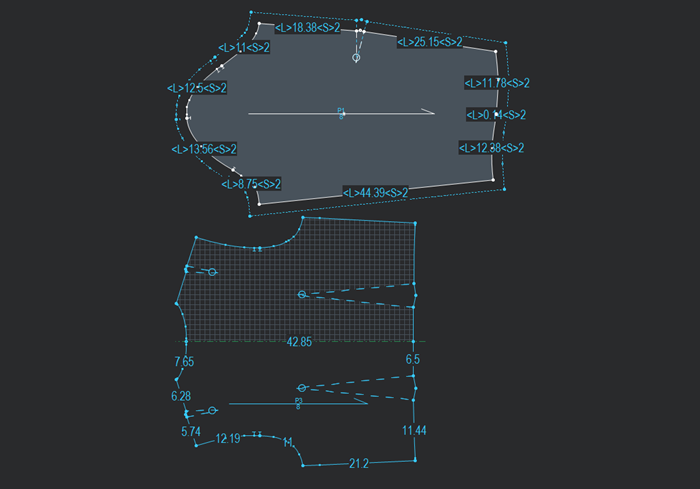
Selection in the Style Set dialog
Click on the piece name from the list to select or click on the piece thumbnail. Hold Shift or Control for multi selection. the pieces will be highlighted on the Working Area.
 Note:
Note:
-
You can move the border between pieces window and description in the Style Set dialog using left/right keyboard arrows.
-
As of version 21.4 style sets are listed in alphabetical order