Using OCC on the Network
The Output Control Center (OCC) is a utility which manages plot files as well as queues on local and network computers.
General Configuration Information
OCC network plotting is different from Outman network plotting. The OCC spooler uses a different ini file for each workstation, while the Outman spooler uses only one ini file which all remote workstations use.
Connecting the OCC Spooler to a Network
The first step is to create the queue at the computer connected to the plotter and share it. Then, the relevant workstations can be directed to it via the network.
Creating a Local Queue
Create a local queue (on the computer that is connected to the plotter).
Using PDS or Marker, verify that you have some pieces on the work area.
Go to File
> Plot.
The Plot dialog opens.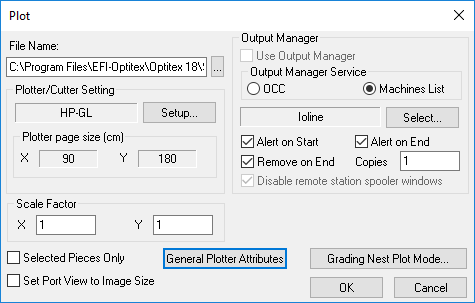
Select the Use
Output Manager checkbox and the OCC radio button.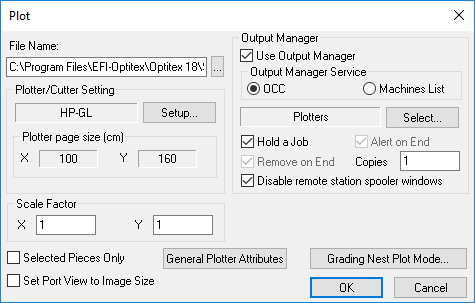
In the Output
Manager area, click the
Select button.
The Queue Wizard Dialog Box opens.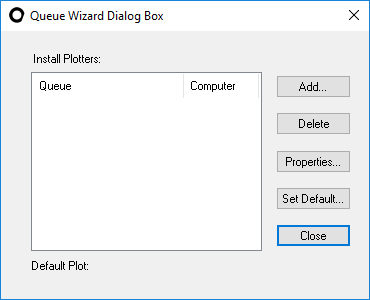
Click
the Add button.
The Add Plotter dialog opens: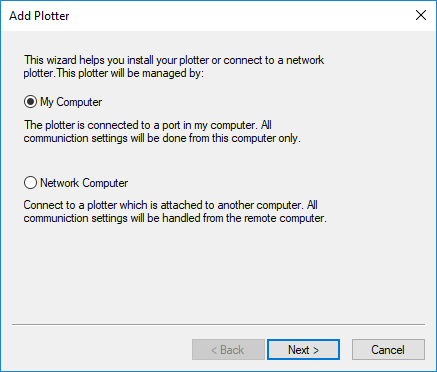
Select My Computer,
then click Next.
The Communication Setting dialog opens: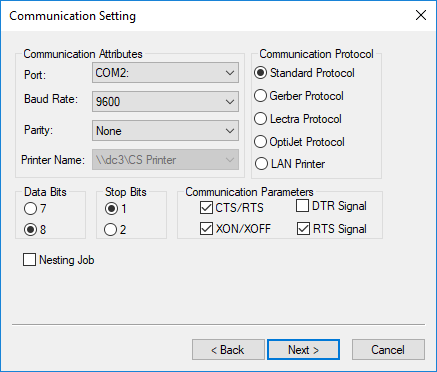
In the Communication
Setting dialog, select the required parameters:
The OCC Spooler supports five different communication protocol types:
Standard protocol (RS232).
Gerber protocol (Gerber ACCUPLOT).
Lectra protocol, (Lectra E32 & E33).
OptiJet protocol.
Lectra Flypen protocol.
Select the type of
protocol you require, then click Next
to continue.
The Local Plotter Setting dialog opens displaying the Plotter
Name and the default path to the queue folder: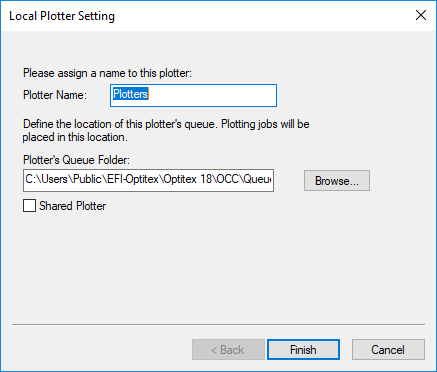
You can change the plotter name if you would like.
Select the Shared Plotter checkbox, and then click Finish.
Folder Sharing Information
Queue folder sharing is crucial for OCC network plotting to function.
To allow the queue creation process to complete the sharing automatically:
-
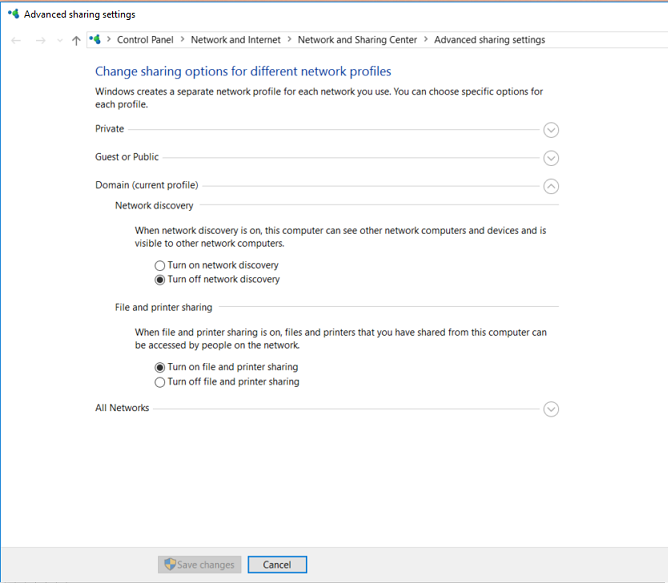
Go to Control Panel > Network and Sharing Center > Advanced Sharing Settings:
-
Under Network Discovery, select Turn on network discovery.
-
Under File and printer sharing, select Turn on file and printer sharing.
-
Under Public folder sharing select Turn on sharing so anyone with network access can read and write files in the Public folders.
-
Click Save Changes.
Note:In windows 10, the automatic sharing will not work. If this is the case, the sharing of the queue folder should be done manually.
Once done, verify that the folder is indeed shared properly:
-
The sharing should allow the relevant parties full read/ write permissions.
-
Make sure this is allowed both by sharing permissions as well as by file-system permissions.
Manual Sharing
In order to share the OCC queue folder with other users/computers you need to handle two specific folders. Verify both folders are shared, as mentioned in the previous section.
You need to share the following folders:
-
The OCC main folder - to allow access to the OCC.ini file. Starting from version 15.3, this folder is located here: C:\Users\Public\Optitex\Occ
-
The second folder is added automatically when creating a new plotter queue. Its name can be determined during the creation of the new queue. This new folder is located under C:\Users\Public\Optitex\Occ\Queue.
Creating a Remote Queue
After the main plotter queue is ready, shared and accessible on the network, proceed with creating the queues on the remote workstations.
-
Using PDS or Marker, verify that you have pieces in the work area.
-
Go to File > Plot.
The Plot dialog opens.
-
Select the Use Output Manager checkbox and the OCC radio button.
-
In the Output Manager area, click the Select button.

The Queue Wizard Dialog Box opens.
-
Click the Add button.
The Add Plotter dialog opens: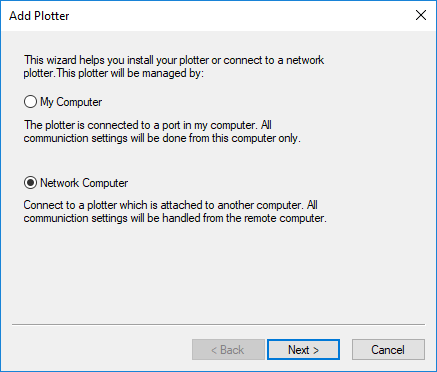
-
Select Network Computer and then click Next.
The Net Work Plotter dialog opens: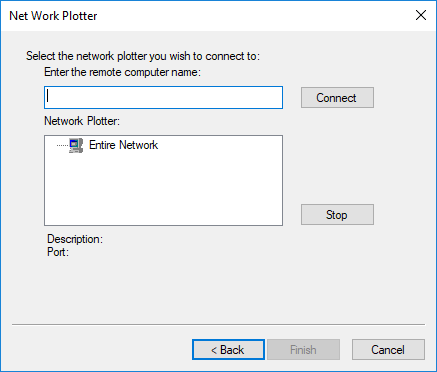
-
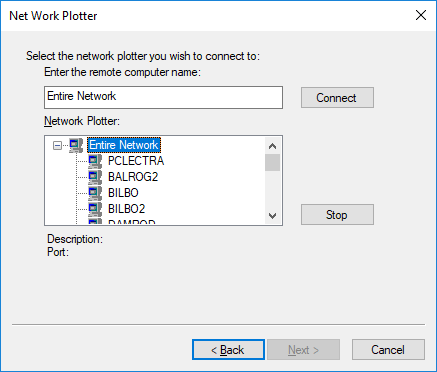
Double click the Entire Network icon to display available network computers:
-
Scroll down and select the computer with the shared network queue.
-
Double-click on it to open the shared queue, then click Connect.