Digitizing
Location
-

-
Menu:File > Digitizer > Digitize
To use Digitizing:
-
Invoke Digitize.
-
Click on the maximize button in order to have a bigger Working Area.
-
Digitize contour, internal contours, notch, button and baseline.
-
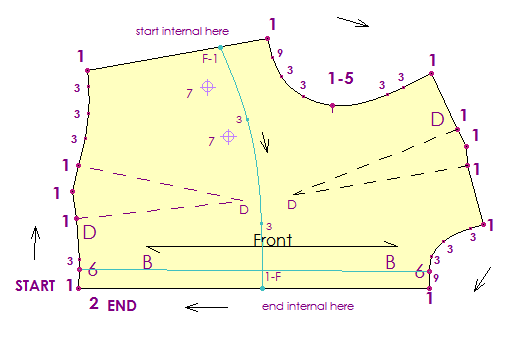
Outside = Start at 1 corner (In picture below, I start at lower left hand corner) to select. Start with pressing the 1 button on the cursor (grade, non-curve point). Continue to digitize the perimeter in a clockwise direction, select 3 for Curve points, 1 for Grade points (usually Corners and Notches), and 1-5 for Graded Notch.
-
Darts – After 3 external dart points are in (1) or after outside Contour is complete then Click D on 2 points of the dart. i.e. first dart leg, dart tip.
-
Notches – Click on point for notch, select 1-5 (Grade Point notch) or 9-5 (non-grade point, non-curve notch) or 3-5 (non-grade, curve point notch)
-
REMEMBER! 1=graded, non curve point. 3=non-grade, curve point. 9=non-grade, non-curve point. 1-5=grade, non curve point notch.
-
End in point 2 about 1 inch from beginning point
-
-
Inside = Digitize all the internals
-
Darts – Digitize 2 points to make dart, D on dart point leg, dart tip (always go clockwise)
-
Drill Hole - 7 on drill hole
-
Circles - 8 on center of circle, 8 on outside edge of circle
-
2- Point Straight internal line - 6-6 on straight line.
-
Internal line digitize - F to begin internal digitize mode – then repeat using same numbers as external contour (ex. 1-3-3-3-9-3-3-1, etc…) on any internal line line. F to end internal mode.
-
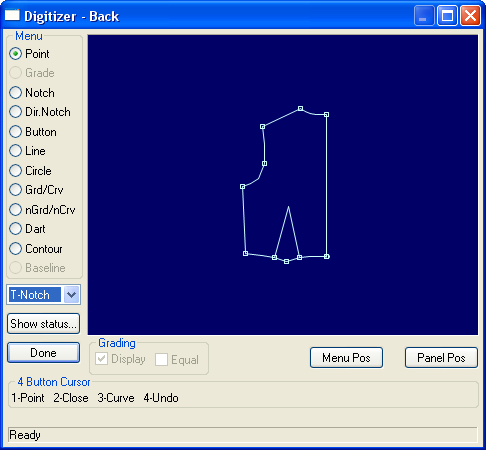
Example of Digitizing a Pattern Piece
-
Baseline = Digitize the baseline - B at the beginning and end of the baseline or any straight edge on the pattern. (First B selected will orient your piece on the screen to the left side.) this will also complete the piece, move to next piece and begin from Step 4.
-
Go to the next piece. Repeat steps 4-6. Return to computer and Click on the “Done” button in the Digitizer Window. The screen will close and the pieces will appear on the piece bar above the Working Area. Double Click on first piece, name it, click APPLY, click on the next piece, name it, Click Apply, etc…
-
Save file. Save often. Use File / File Utilities / View History to keep track of changes.
Digitize Definitions:
|
Cursor Button |
Function |
|---|---|
|
1 |
Grading point on a line. Start digitizing with this point |
|
2 |
Close Perimeter automatically from the last digitized point to first one. |
|
3 |
Curve point (simple and not graded) |
|
4 |
Graded. Assign the last Grading Rule to the currently selected point |
|
5 |
Notch point. Digitize point type then notch. |
|
6 |
Line. Digitize two points |
|
7 |
Button. Click in desired place |
|
8 |
Circle. Center and radius |
|
9 |
Non grading point on a line |
|
0 |
Grading point on a curve |
|
A |
Again apply last the previously entered rule number |
|
B |
Base Line (Grain Line) Digitize from left to right (clockwise) |
|
C |
Undo |
|
D |
Dart, used if the dart points already exist on the perimeter line |
|
E |
Rule. It is also possible to enter a rule from the Digitizer key pad |
|
F |
Contour- internal with multiple points |
Digitize Graded Pieces
-
Start a new style.
-
create a rectangle.
-
Add the sizes of style.
-
Place Nested Pattern on Digitizer
-
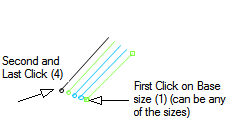
Digitizer contours same as mentioned above. However, at grade point (1), click also on the smallest through largest size (4).
-
For the best grading results, place a grade point on all corners, notches and deep curved lines to help control the growth and shape of the curve. Grade Points can be added and deleted later.
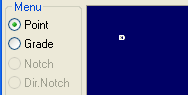
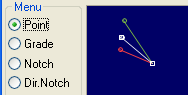
3. First point (1) clicked
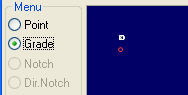
4. Smallest point added (4)

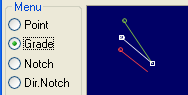
5. Largest point added (4)
6. Second point
7.
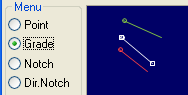
8. Sizes added also to the second point. Process should be continued until all the points are digitized
Digitize Equal Grading
When digitizing an even grading value (same growth on all sizes), you can use the Even check box to spread the grading automatically for all sizes, this will require you to digitize the base size point first (with number 1) and then the biggest size point only (with number 4). This is similar to the Regrade By Break Size.
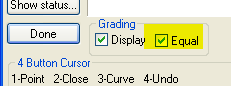
Even Check Box
9. clicks for each grading point
 See also: Optitex Supported Digitizers