Add Tape Measure
The Add Tape Measure tool allows you to measure between two points in the 3D window.
Note: Starting from version O/18 you can no longer modify the avatar's measurements in the Model Properties dialog, rather you have to modify the Avatar via the Avatar Editor. For more information, see Avatar Editor. You can still use the Add Tape Measure tool for viewing purposes; however, you will not be able to replace measures.
Icon & Location
-

-
Toolbar: 3D
To use the Tape Measure tool:
-
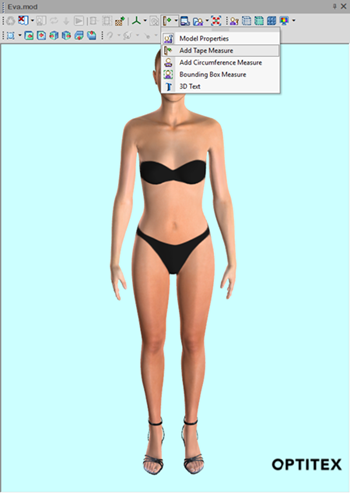
From the 3D Toolbar, click on the Model Properties icon and from the drop-down list, select Add Tape Measure as follows:
The cursor now changes to indicate a tape measure tool is invoked.
-
To take a measurement using this tool, you need to click on 2 points on the model in the 3D Model window.
-
Click on the first point and drag the mouse cursor to another point.
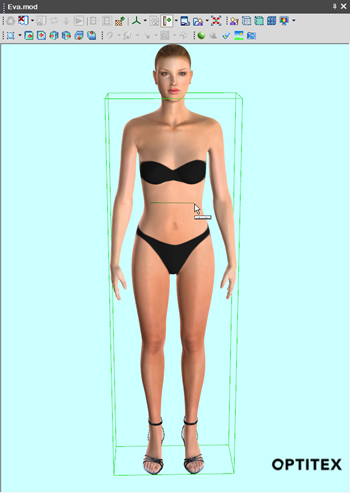
Once you make the second click, a measurement is taken and its value is displayed.
-
Hold the SHIFT key and click on the measure line to invoke the Measure Tool dialog.
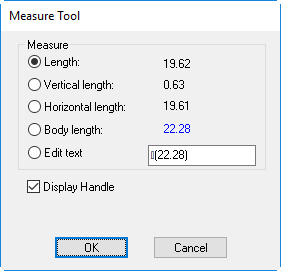
The Measure Tool dialog displays the different measurements taken by the Tape Measure Tool and allows you to choose to which measurements you want to refer. -
Click Ok when you are done.