Loading a Model
You can use the Load Model command when you want to load a 3D model into the 3D Model window.
The file can be in several file formats and you can import files from other 3D systems as well.
 Note: Starting from version O/18, all avatars load with sizes, final poses,
accessories/add-ons that were predefined when creating the avatar. If
you want to modify sizes, poses, etc. you have to do so using the Avatar
Editor and then load the file again. For more information, see Avatar
Editor.
Note: Starting from version O/18, all avatars load with sizes, final poses,
accessories/add-ons that were predefined when creating the avatar. If
you want to modify sizes, poses, etc. you have to do so using the Avatar
Editor and then load the file again. For more information, see Avatar
Editor.
Icon & Location
-

-
Toolbar: 3D
To Load a 3D Model:
-
Click on the Load Model icon in the 3D toolbar.
The Open dialog is displayed: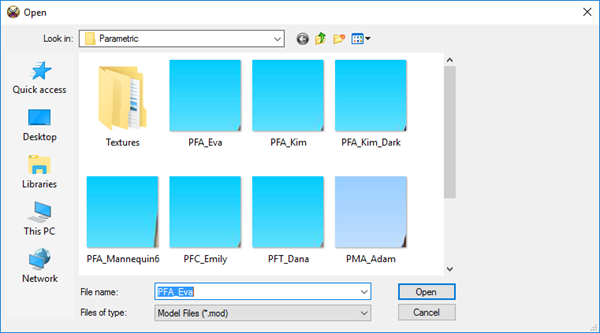
-
From the Files of Type drop-down list, select the type of file you are loading.
The following types are supported:
Model Files (*.mod), Cloth Files (*.clt), 3D Studio Max Files (*.3ds), VRML2.0 Files (*.wrl), AutoCAD Files (*.dxf), PLY Files (*.ply), Body Morph Files (*.mrp), Measure Files (*.ord), Biovision BVH Files (*.bvh), OBJ Files (*.obj).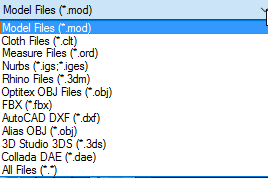 .
.
If you are importing an OBJ file, click
here
click
here
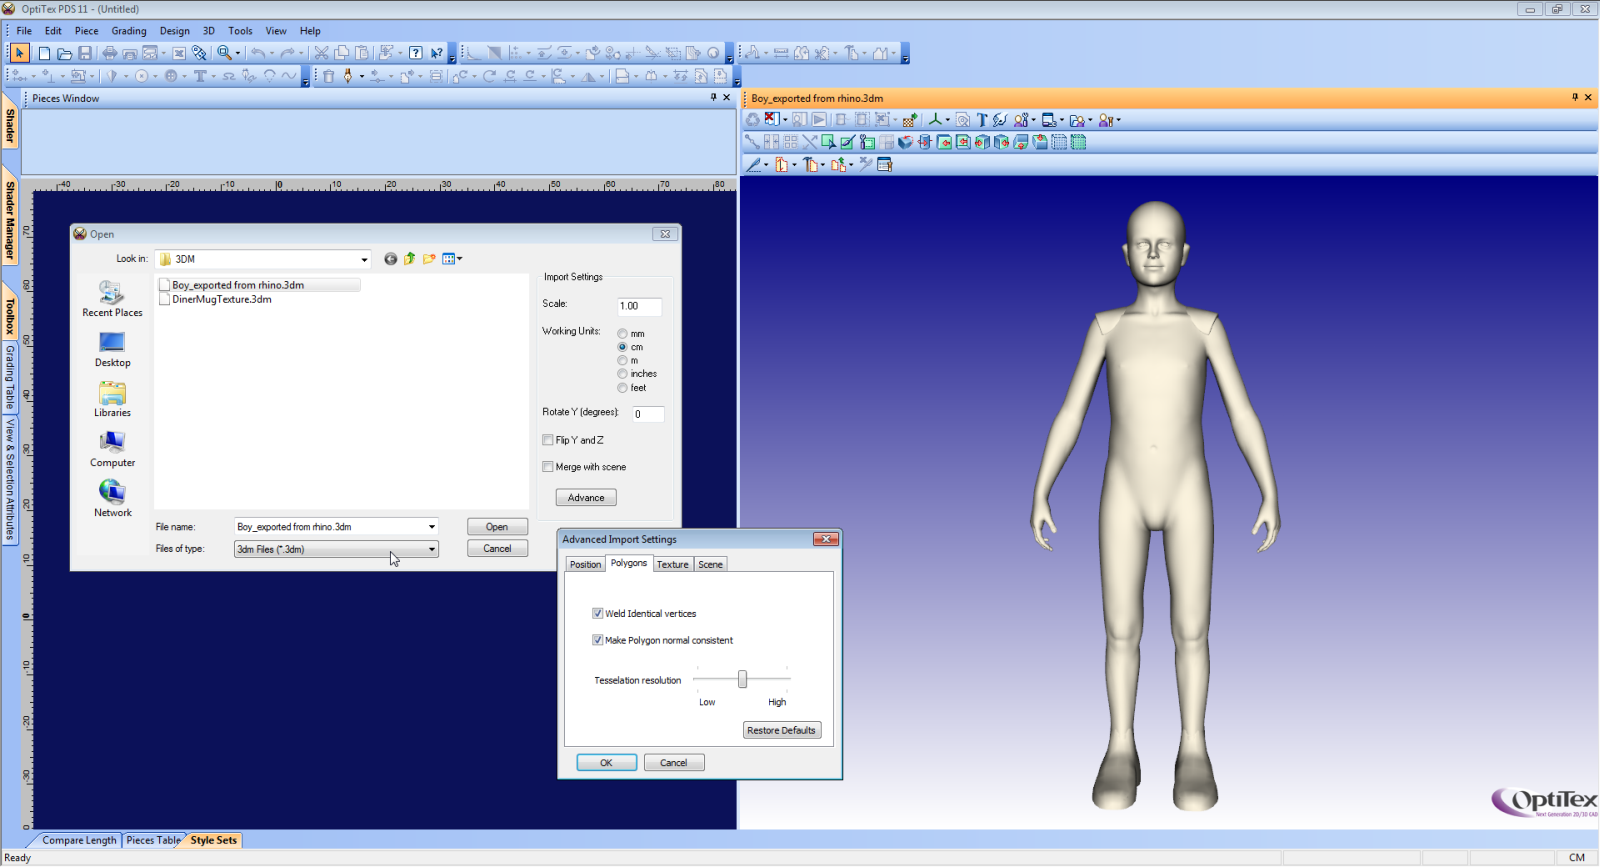
If you are importing a 3DM file,click
here
Once you select a File Type, settings may appear on the right-hand side of the dialog. These settings are dynamic according to the type of file you are loading.
|
Setting |
Description |
|
Scale |
Change the scale factor. This is used if the imported model is too big or small and it depends on the system it was generated from |
|
Working Units |
Set the working units in which the fields were exported. |
|
Rotate Y (Degrees) |
Rotate the model in the Y direction. |
|
Flip Y And Z |
Flips the Y and Z axis. |
|
Position |
Select to define a static distance or enter a defined direction and pivot point. |
|
Merge With Scene |
Merge the imported model to the scene. |
|
More Options |
Define advanced import settings |
|
Position |
Centered: Places the model in the center of the 3D environment Place on Floor: Places the model with the floor displayed Offset X,Y,Z: defines the x,y,z offset of the 3D model |
|
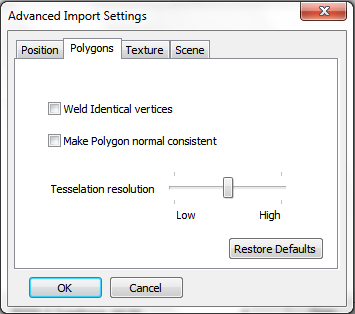
Polygons |
|
|
Tessellation Resolution
|
Set the tessellation resolution of a 3D file. This is used when importing files with high number of vertices that slows down the system tremendously. 'Restore Defaults' set the resolution to it's original value. This slider option is designed to meet the needs in which performance is more important than mesh quality and vice-versa. Its calculation will depend upon:
|
-
Select the model, and then click Open.
 See also:3D Toolbar