Creating a Puffy Garment
The Puffy option in 3D Properties allows you to create a garment such as a winter jacket, vest, etc. A Puffy garment is defined by two layers, the inner layer and the outer layer with internal stitches in between the layers. To define puffiness you have to assign each piece in the inner layer to its partner piece (in the outer layer) and then define the amount of puffiness you need.
The example used in the process below was prepared in advance with defined layers and stitches.
To create a puffy garment:
-
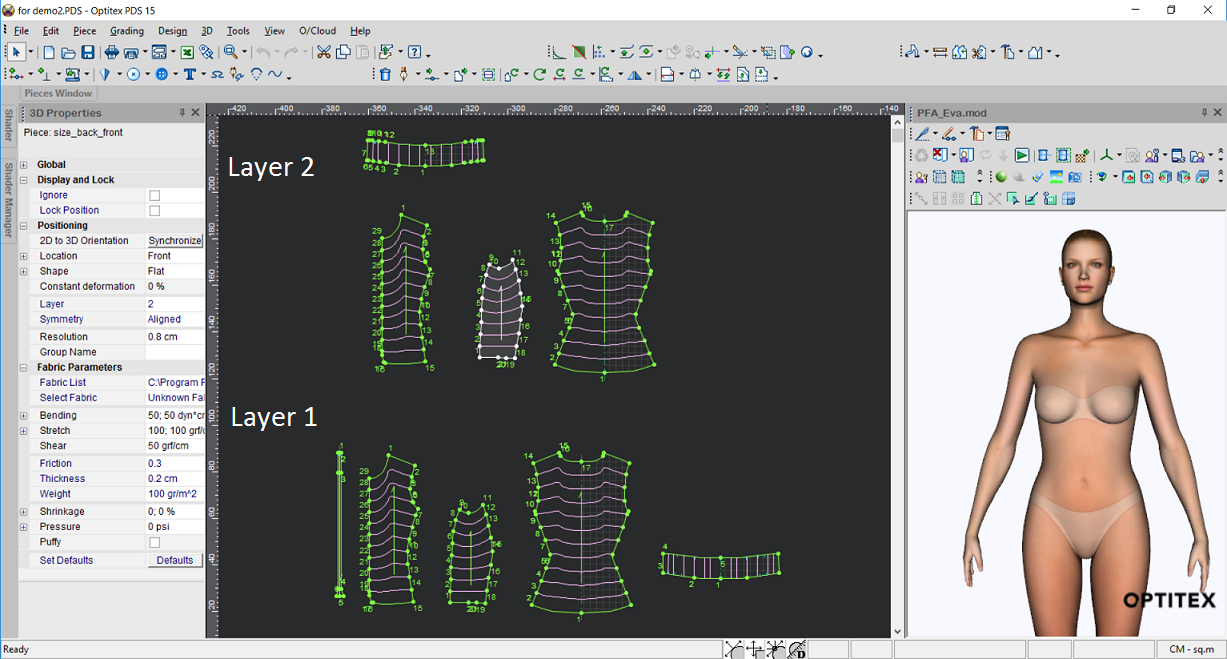
Define the two different layers (if you haven't done so, copy and paste all the pieces and define the new pieces as another layer) like the example below:
-
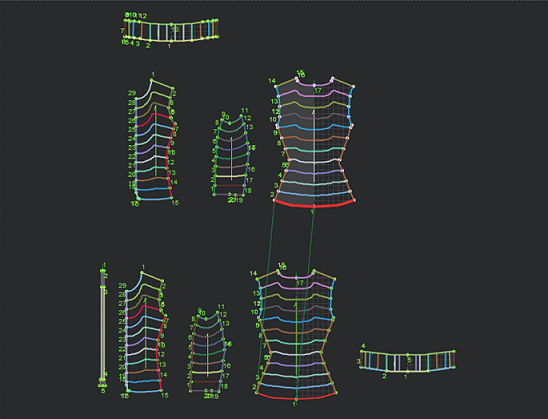
Create stitches between all your pieces in the first layer.

-
Create stitches between layer 1 and layer 2.
Notes:
-
You do not need to create stitches between pieces in the second layer, only stitches between the inner and outer pieces.
-
You do not have to define the layer as "layer 2", once you match the pieces between the inner and outer layers, the layer and the piece positioning in 3D will be defined automatically for you depending on the position of layer 1.
-
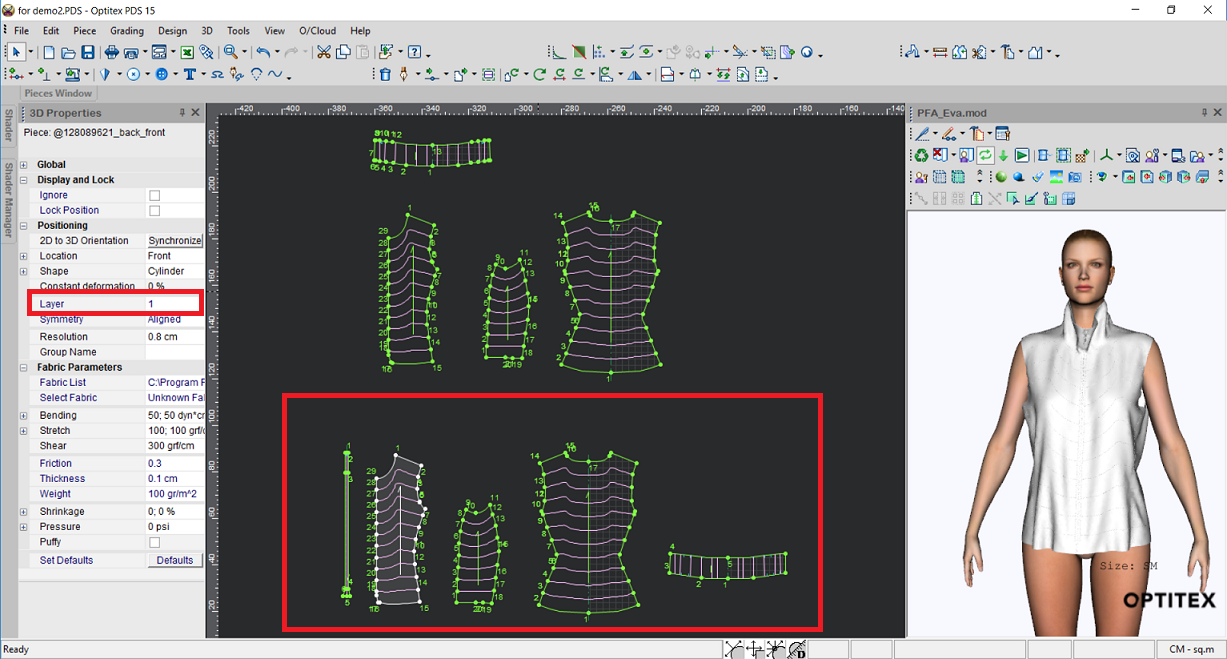
Select all the pieces in Layer 2 and then select the Ignore checkbox (to make sure they are not included when placing the cloth in 3D).

-
Place your cloth, position and then simulate the first layer (make sure you get the required simulation results):
-
Select all the pieces in Layer 2 and clear the Ignore checkbox.
-
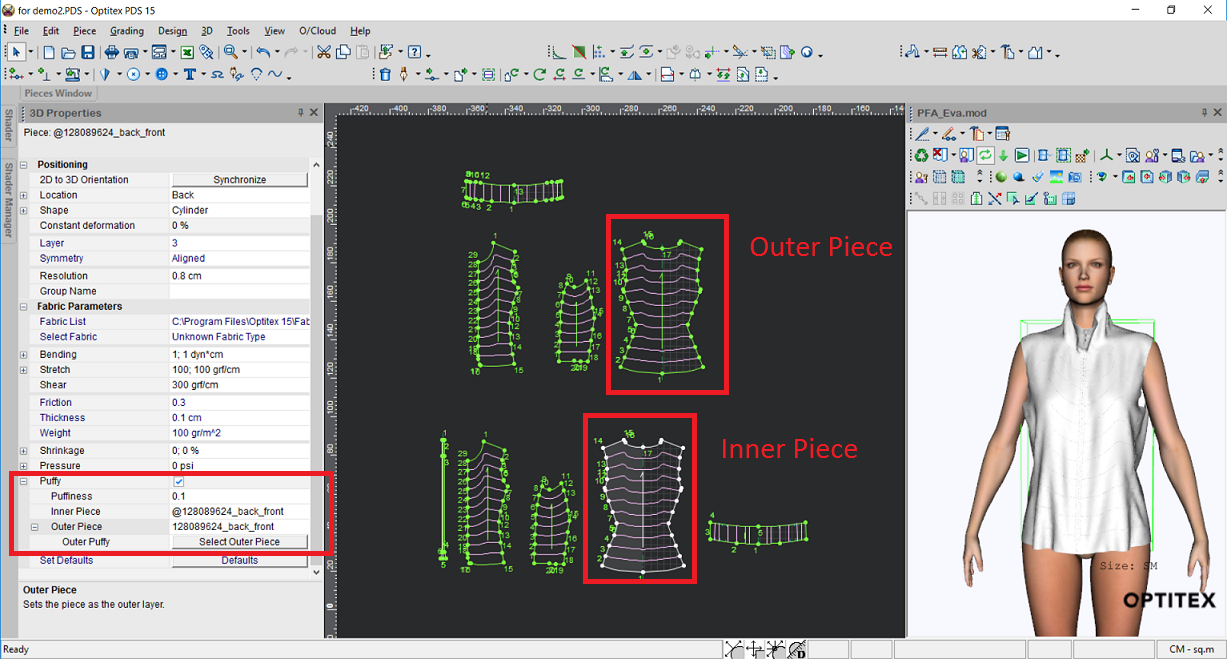
Match pieces from layer 1(inner) to layer 2 (outer):
-
Select the piece in Layer 1 (the inner piece).
-
In the 3D Properties dialog, select the Puffy checkbox.
-
In the Puffiness field, enter the amount of space that is needed to create puffiness.
-
Click the Select Outer Piece button.
-
In the 2D window, click on the piece in Layer 2 (outer piece) to define that piece as the associated piece.
-
In the 3D Properties dialog, click the Select Outer Piece button again, to lock the field.
Notes:
-
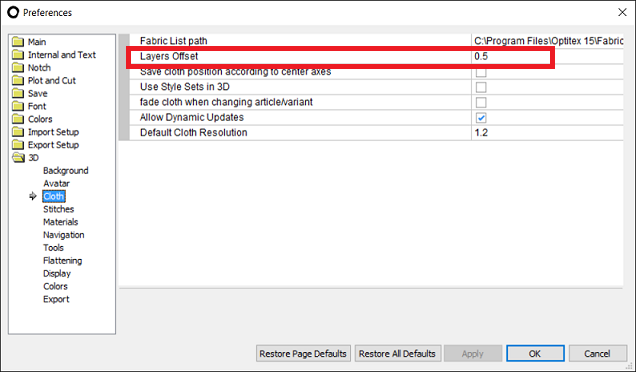
Once you have matched all the pieces, the layers and positions of the pieces change automatically according to the position of the inner layer and the way the layer offset was defined in Preferences > 3D > Cloth:
-
Once an outer layer is assigned, the Bending field automatically changes to 1:1 it is recommend to leave this value as is.
-
Repeat the same procedure for all the pieces.
-
Simulate the pattern.
-
Assign a shader.
-
View your pattern in PR3D to see true life results.