Creating PDS Rigid Parts
You can create a PDS rigid part, when you want to create your own segment shape using the PDS. This allows you to create piping, welting, seam bumps, etc., and then use the segment shape in your pattern.
The following process describes how to create a pipe. The main steps are the same for other segment shape types.
To create a PDS rigid part:
-
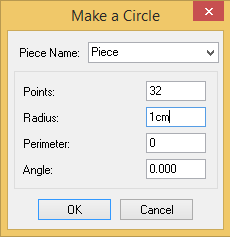
In the PDS, create a circle.
-
Make the radius 1cm.
-
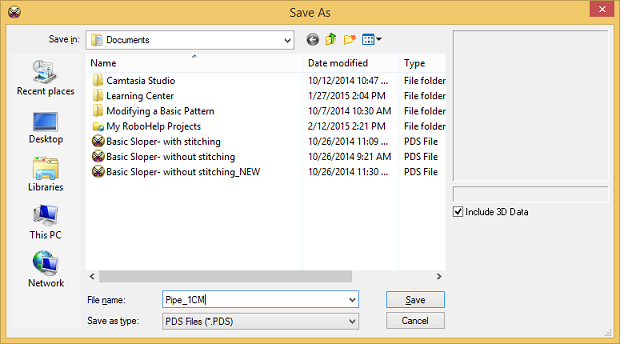
Save the file as a PDS file and name it for example: Pipe_1cm.
-
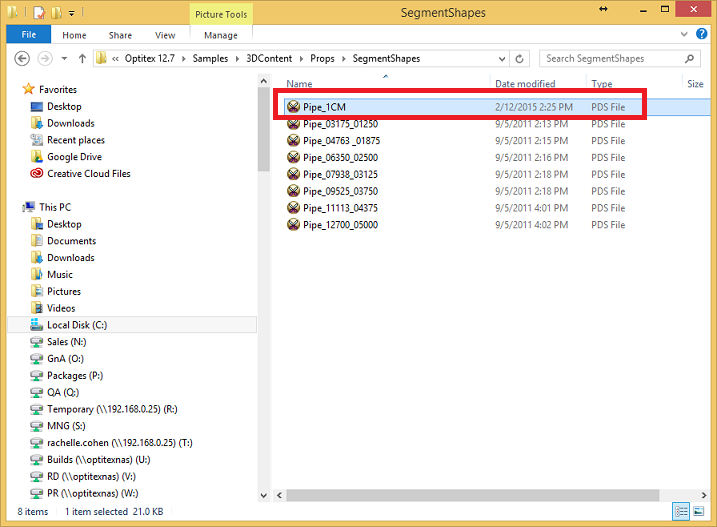
Copy the PDS file into the Segment Shapes folder. This folder is usually located here:
C:\Program Files (x86)\Optitex 12.7\Samples\3DContent\Props\SegmentShapes
-
Load the file into the library by going to Preferences > Stitches > Segment Shape Directory and click Load Now.
-
Once you have loaded the file you can select the segment shape in the 3D Stitches dialog as follows:
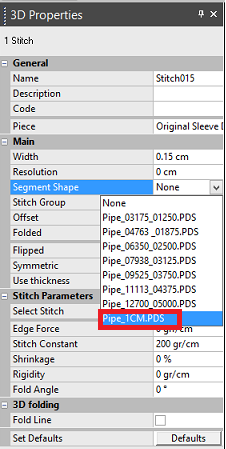
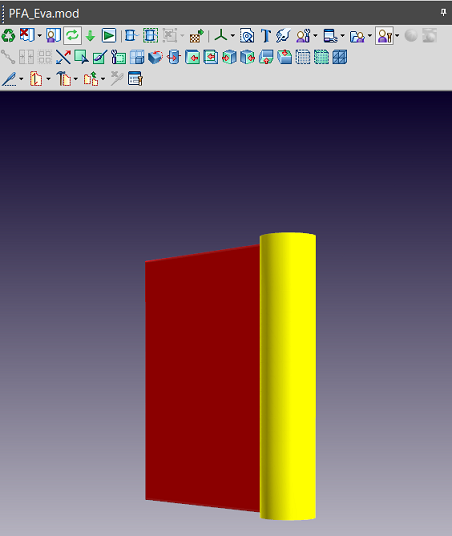
Here is an example of what the pipe looks like as a stitch: