Creating MOD Stitches/Accessories
You can create MOD stitches/accessories when you want to define visual stitches and or accessories (such as fur, zippers, etc.) in your pattern.
You can create your content using any 3rd party software (such as Maya, Rhino, etc.) and then convert the file into an MOD file and import it into the Optitex database.
In the process below, we have demonstrated how to create a visual stitch via Maya.
There are some very important steps you must take to make sure your model is defined correctly in order to achieve best results.
Important: The process below describes how to prepare your model if created in Maya. If you are using another software, make sure the axes are defined correctly and that you are using the correct working units as described below.
To create your MOD stitch/accessory:
-
Make sure your 3D Model is defined according to the following best practices:
-
The axes must be defined like in the PDS as follows (make sure the scale is in centimeters):
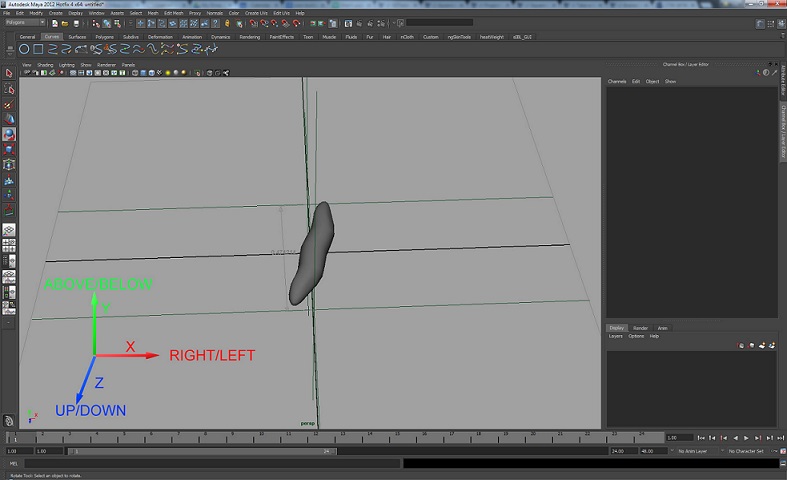
-
You must create good working UVs (try to keep your mesh as low resolution as possible):
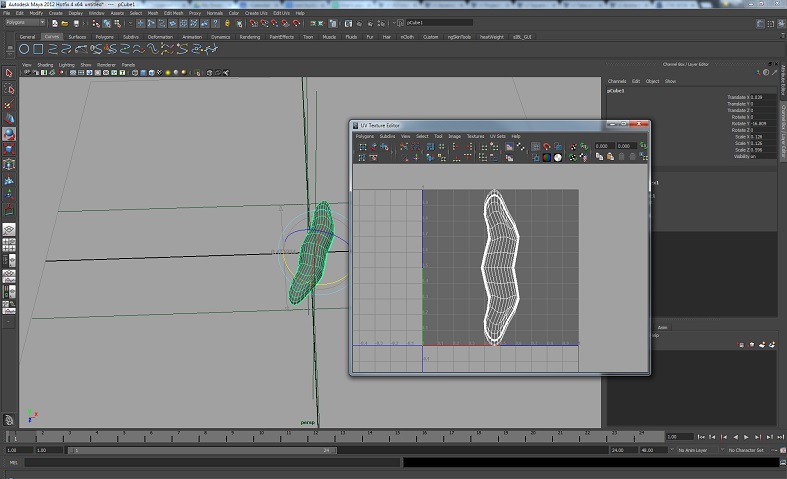
-
Export your file as an FBX file as follows:
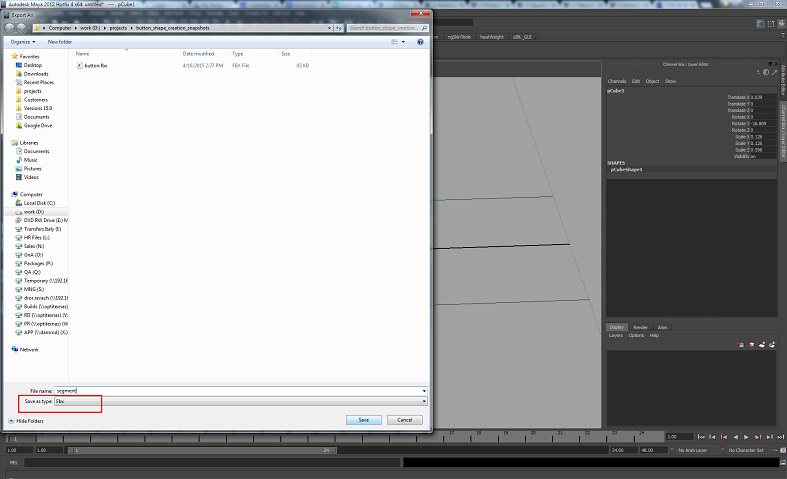
-
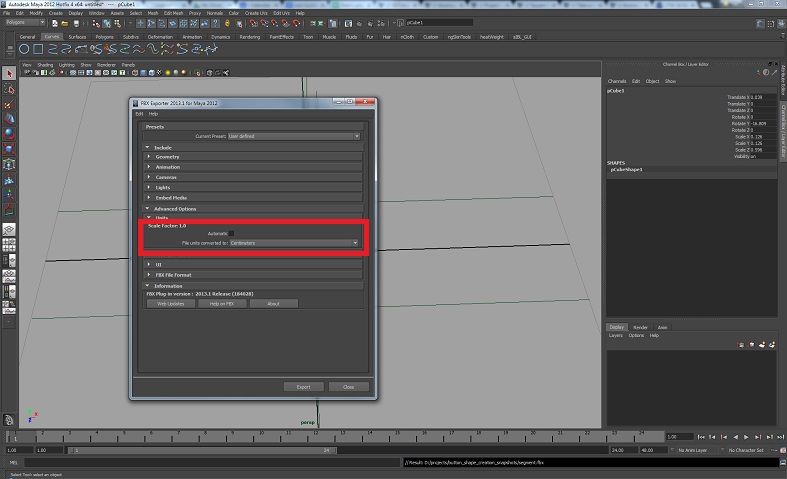
Make sure the Export Units is in centimeters.
Once you have created your stitch/accessory, you can now import it into the PDS.
-
Open the PDS.
-
In the 3D window, from the 3D toolbar, click Open Model (
 ).
). -
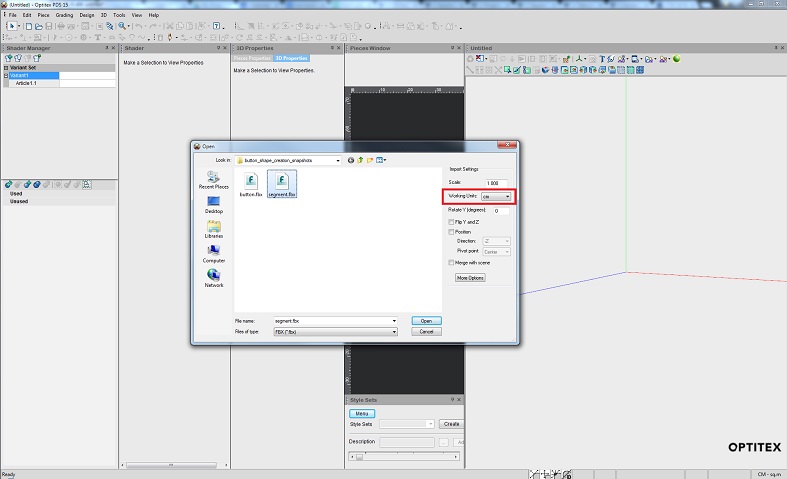
From the File Type drop-down list, select FBX and make sure the Working Units are in centimeters as follows:
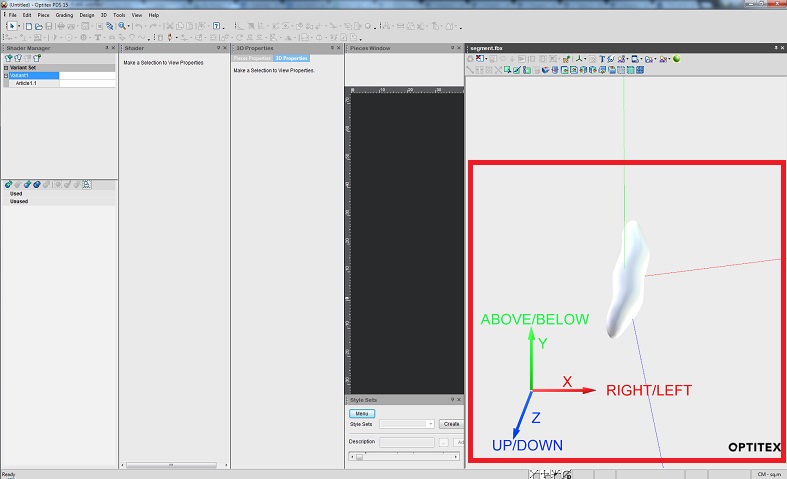
The model is loaded and the PDS axes are the same as in Maya as follows:
-
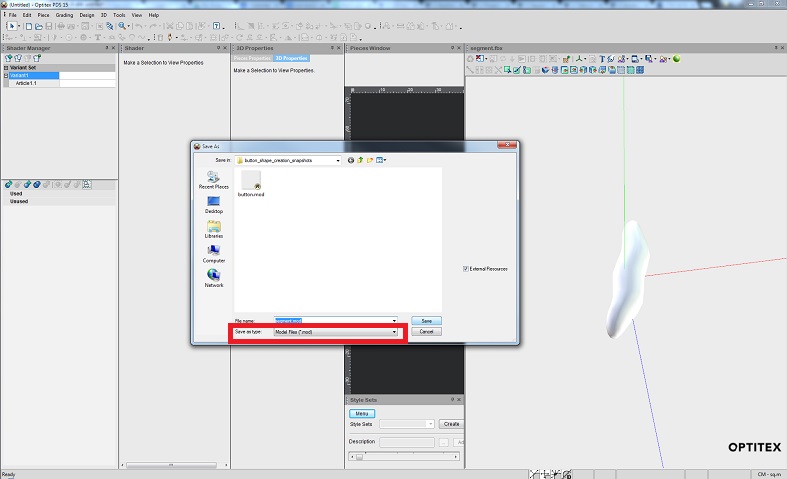
From the Open Model drop-down list, select Save Model and then save the file as an MOD file as follows:
Now you can import the MOD file into the Seam & Stitch Manager. For more information about importing see, Importing a Component into the Seam & Stitch Manager.