Arranging for 3D
You must arrange your pieces in a certain order in order to make them ready for 3D. If your 2D pieces are not orientated correctly, they will not show in 3D in the right position. This topic describes how to arrange your pieces.
To arrange your pieces for 3D:
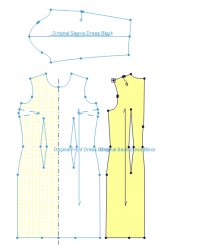
Most
pieces should "stand up" or be vertical on the screen except
for sleeves, which are horizontal on the screen. Select the Front and
Back and Press "]" to rotate them clockwise, or select Toolbox
>Rotation >RotateCW:
Click on the Properties tab.
Click
on each piece to make sure that they are all a Pair. In the Piece Property
window, select the Pair checkbox: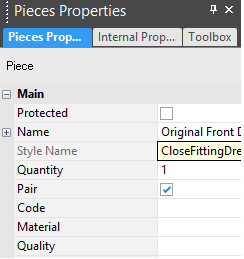
Open the 3D
Properties tab
by going to View >3D >3D Properties:
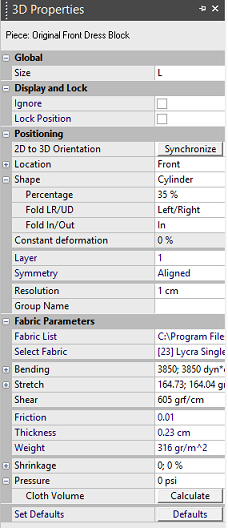
This window determines the 3D positioning, cloth properties and the size
of the style.
Select each piece one at a time, define the 3D location, under Positioning>Location select FRONT, BACK, AND LEFT ARM, for Front Back and Sleeve.
Select all pieces, and click on Synchronize (this saves these positions for 3D).
Define the shapes for each piece. Select the Front and Back pieces and then choose Shape> Cylinder, then enter the Percentage, 49%.
Verify
placement by clicking the Place Cloth  icon.
icon.
Your pattern should like this when you are done:
Before Rotation: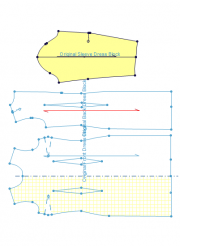
After Rotation: