Table Of Sizes
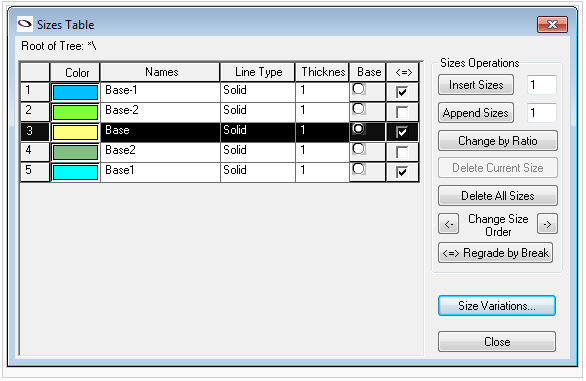
View the fields as follows:
|
Field |
Description |
|
Color |
Click on the color box next to the size name to change the size Color. Note that different settings in the Preferences may override these colors. |
|
Name |
Click on the Name fields to changes the size name. Apart from convenience, there is no geometrical/ grading meaning to these names. |
|
New! |
In version 11, you can define the default name for the Base Size and the default increment for numerical size system in Preferences. For example, default name for base size is name and the default increment is 2. Next new size inserted would get the name36 and new size appended would get the name 40. |
|
Line Type |
Click on the Line Type field to select a different line type per size. This is for display purposes only and will not affect the Plot. |
|
Thickness |
Click on Thickness field to change line thickness for Solid Line type. This change will not affect the Plot. |
|
Base |
The Base Size is marked with the black selection dot. There is only one Base Size for each file. Click on the selection dot to change the base size. |
|
Break Size <=> |
This button is identical to the Regrade All By Break Size command. You can set sizes to act as Size breakers when using the Regrade By Break Size command. The smallest, biggest and base size are always set to be Size Breakers. |
To edit sizes:
Insert Sizes
Use this operation to add sizes that are "smaller" than selected size. The newly inserted sizes will appear above the selected size. Note that only the Grading Values will determine which size is actually smaller.
Append Sizes
Use this operation to add sizes that are "bigger" than selected size. The newly appended sizes will appear below the selected size. Same as Insert Sizes, only grading values will determine which size is geometrically bigger.
Change by Ratio
Use this dialog to add specific sizes or modify the base size by ratio (percentage) of the grading value.

Delete Current Size
Click to delete the selected size. The base size cannot be deleted.
Delete All Sizes
Click to delete all sizes except the base size.
Change Size Order
Use the arrows to change selected size location in the table. It will not change the geometry of the sizes, only the name and line display (color, type and thickness). This is used if during Graded Nest Tool operation, the nested pieces were defined in the wrong order.
<=> Regrade By Brake Size
By Clicking on Regrade by Break Size button, all the grading values of the sizes that lie between these break sizes are re-graded equally.
Size Variations
-
The goal of using Size Variations is to ultimately extract a size with premium fit to different measures from one basic block.
-
For example, let's say that for a pair of jeans we'll define 4 Size Variations for Waist, Hips, Rise and Outseam. For each Size Variation we'll define 4 sizes for Small, Medium, Large and Extra Large (or High, Low, Long, Short etc.). Out of these 4 variations we can obtain 256 different sizes (4x4x4x4=256).
-
Using the Size Variations system we can easily extract a pair of jeans to fit a body shape of Small waist, Extra Large hips, High rise and Long outseam.
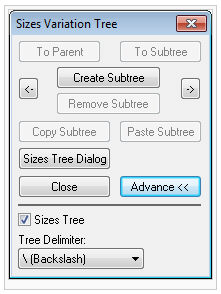
Current Size Variation
Use this field to select the current size variation and rename it if needed.
Current Size Variation is the table displayed on the main window.
Insert
Add a variation to be displayed before the current one.
Append
Add a variation to be displayed after the current one.
Delete
Delete the current size variation.
Advance - Size Tree