Move Points Tool
The Move Points tool allows you to move a number of points at once, according to a defined distance and angle. You can click on the first and second points and all the points between these points will move as well. You can then click on the segment and move the points.
Icon & Location
-

-
Toolbar: Edit
-
Toolbox: Movement
To use the Move Points Tool:
-
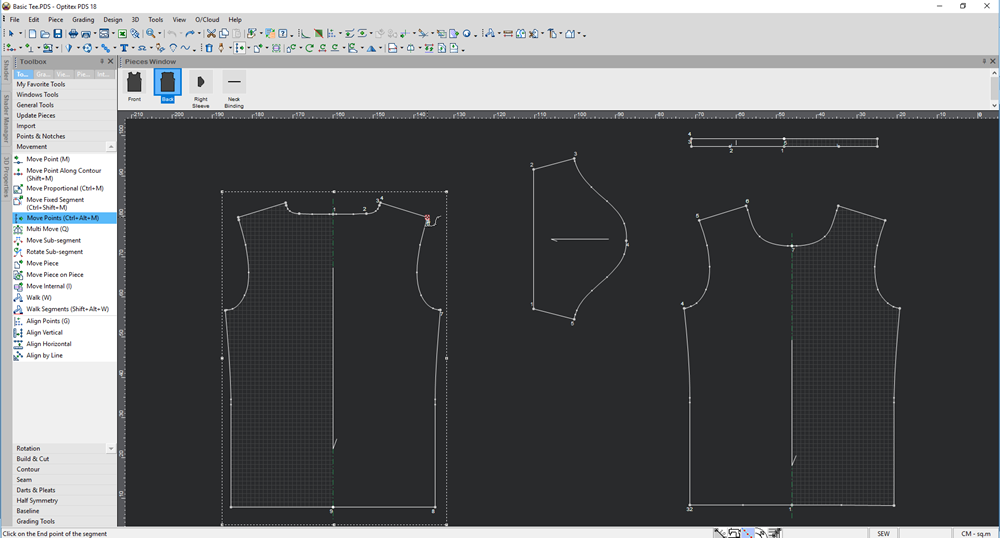
Select the Move Points tool.
-
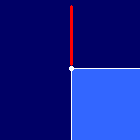
Click on the first point of the segment where the points are located.
-
Click on the last point of the segment where the points are located.
All the points in between the first and last points are selected.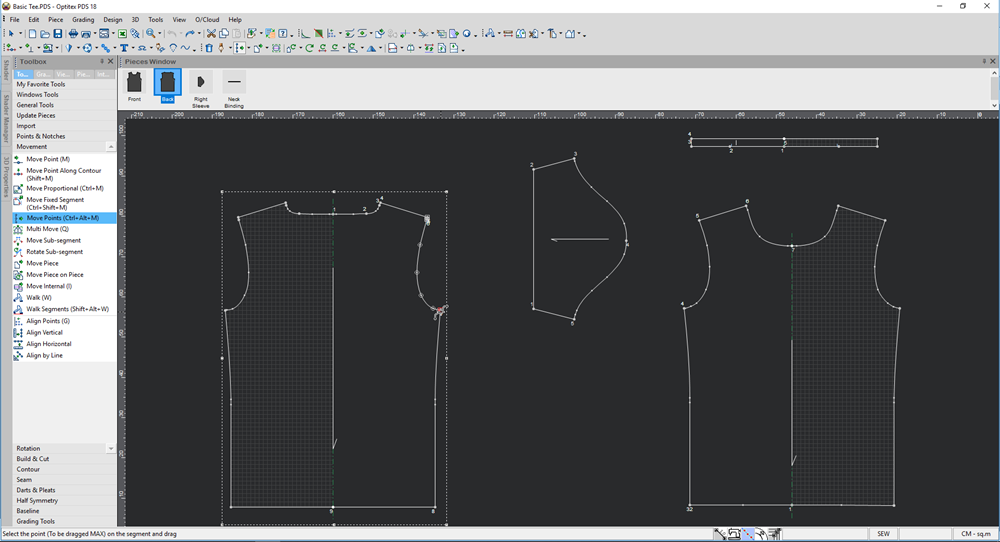
-
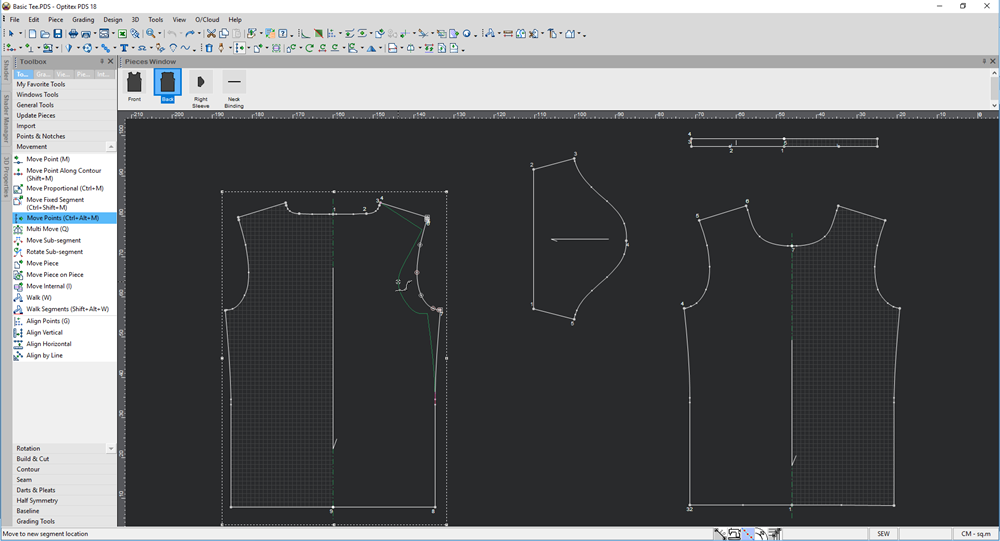
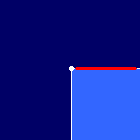
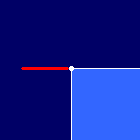
Select the point you are moving and while holding down you mouse, move the entire segment to the desired location:
-
Let go of your mouse.
The Move Points dialog appears as follows: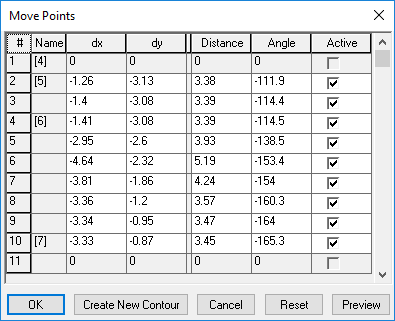
-
View the fields in the Move Points dialog as follows:
Column
Description
Number
The point number (as it is appears in the segment).
Name
If a name was given to the point, displays the name, if not displays the number.
dx
Sets the distance of the point on the X axis.
dy
Sets the distance of the point on the Y axis.
Distance
Sets the diagonal distance according to the angle.
Angle
Sets the global angle.
Active
If selected, the point is active in the piece.
-
You can also right-click on a column to display other options:
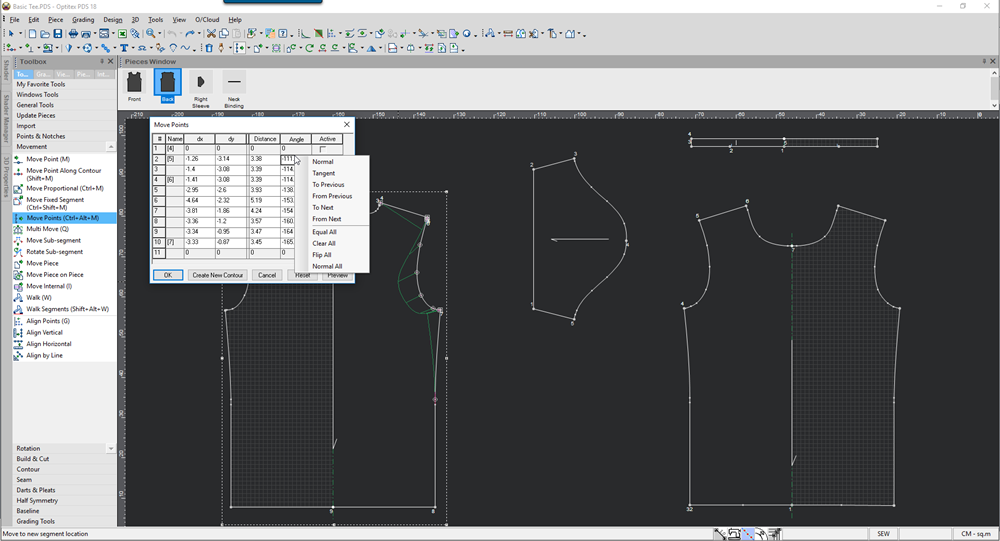
The following options are available:
Note: The options are dynamic according to the column name you are standing on, therefore not all options will be available when you right-click with your mouse.Column
Description
Normal
The point is placed 90 degrees to the tangent line:
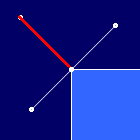
Note: Only available when standing on the Angle column.
Tangent
The point is placed on the tangent line:
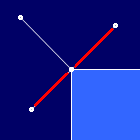
Note: Only available when standing on the Angle column.
To Previous
The point is placed at an angle to the previous segment:
Note: Only available when standing on the Angle column.
From Previous
The point is placed at an angle from the previous segment:
Note: Only available when standing on the Angle column.
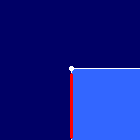
To Next
The point is placed at an angle to the counter-clockwise extension of the next segment:
Note: Only available when standing on the Angle column.
From Next
The point is placed at an angle to the clockwise extension of the next segment:
Note: Only available when standing on the Angle column.
Equal All
Makes all the values in the column equal.
Clear All
Clears all the values in the column (resets to 0).
Flip All
Flips all the values in the column from a negative to a positive value and vice versa.
Normal All
Makes all angle values normal.
Note: Only available when standing on the Angle column.
-
Edit the X and Y distance of each point as you require.
-
Edit the angle if required.
-
Click Preview, if you want to first preview the changes before clicking Ok.
-
Click Reset, if you want to reset all the values after you make changes.
-
Click Ok when you are done.
Or
Click Create New Contour, if you want to create a new contour according to the new points and location.