Plotter Preview
You can use the Plotter Preview option, when you want to view the plot/cut file before plotting or cutting. This enables you to identify problems and adjust. For example, if you see you have an overlap, you can change the page definitions of the Plotter before you actually plot.
Icon & Location
-

-
PDS Menu: File> Plotter Setup> Plotter Select
-
PDS Toolbox: Windows Tools
-
PDS Toolbar: General
-
Marker Menu: File > Plotter Preview
-
Marker Toolbar: System Tools
To use the Plotter Preview option:
-
From the main menu, go to File > Plotter Preview.
The Plotter Preview dialog is displayed: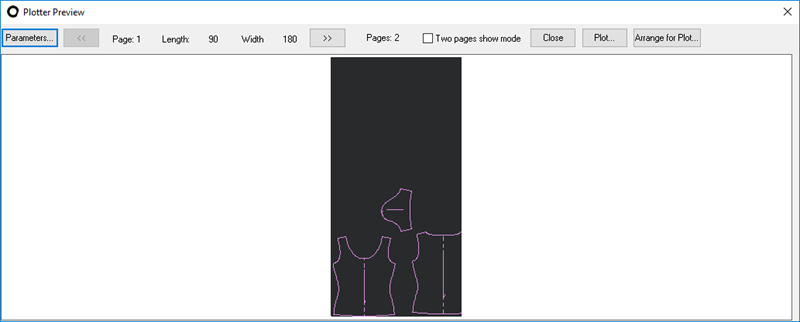
-
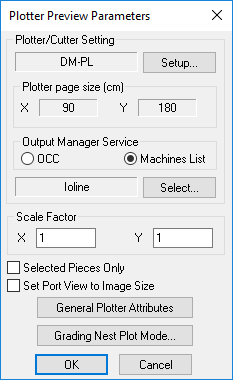
To change the Plotter parameters, click Plotter Parameters.
-
Edit the fields as follows:
-
Click Ok when you are done.
Field
Description
Plot Piece Labels Only
Select this checkbox if you want to plot the piece's label without the outside contours or internal elements.
You should use this option for quick plotting so you can place them on top of a stack of pieces.
Plot Current Marker View only
Select this checkbox if you want to plot the active view of a marker only.
This will plot only part of the marker. You can use the Zoom Rectangle tool if you need to enlarge the specific area.
Check Intersection before Plotting
Select this checkbox if you want to run the Detect Intersection command prior to sending the file to plot.
If an overlap is found, the intersecting pieces will appear highlighted.
Optimize Plot/Cut Order
Select this checkbox if you want to display the Optimize Cut Order dialog prior to the cut/plot file creation.
You should use this option for cutters or pen plotters. Optimize Cut Order automatically changes the sequence of the pieces and how they cut, to save idle time on the cutter.
You can also specify common lines (shared lines) for faster and more accurate cutting.
OpStop Follows Stripe Adjust
Select this checkbox if you want to add the OpStop command (M01) to notches that relate to stripes.
If bump lines are displayed, they will also receive OpStop commands.
Plot Buffer Contour
Select this checkbox if you want to plot the buffer around the pieces contours.
Select the External Contour checkbox to plot the pieces in the correct size.
Not Plot Visible Sew Lines
Select this checkbox if you do not want seam allowance marks or any other internal lines that are set to SEW to be plotted even if they appear on the marker table.
Plotter Cutter Settings
Click Setup to change the Plotter/Cutter settings.
Plotter Page Size (cm)
Enter the size of the plotting/cutting page. X indicates the page length, Y indicates the page width.
Output Manager Service
Select the Output Manager. Optitex software uses two different spoolers: OCC and Outman. Both spoolers support the RS232 protocol and the Gerber plotter (ACUUPLOT) protocol.
The Lectra E32 and E33 protocols, OptiJet printer protocol, LPT communication (parallel) protocol and LAN (TCP/IP) printer protocol are supported only by OCC.
To add an external Plot file to the Outman spooler queue, use the 'Qman' utility.
To add an external Plot file to the OCC spooler queue, an "OCC Queue" key module is required.
 See also: Plotting