History
You can use the History option, when you want to save additional information in each style file. This information allows following up or retrieving the positioning of a file at a specific point of time.
This command gives the possibility to create a History Log for each style and track the people that made changes to a file according to dates. Two options are offered. One enables you to add text description to the file, The second option enables you to make a file generation with the ‘Save’ command allowing the possibility to in the future retrieve the file layout at certain stages in the design process.
 Note:
Enabling and saving file history greatly increases the file size; therefore
it is recommended to not save information that is not going to be used,
or delete it before production.
Note:
Enabling and saving file history greatly increases the file size; therefore
it is recommended to not save information that is not going to be used,
or delete it before production.
Icon & Location
-
Menu: File> File Utilities > History
To use the history command:
-
From the main menu, go to File > File Utilities > History.
If there are no current saved versions, the dialog appears blank as follows:
-
When saving the files, create a version file or add comments.
By default, the following fields are filled out automatically.
Date and Time is according to the computer's date and time.
Saved
By is according to the Windows login name.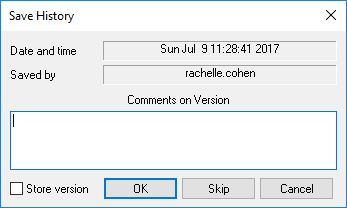
-
Select the Store Version checkbox, if you want to save the new file and be able to open it later.
-
Enter a comment if required, then click Ok.
-
If you do not want to save another version, rather just save the file, click Skip
Once you open the History dialog again, the saved versions are displayed as follows: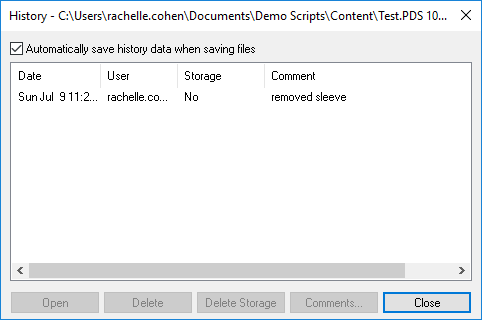
-
To view a specific version, select the row of the version, and then click Open.
-
To delete a specific version, click Delete.
-
To delete all the versions from the history, click Delete Storage.
-
To edit comments, click Comments.
 See also: File Utilities