Importing Digipen files
Algotex DigiPen Installation
How to install DigiPen to work with Optitex
-
[Ver.3.1.593.1 Installation Disk]
-
Install the Logitech IO2 Software using the provided CD. The installation should start automatically upon insertion of the disc in the drive. If this is not the case, run manually the Setup.exe program. Please follow the on-screen instructions. When the installation has terminated close all the open windows. (Note that after installing the .net framework the computer will restart )
-
Connect the pen’s cradle to a PC's USB port. Insert the pen in the cradle: the operating system recognizes automatically the new device and installs the driver accordingly.
-
Open the Control Panel and click on digital pen settings

-
Take note of the Pen Serial Number (make sure the pen is on the cradle and charged) and send an e-mail message citing this number to Algotex customer care mailbox mailto:hotline@algotex.com
Algotex will send you back a license file via e-mail. You must copy this file into the C:\Program Files\PenPlot2\Lic directory and re-boot your PC.
Algotex Installation On Windows Vista(32 Bit OS ONLY)
- Browse the Digipen installation CD and run "AnotopenDirector.msi"
that inside "penDirector10" folder. Follow the instructions
that on the screen during the insulation. At the end of the process
, a red rectangle will appear on the task bar . It is the PenDirector
icon.
- Right Click on the icon and select settings
. Set the following settings: Synchronization - automatic
Notification - no
Delete data after successful synchronization - YES
Set pen clock each time pen is docked - YES - Right Click on the icon and select Plug-ins
-> penDispatcher . Set following parameters : PGC storage
folder - default c:\Anotopgc
PGC post URL - blank
Pattern address - edit and modify current to "19.0.3.*"
import setting file - blank - Run the Setup file that in "PenPlot2BT-VISTA"
folder. Can be found on the CD as well
- Connect the pen’s cradle to a PC's USB port. Insert
the pen in the cradle: the operating system recognizes automatically
the new device and installs the driver accordingly.
- Open again the Pen settings and take note of the Pen Serial Number (make sure the pen is on the cradle and charged) and send an e-mail message citing this number to Algotex customer care mailbox mailto:hotline@algotex.com
Optitex Version 9 Installation
- To use the Digipen you must have version 9.7 or higher.
- Open Optikad.ini file in c:\windows (or c:\winnt) folder with NotePad and in [Optitex PDS] section add the line:
DigiPenDirectory = C:\Program Files\PenPlot2\Bin\files
(this is the default installation directory).
 Run this
file to activate the Digipen in version 9
Download (How to launch a batch file)
- Make sure your computer is connected to the Internet the first time you import a pattern, to be able to download the paper definition .
- You are now ready to work with DigiPen.
Optitex Version 10 Installation
- Open PDS and Go to File>> Digitizer>> Import Digipen Files
- Browse to the DigiPen Files Folder , default is :
C:\Program Files\PenPlot2\BIN\Files
- To remove the files after import , check the Remove file after import check box.
- To enable upload of patterns , check the start check box.
- To import all files from the DigiPen directory, use Import all files option.
- To import only new files use the Import new files only option
How to Import Patterns to Optitex
- Open PDS and make sure you see the DigiPen icon tray, see picture bellow .

Icon when Pen is not on Cradle

Icon when Pen is on Cradle
- Take the DigiPen from its stand and Digitize one pattern (according to the next session instructions).
- When you are done with the pattern press on the box at the bottom right of the paper map and reposition the pen in the cradle.
- When you reposition the pen in the cradle the memory content is automatically written to a text file. The file is written in the C:\Program Files\PenPLot2\Bin\Files directory and has a name in the form:
ALGOTEX_YYYYMMDDhhmmss_xxxxxxxxxxxx_x.dat YYYY=year MM=month DD=day hh=hour mm=minute ss= second x=digit
- The DigiPen program should now display the following window, You can close this window.

- Now wait 10 seconds until the PDS recognize the file.
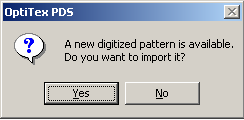
- The file saved is automatically loaded to PDS and you will be prompted to confirm (see image bellow).

 Note:
Note:
- For the first time the Digipen is used a connection to the Internet is needed.
- You can digitize multiple pattern pattern, using number 8 to start a new pattern.
- Patterns will only be imported while PDS is running.
- Any mistake during the digitizing process may lead to an importing failure.
- Be sure to place your pattern under the paper map.
- All points should be marked clockwise (as in PDS).
 See also: Digitizer Menu