Digitizer Setup
Use the Digitizer option, to Digitize the displayed pieces. Files can be digitized on a Digitizer connected directly to one of the serial or parallel ports on your machine, or on any PC on the network.
Note:Optitex Digitzers cannot be plugged into the USB port.
Icon & Location
-
Menu: File> Digitizer > Digitizer Setup
To use Digitizer Setup:
-
From the main menu, go to File > Digitizers > Digitizer Setup.
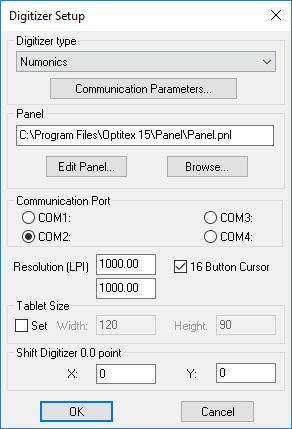
The Digitizer Setup dialog appears:
View the fields as follows:
|
Field |
Description |
|
Digitizer Type |
Set the Digitizer Name. Ex. Numonics , Calcomp |
|
Communication Parameters |
The user is able to select the required digitizer from a list. NO need to make the communication Setup from the ‘Control Panel’, it is done now from inside Optitex Digitizer Setup. The system will load the Digitizer’s default values: Size and communication parameters (baud rate, parity etc..)The last changes will be saved as default values in the OPTIKAD.INI file. |
|
Panel Setting |
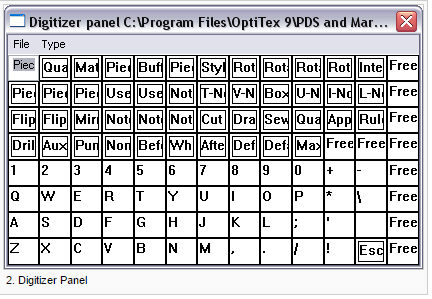
The digitizer panel contains all the piece attributes and information found in the Piece Info dialog box. Using the Digitizer panel while digitizing eliminates the need to enter the relevant attributes and information into the Piece Info dialog box
|
|
Communication Port |
Select the COM Port on which the Digitizer is physically connected. |
|
Resolution |
This is for Digitizer Resolution. Set according to the Digitizer Type. Default Resolution for Numonics is 1000. |
|
Cursor |
By Default 4 Button Cursors are used. If you want to use a16 Button cursor, then you should select the 16 Button Cursor. |
|
Table Size |
|
|
Shift Digitizer |
Defines the 0/0 point on the digitizer. |
 See also: Digitizer Menu
